https://www.youtube.com/watch?v=ezIV-Lh-_lA
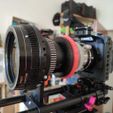
This QR adapter allows for a secure connection of an anamorphic projection scope to a taking lens, while allowing a very fast taking-lens switch as well.
An additional goal with this adapter is to keep the optical chain as short as possible while maintaining security for every piece of glas. The only things seperating the scope and the taking lens is the wall-thickness of a stepper ring, so only around 1,4mm. This sounds like a lot, but no commercial clamp comes closer while maintaining a stable connection.
The locking-part goes onto the scope, while the ring that it locks onto is attached to the taking lens - the scope-part is entirely printed, the part on the taking lens needs an additional step-up ring. The idea is that each taking lens has this dedicated ring always attached; as it's based on a stepper ring you can use normal lenscaps without any issues.
It works with a variety of scopes already, and I also think it's fair to say that it can be adapted to probably any 16mm scope (8mm ones will be too small, most 35mm scopes are too big). A dedicated ring is attached to the scope directly, when the locking-part gets attached to that (this way it works with different scopes without having a very complicated model for different scopes, but rather the same base for all of them).
If you wonder why the attachment on the scope-side looks rather large. As the core idea is to have a system that works with all (my) scopes, the design needs to fit the largest diameters. As I intended to have a common stepper ring on the taking lens, I was also kinda forced to work around the common sizes - as 72mm would've been too small already I needed to go with 77mm instead. Also, this design started as an adapter for the Rapido Technology clamp. The taking lens connection of that version is fully compatible with this one, so I can use all my taking lenses on this design as well as the Rapido version.
Even though you need to buy a step-up ring seperately, each taking lens you want to equip will only cost a few bucks.
Note: this QR adapter doesn't have the structural integrity to hold your complete scope, so only use with a proper and locked front support!
one solution would be my 70mm clamp: https://cults3d.com/en/3d-model/tool/70mm-clamp-with-beam-support-for-anamorphic-projection-lenses
ADDITIONAL PARTS
Some additional parts are needed for this QR clamp
- Step-up ring to 77mm (the common cheap ones; works up to 72-77mm)
- 3x M3 nuts
- 3x M3 grubscrews (4-5mm ideally); you can use normal screws if you don't mind them sticking out
- some drops of glue (optional)
(depending on scope an additional M3 nut and normal M3 screw will be necessary)
PRINT
The bare minimum to make this work consists of five parts you need to print. An indepth description of all parts can be found below.
To get all tolerances perfect, you should print all parts at 0,1mm layer height.
- TK_ring (variants)
- CL_Lock
- CL_Attachment
- GrabLocker
- SC_variant (variants)
In theory, none of the parts is in the path of light but I'd still play it safe and print SC_variant in black.
POST PROCESSING
Two parts need some additional sanding: GrabLocker and CL_Lock.
GrabLocker needs to be sanding on its insides, the grooves as well as the general wall area. CL_Lock needs to be sanded on the outside, be careful to not break the clippers or remove the small chamfer while doing so.
I use a rough 80 to 120 grit for the initial sanding, then something fine like 400 to make it smooth.
ASSEMBLY
Sandwich GrabLocker between CL_Lock and CL_Attachment, the dots on it facing in the direction of CL_Lock. CL_Lock and CL_Attachment just clip together; make sure that GrabLocker can be rotated freely, if this is not possible you should disassemble it again to sand the parts a bit more. If you want the strongest possible connection, add glue to the clips.
When everything's fine, push the M3 nuts into the deisgnated pouches on CL_Attachment; use some glue if they're loose. Insert the grub screws from the outside.
Screw SC_variant onto your scope (the rear flange of the scope should be flush with the bottom of SC_variant!). Push the assembled QR-lock onto this ring attached to the scope, the GrabLocker facing away from the scope towards the camera-side. Lock with the grubscrews.
Now take TK_ring and push it from behind onto a 77mm stepper ring; the markings on them should face the camera-side. In the long run, I'd suggest to glue these parts together as depending on your stepper rings it might be loose or become loose over time (I exclusively buy stepper rings from VHBW on Amazon.de)
You can make your life a little easier by painting the dots on the GrabLocker as well as TK_ring, e.g. with a Sharpie; I use Molotow acrylic markers.
USAGE
It's pretty safe-explanatory, but what gives :)
Get your camera and scope on rails. Push the scope towards the taking lens, align the dots of the GrabLocker and TK_ring and push them into each other. Rotate the GrabLocker clockwise to lock scope and taking lens together, then lock your front support to the rails.
To change the taking lens, turn the GrabLocker counter-clockwise, push the scope away, switch lenses, push it back, lock and load :)
ADDENDUM
Follwing is a detailed description for all the parts provided
GrabLocker
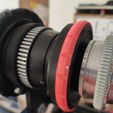
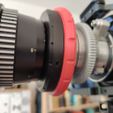
This integral part locks the scope to the taking lens; I like to have print it in an accent colour :)
CL_Attachment
This ring has the pouches for nuts, it locks the QR clamp to your scope
CL_Lock
This ring locks the GrabLocker to the CL_Attachment
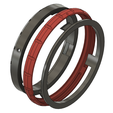
TK_ring
This ring is what GrabLocker locks onto. It comes in two variants, with and without window. The window is there so you can still read the original markings on your stepper ring to be able to read its source-size on the camera-side. I found this very handy so far, but if you mind you can use the version without a window.
TK_Cap_full
Combined with a windowless TK_ring, this part can be used to make a rear-cap that attaches to this QR clamp for when you don't have it attached to a camera. Needs to be glued - logo and markings on TK_window point in the same direction.
TK_Cap_52
In case you don't trust an all-printed cap, you can use this part alongside a windowless TK_ring and a 52-77mm to create a rear-cap that attaches to this QR clamp when you don't have it attached to a camera.
SC_variant
This ring attaches to your scope. Each variant fits multiple scopes which is why they are not named directly after the specific scopes.
- variant01 - Sankor Type 5e, Schneider Cinelux ES, Carl Zeiss Anamorphot 63/2x (slit-version just wraps around the lens in case you can't print it properly)
- variant02 (1) - Kowa Prominar 16-H, Kowa Prominar 8-Z, Sankor Compact Cinemascope, Sankor AnamoPrime, Sankor 16D
- variant03 (2,4) - ISCO Ultra Star, Iscomorphot 16/2x
- variant04 (3) - Kowa for Bell and Howell (Kowa B&H)
- variant05 (3,4) - Sankor 16C, and other scopes with 43mm flange
- variant06 (4) - Anamorphic for Bell and Howell (the single-focus one)
1 Sankor 16D untested
2 ISCO Ultra Star untested
3 untested
4 this part needs an additional M3 nut and screw, 15mm length

/https://fbi.cults3d.com/uploaders/15126975/illustration-file/0d0a1fce-7b0d-41c7-a89a-e699e2636df9/Fusion360_2020-06-29_23-40-14.png)


