Skip to content

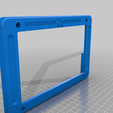
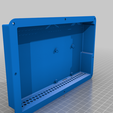
Raspberry Pi 7" Handheld Tablet

Advertising
Advertising
?
Creation quality: 5.0/5 (1 vote)
Evaluation of members on the printability, utility, level of detail, etc.

  • 3.7k views
  • 3 likes
  • 86 downloads

License
3D design format
STL Folder details Close
  • Pi-tab_-_BackPi-tab-1.STL
  • Pi-tab_-_Front-1.STL

Learn more about the formats

Publication date 2020-10-07 at 18:14
?
Published to Thingiverse on: 2020-06-01 at 10:20
Design number 209654

3D printer file info

3D model description

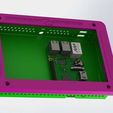
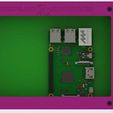
So this is the tablet version of the Rasptop 2.0 (https://www.thingiverse.com/thing:2859679) and it uses all the same parts, except no keyboard and one less USB port.

Just 2 parts, it's screws together with M3x10 self threading screws for the two halves and M3x25mm screws hold in the screen.

#Some config notes

If you get the voltage warning symbol you can disable it with this line in the config.txt

avoid_warnings=1

Also, I like to have the lights on my Pi setup so the red light is only on when the machine is off, like if you tell it to shutdown the red light comes on when it's safe to power down:

dtparam=pwr_led_trigger=none
dtparam=pwr_led_activelow=off

And finally I like the green light to pulse based on system load. This is called heartbeat:

dtparam=act_led_trigger=heartbeat

#BOM

#Raspberry Pi 4B fits!

#If links are dead:

Let me know or search the item. The battery one keeps changing. You want a 10,000MAH booster pack with a LiPo battery. These are often sold as slim type about $10 USD.

#This uses the 2S 7.4v Power System

how to

Use this one please. It provides the best results and the longest battery life. Used with a 9 volt charger it charges up quickly and safely with little excess heat.

#How I wired it:

Starting with the batteries I wired them each with a length of 20ga silicone wire then on the balance board you connect positive from one cell and negative from the other to the B+ and B+ tabs on the balance board. The leftover positve and negative wire both go to the BM pad together making a series connection.

The P+ and P- from the balance board then go to the MOSFET input side. This is also where the positive and negative from the charger board attach so it can charge with the switch off. I used 24GA wire from the charger to the cells. I also used 24gs from the DC barrel jack to the charger board.

You need a wire from Battery + to go to the switch as well, this can be 24ga or even smaller. and the wire coming back from the switch goes to the input signal on the MOSFET module.

On the output of the MOSFET module connect the battery level indicator and the DC to DC converter board so they come on when the switch is on.

#Be sure to set the voltage before connecting anything to the DC to DC converter!

#No more than 5.2 volts. Set to 5.1 volts!

I put the Micro USB in still and just wired it directly to the 5v side of the system so I can plug power in there and not use the battery to run it on the bench or something.

So in a test with Ubuntu 18.04 MATE and Chromium browser running Google Play Music I got 14.5 hours of battery life on a full charge playing over bluetooth speakers and doing other random things on this battery arrangement.

#14.5 hours!

I have not yet built this myself. I will soon.

#Thank you!

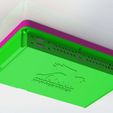
  • Update 6/3/2020 Updated everything. Made small improvements, made it thinner, stronger and easier to hold. Added my logo to the back and reuploaded parts.
Advertising


Issue with this design? Report a problem.

Would you like to support Cults?

You like Cults and you want to help us continue the adventure independently? Please note that we are a small team of 3 people, therefore it is very simple to support us to maintain the activity and create future developments. Here are 4 solutions accessible to all:

  • ADVERTISING: Disable your banner blocker (AdBlock, …) and click on our banner ads.

  • AFFILIATION: Make your purchases online by clicking on our affiliate links here Amazon.

  • DONATE: If you want, you can make a donation via Ko-Fi πŸ’œ.

  • WORD OF MOUTH: Invite your friends to come, discover the platform and the magnificent 3D files shared by the community!


Sharing and downloading on Cults3D guarantees that designs remain in makers community hands! And not in the hands of the 3D printing or software giants who own the competing platforms and exploit the designs for their own commercial interests.

Cults3D is an independent, self-financed site that is not accountable to any investor or brand. Almost all of the site's revenues are paid back to the platform's makers. The content published on the site serves only the interests of its authors and not those of 3D printer brands who also wish to control the 3D modeling market.

100% secure payment by credit card, PayPal, Apple Pay, Google Pay, etc.
View all payment options.