Skip to content

3DLS The Full Belt Free Printer From Morninglion Industries

Advertising
Advertising
?
Creation quality: 5.0/5 (2 votes)
Evaluation of members on the printability, utility, level of detail, etc.

  • 9.9k views
  • 25 likes
  • 269 downloads

License
3D design format
PDF, STL, and ZIP Folder details Close
  • 12864_LCD_Case.zip
  • 3DLS_Instructions.pdf
  • Accessories.zip
  • BLTouch_Spacers.zip
  • CR-10_Extruder_Mount.zip
  • Chimera_Dual_Mount.zip
  • Closed_Loop_Control_Parts.zip
  • Dual_MK8_Hotend_Mount_Use_Ender3_Hotend.zip
  • Firmware.zip
  • Frame_Parts.zip
  • Lion_Desk_Logo.STL
  • Lion_Mount_Front_Sensor_Single.zip
  • Lion_Mount_Not_Bowden.zip
  • Raspberry_Pi_Parts.zip
  • SKR_Board_Parts.zip
  • Spool_Holder_and_Accessories.zip
  • Wire_Management.zip
  • X_Axis_Parts.zip
  • Y_axis_Parts.zip
  • Z_Axis_Parts.zip

Learn more about the formats

Last update 2020-11-06 at 16:42
Publication date 2020-10-07 at 17:11
?
Published to Thingiverse on: 2019-12-08 at 19:33
Design number 209612

3D printer file info

3D model description

Welcome to the 3DLS Lead Screw Drive Aluminum Frame 3D Printer by Morninglion Industries!

As seen on HACKADAY.com

You can find us on Discord! For tips, help and 3DLS specific stuff!

Here's a 4k render of the machine

3DLS as of 7/28/2020

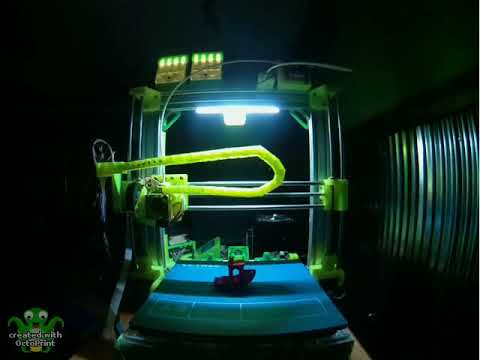
This is fully operational and printing now!

I have been rebuilding it with all the latest design parts and taking lots of pictures. Here's a gallery of all the pictures.

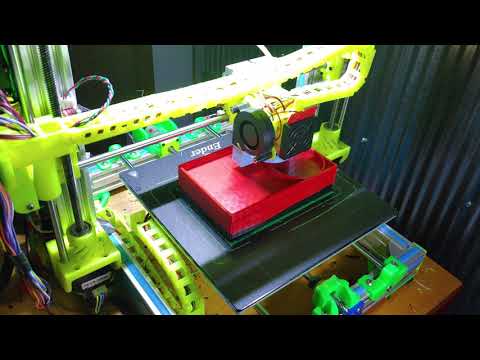
Video of it at 120mm/sec printing the back for my Rugged Raspberry Pi Tablet (https://www.thingiverse.com/thing:4245726)

Here's another Video printing at 150mm/sec outrunning my extruder the print didn't turn out well because the extruder could not keep up at these speeds. Follow up here and the timelapse of the failed print is here.

Current Status

Test print done, all per this build!
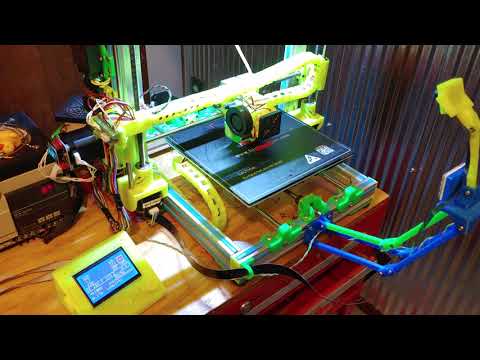
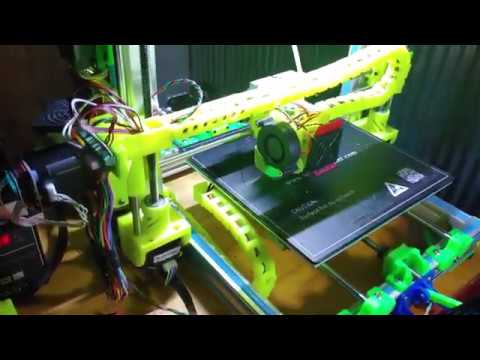
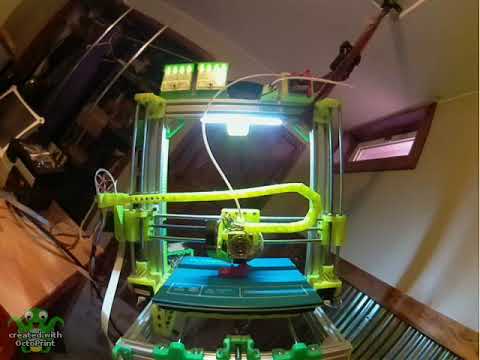
b1
Full view

2
Full view

3
Full view

4
Full view

5
Full view

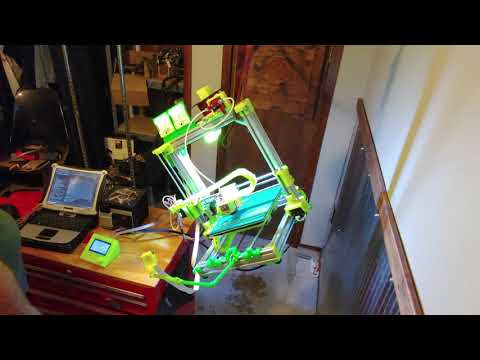
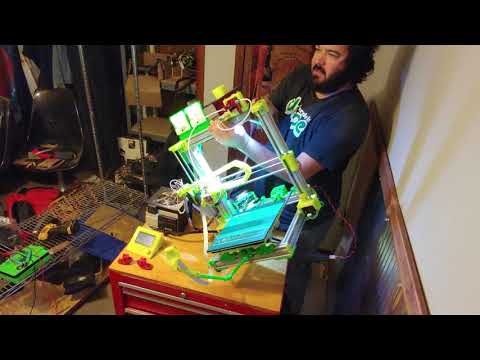
Then I strapped it up by one side…

I am writing the instructions now!

  • Printing at 100mm/sec with accel set to 3000 on X and Y. Max speed is 300mm/sec.
  • The precision is so good that the little compensations done by Prusa Slicer get printed out instead of compensating for anything.
  • Machine is done. Marlin 2.0.3 included. Requires SKR 1.3 to meet speed requirements and SKR 1.4 Turbo is highly recommended.
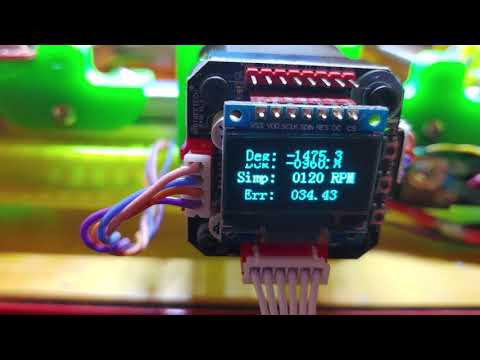
  • Machine runs best with TMC2208 on Z and Extruders, The closed loop controllers are required on X and Y for flawless operation.

Here's some pictures and links:

settings

Slicer Settings, Prusa Slicer

It's now at 300 Accel X and Y with 100mm/sec top speed. There's still some over extrusion in the corners and some following of the infill. I am going to set infill/edge overlap to 0.

A video of it running for noise levels

The frame is based on Pheneeny's great AM8 (https://www.thingiverse.com/thing:2263216)

The extrusions used are the same as theirs but that's it.

Everything except the frame is my design.

You can retrofit most of this back onto an AM8 bit by bit however there's a lot of tweaks here.

Specs

  • Prusa Type 3D Printer with No Belts!
  • 235x235x235 Build Area but this is scalable to larger.
  • Heated Bed, Uses Ender3 Bed
  • CR-10, Chimera Dual or E3D Extruder, even dual extruder options! Can use any Lion Mount or Anet A8 type carriage.
  • Smooth Rails
  • Single or Dual Extruder
  • SKR 1.4 Turbo 32bit Control @ 120MHZ
  • LV8729 Drivers
  • Closed Loop Control on X and Y axis
  • Optional Full Web Control Via Octoprint Onboard
  • Many More Options and Accessories!

Goals

  • Ultimate precision at an obtainable budget
  • High speed ability
  • Compact overall size for Cartesian machine
  • Off the shelf parts
  • Easiest possible assembly
  • No special tools or machining
  • Ultimate reliability, thousands of hours between service

The Things That This Is Inspired From

In no particular order either…

  • AM8 Z Motor Mount and Top Mounts with Bearings On Both Ends! (https://www.thingiverse.com/thing:4030339)
  • AM8 Mod Y Rod Support wIth Full A8 Travel (https://www.thingiverse.com/thing:4028536)
  • Anet AM8 Y Axis Lead Screw Drive System (https://www.thingiverse.com/thing:4008517)
  • Anet A8 X Axis Lead Screw Drive System (https://www.thingiverse.com/thing:4002442)
  • Creality CR-10 & Ender3 Type Extruder Mount for Anet A8 and Alike! (https://www.thingiverse.com/thing:3962768)
  • AM8, Creality and Other 2020 Series Printer Rear or Side Spool Holder (https://www.thingiverse.com/thing:3934425)
  • 2020 Series Extruder Mounting Clamp (https://www.thingiverse.com/thing:3934413)
  • 8mm Frame or 2020 Bowden Inlet with Filament Sensor (https://www.thingiverse.com/thing:3934382)
  • SKR 1.3 Multi-Mount! Fits 92 or 80mm Fan (https://www.thingiverse.com/thing:3901774)
  • 2020 Series Frame Raspberry Pi 2 & 3 Case Mount with 60mm Fan - Octoprint Ready! (https://www.thingiverse.com/thing:3540440)
  • 2 Place 2040 Terminal Block (https://www.thingiverse.com/thing:3539475)
  • 2020 Series Frame Raspberry Pi Camera Mount (https://www.thingiverse.com/thing:3539456)
  • Lion Link Narrow Y axis chain for AM8 mod! (https://www.thingiverse.com/thing:3539350)
  • Quad MOSFET 2020 Mount (https://www.thingiverse.com/thing:3538228)
  • 2020 to 8mm Frame Adapter for Accessories! (https://www.thingiverse.com/thing:3538181)
  • Ender3 Bed Mount for AM8 (https://www.thingiverse.com/thing:4161174)

These have been used as is or modified and assembled here into a standalone Cartesian 3D Printer with No Belts!

Full BOM

Items that are direct links are the parts the machine is designed to fit.

BOM for AM8 Conversion

With the conversion you use the A8 Y carriage so do not print the Ender3 bed carriage.

Firmware

I forked Marlin FW on Github, the latest firmware built and setup for the 3DLS is available on my Github page

Why the SKR 1.4 Turbo?

It's all about speed with lead screws. The speed a stepper can run at on a controller is proportional to the CPU speed. The CPU is what generates the pulses required to run the motor.

As an example a RAMPS with Arduino MEGA 2560 runs at 16 MHZ. This limits the step generation to about 10MHZ before the CPU gets bogged down and begins to miss steps, this is with a single stepper too, divide that across 4 and you can quickly run into issues. This is with Marlin FW.

Now on a board with a faster CPU like a SKR 1.4 Turbo at 120MHZ can run the steppers up to 100MHZ pretty easily. This means a much higher top speed without bogging the CPU down and causing issues. Also the 32bit board has much more RAM for running Marlin effectively.

Now there's still other considerations for speed and this machine will never be quiet. It's not meant to be fast or silent though you are trading those in for a much more precise control and quality in the print. As it sits I am limiting speeds to 100mm/sec at quad stepping in X and Y. Since the screw has to turn 4x faster for the same speed compared to the belt this runs it at the same steps per mm as the belt since it's 1/4th less steps.

This has no real effect on accuracy. It's all about elimination lash and the rubber band effect all belts have. I have run a tolerance test at 60mm/sec print speed with this machine and got .2mm pass on it. On my highly tuned Anet A8 I ran the same test at 40mm/sec and got .3mm.

There's more info on the SKR 1.4 Turbo here and this page has lots of information on stepper driving and speeds here.

3D printing settings

20% infill with thick walls. I used all PLA and it has been running perfect for a year now.

Assembly!

  • First cut the extrusions or you can find pre-cut kits for the AM8 on Ebay. You need 340mm long x2, 313mm x 3 and 440mm x 2. the ends of the 440mm sections should be tapped to M5, the holes are already sized and I like to use a tap drill for this.For now you can get the AM8 build guide or reference my renders and photos. I am still working ona proper guide.

  • Use the 3D printed frame corners to assemble the printer loosely first. just barely hand snug the bolts. The If you use the T-nuts you can pre-load the part and put the nuts in the channel then tighten.

  • Secure the corners with metal corner brackets on the insides. Tighten snug all the bolts on the printed pieces. Fully assemble the frame at this point.
    e
    f
    g

  • For the Y axis mount the motor then coupler and bearing. Cap the bearing then slide the 8mm lead screw through the bearing into the joint on the motor and tighten. Install the Y axis nut in the holder and gently work it down the Y axis lead screw a good 100mm. Install a Collar Spacer and lock collar on the other end of the rod and slide the bearing holder on next. Keep this collar loose for now.

Y1

  • Install the 4 sliding bearings for the bed on the Y axis carriage with the nut adapter and chain mount.

y2

y3

  • Mount the Y rods and holders loosely, then mount the Y motor mount and front bearing support. Push the lead screw towards the motor and tighten the locking collar up against the collar spacer and bearing.

y4

y5

  • Mount the bearing in the Z motor mount.

  • Install the Z motor mounts on the frame loosely.

  • Insert the Z smooth rod into the motor mount.

  • Set the height by aligning the top of the Z rod with the top of the frame, tighten the motor mount at this position.

  • Mount the flex coupler to the Z motors and the lead screw to the coupler.

  • Mount the motor and Z lead screw in the motor mounts.

z

  • Setup the X axis. Install the LM8UU bearings in the holders and mount the lead screw nuts on both. Install the lead screw bearings and cap. Mount the motor then install the motor coupler. Slide the lead screw in through a collar spacer and lock collar. Push the rod firmly into the coupler and slide the lock collar up to the spacer and bearing and tighten then tighten the coupler.

  • Install the X axis nut on the carriage part and then on the lead screw.

  • Setup install the left side first by easing it down the Z lead screw. Then install the right side mounting the X lead screw in the bearing and working it down the right Z lead screw.

  • Mount the bearings in the Z upper caps and secure with the covers. Install the upper Z mounts sliding the lead screw into the upper bearing. Loosely attach the upper mounts to the frame then slide the smooth rod down through the top then the X carriages and finally into the lower mounts.

m

  • Mount the Y axis nut support on the Y bed frame then mount the frame on the Y bearings while sliding the nut holder of the lead screw into the mount on the bed frame.

ys

yrt

Wiring

  • It's best to start by mounting the SKR, voltage converters, wiring block, MOSFETs board, RPi, and any meters you choose to include.

  • Start at the power supply. Wire 24v from the power supply to each voltage converter.

  • Run 5v to the RPi

  • Run 12v to the MOSFET board input. From there go to your lights, accessories and the relay for main power.

  • Negative from the power supply goes right to the SKR. The positive goes to the large relay and out to the SKR from the NO terminal.

  • Endtops, motors and others simply follow their directions.

#Assembled Pictures:

5

1

2

3

4

6

Why the closed loop control?

Simply, it works. These are self contained microcontrollers monitoring the degrees of movement on the output so they always move the amount called for.

With TMC2208, 2209 or 2130 the machine skipped steps at high speeds over about 60mm/sec. It did the same with DRV8829 and LV8729 too.

For the money the performance of these closed loop controllers and the larger motors makes a huge difference.

Firmware Notes!

I use Marlin 2.0.3 on a SKR 1.4 board. This is a 32bit board. I also use LV8729 drivers for maximum reliability at the high stepping speeds required.

To use these you want the jumpers on the SKR for Z and E you want #3 closed and the rest removed, This sets E and Z to 1/16th steps.

Set driver current voltages to 0.95V on X and Y and 0.75v on E and Z.

Now for the longer travel in the Y axis you will need to setup your home offsets and positions. Use these instructions to set home offsets. What I do is send command G0 X0 Y0 and adjust these offsets until the nozzle is over the corner of the bed. Make you adjustment and send the command again, save with M500.

In the firmware archive there's a Firmware folder with the files you need to copy into your Marlin folder then adjust and compile. It's set to SKR1.3 board with LV8729 by default.

If you wanna help me make these builds and others, as well as the sweet renders and buying machine parts, consider a donation! Maybe I will save them up towards replacing my 8 year old computer. You can always contact me a via a PM as well.

Thank you!

  • Update 2/14/2020 Updated the Y axis rod holders to be a little stronger around the screws and fixed the upper right corner bracket hole positions.
  • Update 2/22/2020 Updated the X motor mount to correct some clearances for the endstop switch. Files updated. Instructions Updated!
  • Update 5/1/2020 Reloaded the firmware with Marlin 2.0.5.3 and new speed tweaks.
  • Update 5/5/2020 I ran into a spool that didn't fit on the spool holder so I designed a part that slides over the spool spike to hold a spool with as small as 40mm center and 100mm wide.
Advertising


Issue with this design? Report a problem.

Would you like to support Cults?

You like Cults and you want to help us continue the adventure independently? Please note that we are a small team of 3 people, therefore it is very simple to support us to maintain the activity and create future developments. Here are 4 solutions accessible to all:

  • ADVERTISING: Disable your banner blocker (AdBlock, …) and click on our banner ads.

  • AFFILIATION: Make your purchases online by clicking on our affiliate links here Amazon.

  • DONATE: If you want, you can make a donation via Ko-Fi 💜.

  • WORD OF MOUTH: Invite your friends to come, discover the platform and the magnificent 3D files shared by the community!


Sharing and downloading on Cults3D guarantees that designs remain in makers community hands! And not in the hands of the 3D printing or software giants who own the competing platforms and exploit the designs for their own commercial interests.

Cults3D is an independent, self-financed site that is not accountable to any investor or brand. Almost all of the site's revenues are paid back to the platform's makers. The content published on the site serves only the interests of its authors and not those of 3D printer brands who also wish to control the 3D modeling market.

100% secure payment by credit card, PayPal, Apple Pay, Google Pay, etc.
View all payment options.