Skip to content

Wood PLA Coffee Espresso Tamper

Advertising
?
Creation quality: 5.0/5 (7 votes)
Evaluation of members on the printability, utility, level of detail, etc.

  • 28.1k views
  • 140 likes
  • 1.1k downloads
  • 7 collections
  • 2 comments

License
3D design format
STL Folder details Close
  • Base.stl
  • Handle.stl

Learn more about the formats

Last update 2019-08-26 at 10:35
Publication date 2019-08-23 at 08:30
?
Published to Thingiverse on: 2019-08-23 at 01:54
Design number 70200

3D printer file info

3D model description

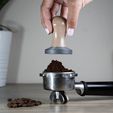
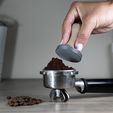
This is a fully printable wooden PLA coffee / espresso tamper. The original design is for a 52mm portafilter, specifically for the breville barista express. This being said the design is quite adaptable because it is 2 parts that screw together, the base and the handle, so I can take requests for specific portafilter sizes.

This is a pretty simple design and print but what sets it apart is in the filament used and the work done post print. I must say this Wood PLA is quite amazing and the things you can do in post printing open a lot of new possibilities.

This HatchBox Wood PLA is highly sand-able, stainable and takes a polyurethane sealing coat very well.

I highly recommend checking it out, it can be found here:
HatchBox Wood PLA - https://amzn.to/2L9eeMO

The other filament I used for the "metal" base was prusament grey, I plan to test more interesting metaling finish PLA soon.
Prusament PLA Pearl Mouse - https://amzn.to/2Zit747

Materials for post printing are:

Sand Paper - https://amzn.to/2Hjxk1i
Here is a great assortment from 120-3000 grit

Wood Stain - https://amzn.to/2TTKGqg
Any color works, this brand worked great.

Spray on polyurethane finish - https://amzn.to/2KQybss
To seal and provide a nice gloss to the prints

Post-Print Procedure
After printing I started with a heavier sand paper to get rid of obvious layer lines, although with printing at 0.1mm this wasn't much of an issue. Started with 150 - 200 grit.

Progressed with lighter sand paper around 320 grit until very smooth.

Then use very light sand paper and wet sanded to almost polish the finish. This was 1000-2000 grit.

After the sanding process I applied the stain, I coated the piece pretty heavy and let it sit and soak in then wiped the remaining stain off. I let the piece sit and dry until it was no longer wet to the touch.

I then applied the polyurethane in small coats allowing about 30 min to dry in between. 2-3 coats did the trick.

Once this was completely cured 3-4 hrs later I did a quick wet sanding again to polish the finish with 2000 grit paper.

This same process can actually be done for the silver piece to make it look more like metal.

3D printing settings

0.1 Layer Height

Advertising


Issue with this design? Report a problem.

Advertising

Would you like to support Cults?

You like Cults and you want to help us continue the adventure independently? Please note that we are a small team of 3 people, therefore it is very simple to support us to maintain the activity and create future developments. Here are 4 solutions accessible to all:

  • ADVERTISING: Disable your banner blocker (AdBlock, …) and click on our banner ads.

  • AFFILIATION: Make your purchases online by clicking on our affiliate links here Amazon.

  • DONATE: If you want, you can make a donation via Ko-Fi 💜.

  • WORD OF MOUTH: Invite your friends to come, discover the platform and the magnificent 3D files shared by the community!


Sharing and downloading on Cults3D guarantees that designs remain in makers community hands! And not in the hands of the 3D printing or software giants who own the competing platforms and exploit the designs for their own commercial interests.

Cults3D is an independent, self-financed site that is not accountable to any investor or brand. Almost all of the site's revenues are paid back to the platform's makers. The content published on the site serves only the interests of its authors and not those of 3D printer brands who also wish to control the 3D modeling market.

100% secure payment by credit card, PayPal, Apple Pay, Google Pay, etc.
View all payment options.