Skip to content

Artificial Sunrise Lamp

Advertising
Advertising
?
Creation quality: 5.0/5 (1 vote)
Evaluation of members on the printability, utility, level of detail, etc.

  • 1.9k views
  • 1 like
  • 26 downloads

License
3D design format
STL Folder details Close
  • Motor_mount.STL
  • dimmer_gear.STL
  • dimmer_track.STL
  • gear_mount.STL
  • gear_stage2.STL
  • motor_gear.STL
  • spur_gear_mount.STL

Learn more about the formats

Publication date 2019-10-01 at 14:33
?
Published to Thingiverse on: 2011-05-07 at 17:48
Design number 77865

3D printer file info

3D model description

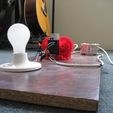
As a project for our electrical engineering (for mechanical engineers) class, and since Ottawa mornings can be extremely dark, me and my group decided to build a lamp that could simulate the sunrise during the morning to help with waking up. My modular gear reducers, which i posted about a month ago, were designed for, and played a huge role in, this project.

Once built, the lamp plugs into a wall timer, and as long as the control switch is open (optional part) the lamp begins turning on as soon as electricity is applied from the wall timer.

These kinds of lamps exist for purchase, but usually go for around $200. We spent around $70 total, but you could definitely build it for much less.

Video at http://www.youtube.com/watch?v=9fHnanEdq4w

3D printing settings

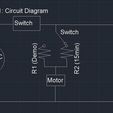
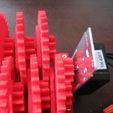
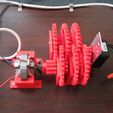
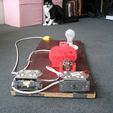
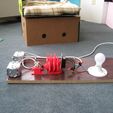
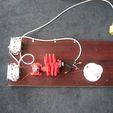
I think the pictures I took of it, and the wiring diagram in the pictures will provide a good overview of how to assemble it. There's not much hidden.

The motor gear is glued to the spur gear mount to allow the mount to be easily bolted to the motor shaft. Make sure that they are very well centred, as eccentricity can cause wobbling and noise.

A few things were changed from the given circuit diagram. We used a dimmer instead of two different sized resistors (don't run this with a dimmer for a long time, especially with abs, theoretically the motor will heat up and be dangerous, though we were careful and never had any problems, I never leave it running unattended). Also, we just used a standard dimmer in series with the lightbulb to control that as well, instead of a potentiometer.

As mentioned, we spent around $70 total, and that was with completely new parts. We even bought a new fan to salvage the motor from (it was cheaper than buying a motor by itself, and was AC so it didn't require any conversion). If you have any spare wires, motors, parts, etc. laying around your cost will be greatly reduced.

Advertising


Issue with this design? Report a problem.

Would you like to support Cults?

You like Cults and you want to help us continue the adventure independently? Please note that we are a small team of 3 people, therefore it is very simple to support us to maintain the activity and create future developments. Here are 4 solutions accessible to all:

  • ADVERTISING: Disable your banner blocker (AdBlock, …) and click on our banner ads.

  • AFFILIATION: Make your purchases online by clicking on our affiliate links here Amazon.

  • DONATE: If you want, you can make a donation via Ko-Fi πŸ’œ.

  • WORD OF MOUTH: Invite your friends to come, discover the platform and the magnificent 3D files shared by the community!


Sharing and downloading on Cults3D guarantees that designs remain in makers community hands! And not in the hands of the 3D printing or software giants who own the competing platforms and exploit the designs for their own commercial interests.

Cults3D is an independent, self-financed site that is not accountable to any investor or brand. Almost all of the site's revenues are paid back to the platform's makers. The content published on the site serves only the interests of its authors and not those of 3D printer brands who also wish to control the 3D modeling market.

100% secure payment by credit card, PayPal, Apple Pay, Google Pay, etc.
View all payment options.