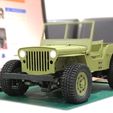
Video : https://www.youtube.com/watch?v=ZGB7M1b0JCo
Ok. Now you be wondering why 133%? In real life, an Army Jeep is quite small vs the general size of vehicles, so if you scale it down by 1/10, it uses 1/18 or 1/16 scale of RC parts. But RC 1/10 scale is the more common type of scale we play, more parts & choices available so you can get even higher performance, torque, grip and tires and using the more commonly M3 size of screws and nut.
Still confused? just follow the below step/instructions. haha
Step 1
First head to the original Ossum listing and download all the parts.
https://www.thingiverse.com/thing:2056923
The files you need to print from the ABOVE LINK are as follows,
NOTE 1 : always remember to apply 133% or 1.33 on the "scale" setting in your cura.
NOTE 2 : most are printed at 10% infill and 1 piece only, unless otherwise stated below
- bumper_front.stl
- bumper_rear.stl
- dashboard_et_al.stl
- fender_left.stl
- fender_right.stl
- front_floor_and_tub.stl
- grill.stl
- handle_side.stl (2x)
- headlamp.stl (2x in transparent filament)
- hitch.stl
- hood.stl
- leaf_thin.stl (4x at 50% infill has the right flex for my weight)
- rail_front_left.stl (100% infill)
- rail_front_right.stl (100% infill)
- rail_rear_left.stl (100% infill)
- rail_rear_right.stl (100% infill)
- rear_floor
- rear_handle.stl (2x)
- seat_frame_left.stl (2x) then pair with right frame during assembly
- seat_frame_right.stl (2x)
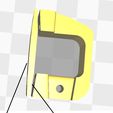
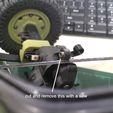
- servo_and_Shock_supports.stl (you will need to cut the middle bridge of this)
- shackle_a.stl (4x)
- shackle_b.stl (4x)
- suspension_bracket.stl (4x)
- tailgate.stl
- tub_wall_rear_left.stl
- tub_wall_rear_right.stl
- windscreen_frame.stl
- windscreen_insert.stl
- last part. Tip me cause I've figured out all above for you haha just kidding. Just share the photos here and in the fb group after you've printed.
Step 2
Now download and print the parts I uploaded here, which will make these 133% parts of Ossum to work with your RC 1/10 parts.
*Print as it is, do not scale up any
- HG_Axle_Clamp_A.stl (2x 100% infill)
- HG_Axle_Clamp_B.stl (2x 100% infill)
- Clamp_Spacer_1mm_A.stl (2x 100% infill)
- Clamp_Spacer_1mm_B.stl (2x 100% infill)
- Engine_mount_V2.stl (50% infill)
- Engine_Bay_Servo_Mount_V2.stl (50% infill)
- Steering_rack.stl (100% infill)
- Engine_bay_cover.stl (2x. if you are using HG axle like me, you need to cut the bridge, then glue and cover the hole with this)
- Steering_rack_Spacer_3mm & 5mm.stl (optional. in the case your screw not long enough)
Step 3
As for the 4 wheels, you can print from the below link, just the Wheels/Rim, 4 of them.
https://www.myminifactory.com/object/3d-print-mb-jeep-wheel-and-tyre-1-6-1-7-scale-49380
Then, print this Ring when you use aftermarket Tires. The one that fits well for me as link below.
https://www.thingiverse.com/thing:2668092
Step 4
1/10 parts to use/buy. Link below,
HG Axle Rear (affordable)
https://www.banggood.com/HG-P401P402P601-110-RC-Car-Rear-Gear-Box-HG-BX03-p-977819.html?p=DG23031123036201501P
HG Axle Front (affordable)
https://www.banggood.com/HG-P401P402P601-110-RC-Car-Front-Gear-Box-HG-BX02-p-977820.html?p=DG23031123036201501P
Gearbox (comes with bearing inside!)
https://www.banggood.com/HSP-94180-Gear-Box-Set-18024-Aluminum-Alloy-110-RC-Rock-Crawler-Car-Part-p-1172466.html?p=DG23031123036201501P
17kg Servo
https://www.banggood.com/1501MG-17KG-Big-Torque-Winch-Multi-axis-gear-robot-manipulator-and-FUTABAv-p-1015646.html?p=DG23031123036201501P
Tires (cheap and grippy! well worth the money!)
https://www.banggood.com/AUSTAR-4PCS-1_9Climbing-Car-Tyre-For-110-Climbing-Car-Red-Color-p-1110296.html?p=DG23031123036201501P
320A brushed ESC
https://www.banggood.com/320A-Brushed-Speed-Controller-ESC-for-RC-Car-Truck-Boat-1-or-8-1-or-10-p-919886.html?p=DG23031123036201501P
or waterproof one
https://www.banggood.com/Waterproof-Brushed-ESC-320A-3S-with-Fan-5V-3A-BEC-T-Plug-For-110-RC-Car-p-1030021.html?p=DG23031123036201501P
3channel Remote control
https://www.banggood.com/New-Version-AUSTAR-AX5-3CH-2_4G-Transmitter-With-Receiver-For-RC-Car-p-1046802.html?p=DG23031123036201501P
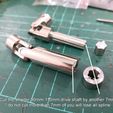
90mm-115mm drive shaft (Cut it shorter by 7mm)
https://www.banggood.com/Stainless-Steel-Universal-Drive-Shaft-90mm-115mm-for-rc-crawlers-D90-SCX10-p-1209569.html?p=DG23031123036201501P
100mm-140mm drive shaft
https://www.banggood.com/2PCS-Speed-Steel-Center-Drive-Shaft-100-140mm-For-Axial-SCX10-110-RC-Car-Crawler-p-1180716.html?p=DG23031123036201501P
Ball joint to be used for the servo. the middle rod use for the steering rack
https://www.banggood.com/DHK-Hobby-8382-9Z0-Assembly-Steering-Tie-Rod-18-8382-Maximus-RC-Car-Part-p-1225686.html?p=DG23031123036201501P
- then, you need a long M3 grub screw at least 10mm for the steering rack. if you can't find it, just screw a M3 screw into the "steering_rack.stl", then cut the head and screw in the rod end
Steel leaf spring (optional)
https://www.banggood.com/4pcs-110-Leaf-Springs-Set-HighLift-Chassis-For-110-D90-RC-Crawler-Car-Parts-Black-p-1172465.html?p=DG23031123036201501P
CR10. Fits all parts 3D Printer I used
https://www.banggood.com/DIY-Creality-CR-10-3D-Printer-300300400mm-Printing-Size-1_75mm-0_4mm-Nozzle-p-1085645.html?p=DG23031123036201501P
*** For those who's going to use Axial axles, you may request me to make a different clamp for the leaf spring. I don't have one.
**Screws needed ( exact to be updated)
- lots of 15mm and 20mm M3 Allen CAP screw
- some 30-50 M2 allen screw

/https://fbi.cults3d.com/uploaders/14379627/illustration-file/09bfb30d-74b3-4db9-870a-431db62360d5/133pc_awesome_jeep_done.jpg)


