Skip to content

Cupcake Oven Kit

Advertising
Advertising
?
Creation quality: 5.0/5 (1 vote)
Evaluation of members on the printability, utility, level of detail, etc.

  • 1.5k views
  • 4 likes
  • 18 downloads

License
3D design format
EPS Folder details Close
  • cupcake-oven-060-PETG.eps

Learn more about the formats

Publication date 2019-10-18 at 15:27
?
Published to Thingiverse on: 2011-11-27 at 23:09
Design number 80911

Template info

3D model description

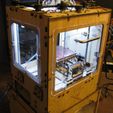
A few people in our Makerbot users group wanted a set of covers for their bots a while back, so I designed a set of laser cut PETG panels that covered the holes on the original Cupcake. I recently revisited the design after someone else wanted a ToM set so I decided to post the designs.

I solved the problem of closing up the front of the bot by creating a fold down door that secured with a couple magnets and utilized some drawer pulls I had on hand. Once the door and panels were installed on my bot, the entire thing looked kinda like an oven, hence the name. Appropriate for a Cupcake, right?

Rather than just preventing drafts from affecting your builds, these panels can also be used in conjunction with a specialized fume hood I designed (which will be posted soon along with ToM oven files) to manage the ABS fumes produced by a bot.

More pics here:
http://www.flickr.com/photos/builttospec/6103855648/in/photostream

Manufacturing settings

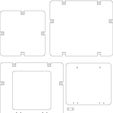
The panels have a few tabs that hold each in place that need to be carefully bent out. The design files have filled areas (they don't show up on the DXF preview, check out the EPS file) that should be etched into the PETG using the raster mode of the laser to give the tabs pre-scored creases that make bending the tabs much easier, but you may still want to use a pair of pliers to bend them out. Don't bend them out more than 90 degrees, you'll want them to press up against the sides of the holes you're covering.

The smaller square pieces are washers that allow the door to lay flush with the face of the front cover, place these under the hinges. I installed the hinges with M3x8 bolts. The magnets are held in place with double sided tape.

Advertising


Issue with this design? Report a problem.

Would you like to support Cults?

You like Cults and you want to help us continue the adventure independently? Please note that we are a small team of 3 people, therefore it is very simple to support us to maintain the activity and create future developments. Here are 4 solutions accessible to all:

  • ADVERTISING: Disable your banner blocker (AdBlock, …) and click on our banner ads.

  • AFFILIATION: Make your purchases online by clicking on our affiliate links here Amazon.

  • DONATE: If you want, you can make a donation via Ko-Fi πŸ’œ.

  • WORD OF MOUTH: Invite your friends to come, discover the platform and the magnificent 3D files shared by the community!


Sharing and downloading on Cults3D guarantees that designs remain in makers community hands! And not in the hands of the 3D printing or software giants who own the competing platforms and exploit the designs for their own commercial interests.

Cults3D is an independent, self-financed site that is not accountable to any investor or brand. Almost all of the site's revenues are paid back to the platform's makers. The content published on the site serves only the interests of its authors and not those of 3D printer brands who also wish to control the 3D modeling market.
100% secure payment by credit card, PayPal, Apple Pay, Google Pay, etc.
View all payment options.