Skip to content

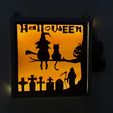
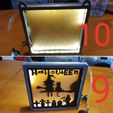
illuminated halloween setting

Advertising
Advertising
?
Creation quality: 5.0/5 (1 vote)
Evaluation of members on the printability, utility, level of detail, etc.

  • 5.2k views
  • 16 likes
  • 142 downloads
  • 2 collections

License
3D design format
STL Folder details Close
  • cadre modif.stl
  • sorciere.stl

Learn more about the formats

Last update 2019-11-07 at 09:30
Publication date 2019-11-05 at 10:10
Design number 83864

3D printer file info

3D model description

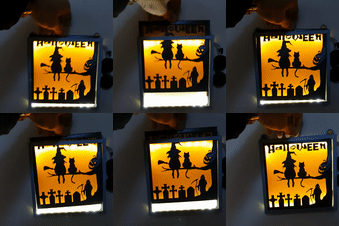
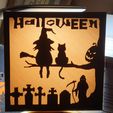
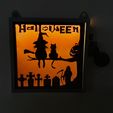
For this project, or this "Halloween" challenge, I had the idea to make a lighted board

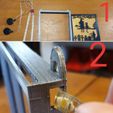
You have a frame or you can integrate leds at the back of it (two holes were made for a better integration)

You can put them on each side, I chose to put them at the top and bottom of the painting.

You also have the possibility to change your painting, your own creation for example... but don't worry, I intend to create tons of them... of the same size so that you can integrate them in the frame...

I have chosen my leds with switches, easier to switch them on and off as I wish.

Here's hoping you'll like it.

1 - print the frame and the painting in the colors of your choice and buy leds with or without switches (LED bar Lights 15 cm) smaller than mine.

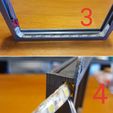
2 - insert the led in the hole made for this purpose

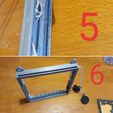
3 - position the led at your convenience (top, bottom side ...)

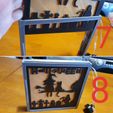
4 - insert the 2 nd leds and position it in the desired place.

5 - hide the threads in the compartment you can glue them with colored tape or simply glue.

6 - the frame is finally ready to be installed ( or hung on a wall)

7- you can slide the painting inside the frame 8.9.10- switch on and admire your work

perfect interior decoration to decorate a bedroom, a living room, a corridor....

#3dsimo

The frame measures 17.6 cm by 17.8 cm and is 2 cm thick.

printing time 7 h 35 min with media

The "witch" board measures 15.5 cm by 15.2 cm and 3.5 mm thick printing time 8 h 13 min.

On the photo I printed the color filament "black alumina" on the color filament "gold" (with my cr10, at the end of several layers, changed the filament, when "the devil" appears put black color and relaunched )

or you'll just have to paint.

With the CR10

when you see that the "Halloween" appear when printing do "tune" then "change filament" put the desired color then restart by pressing the button.

3D printing settings

Fill rate 30

80 % print speed not too fast for a better rendering

215 Β° PLA printing temperature

60 Β° tray temperature

0.15 layer thickness

1.2 hull thickness

1.2 thickness top/bottom

NO SUPPORT

Advertising


Page translated by automatic translation. See the original version.
Issue with this design? Report a problem.

Would you like to support Cults?

You like Cults and you want to help us continue the adventure independently? Please note that we are a small team of 3 people, therefore it is very simple to support us to maintain the activity and create future developments. Here are 4 solutions accessible to all:

  • ADVERTISING: Disable your banner blocker (AdBlock, …) and click on our banner ads.

  • AFFILIATION: Make your purchases online by clicking on our affiliate links here Amazon.

  • DONATE: If you want, you can make a donation via Ko-Fi πŸ’œ.

  • WORD OF MOUTH: Invite your friends to come, discover the platform and the magnificent 3D files shared by the community!


Sharing and downloading on Cults3D guarantees that designs remain in makers community hands! And not in the hands of the 3D printing or software giants who own the competing platforms and exploit the designs for their own commercial interests.

Cults3D is an independent, self-financed site that is not accountable to any investor or brand. Almost all of the site's revenues are paid back to the platform's makers. The content published on the site serves only the interests of its authors and not those of 3D printer brands who also wish to control the 3D modeling market.

100% secure payment by credit card, PayPal, Apple Pay, Google Pay, etc.
View all payment options.