Skip to content

Formicarium

Advertising
Advertising
?
Creation quality: 3.5/5 (1 vote)
Evaluation of members on the printability, utility, level of detail, etc.

  • 3.3k views
  • 1 like
  • 27 downloads

License
3D design format
PDF and STL Folder details Close
  • Formicarium_antplant_mini_floor1.PDF
  • Formicarium_antplant_mini_floor1.STL
  • Formicarium_antplant_mini_floor2.STL
  • Formicarium_antplant_mini_top.STL

Learn more about the formats

Last update 2021-03-31 at 01:24
Publication date 2020-01-28 at 20:55
?
Published to Thingiverse on: 2019-03-22 at 21:29
Design number 102577

Sergei000

3D printer file info

3D model description

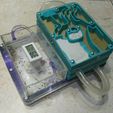
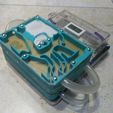
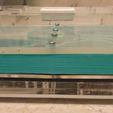
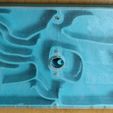
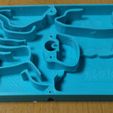
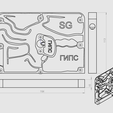
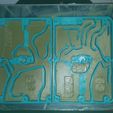
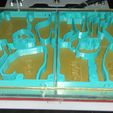
This is an add-on module for the AntPlanet mini series farm.
You can also use separately.

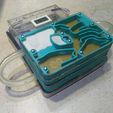
At the bottom of the module(Floor 1) there are cutouts for protruding elements of the base module. You can put on each other several modules(Floor1 or Floor2, it is better to alternate them to avoid excessive bending of the connecting tubes)

Must have:
- printed module (Formicarium_antplant_mini_floor1 or
Formicarium_antplant_mini_floor2)
- transparent plexiglass (either print lid) (113mm*164mm or larger)
- tube (outside diameter 10.5 mm-12mm)
- screws M3*16 (with Plexiglas 5mm) 10pcs per module 10pcs
- M3 nuts per module
- gypsum

Это добавочный модуль для фермы AntPlanet серии mini.
Также можно использовать отдельно.

Снизу модуля(Floor 1) предусмотрены вырезы под выступающие элементы базового модуля. Можно ставить друг на друга несколько модулей (Floor1 или Floor2, лучше их чередовать для избегания чрезмерного изгиба соединяющих трубок)

Необходимо иметь:
- напечатанный модуль (Formicarium_antplant_mini_floor1 или
Formicarium_antplant_mini_floor2)
- прозрачное оргстекло (либо напечатать крышку) (113мм*164мм либо больше)
- трубка (внешний диаметр 10.5мм - 12мм, длинной сантиметров 20)
- винты M3*16 (при оргстекле 5мм) 10шт на модуль
- гайки M3 10шт на модуль
- гипс

Порядок сборки (в случае с оргстеклом):
- приложить оргстекло и просверлить 2 отверстия на 2х противоположных углах по диагонали.
- далее прикрутить оргстекло к модулю и обрезать выступающие части оргстекла
(я обрезал электро лобзиком)
- просверлить оставшиеся отверстия для винтов.
- разметить место под центральное отверстие и снять стекло.
- далее просверлить центральное отверстие для добавления воды в камеру увлажнения (я сверлил ступенчатым сверлом)
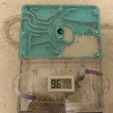
- далее развести гипс, добавить в области с надписями гипс и дождаться затвердевания
- вставить в отверстия гайки М3 и протянуть их в отверстия винтом
- прикрутить оргстекло.

Advertising


Issue with this design? Report a problem.

Would you like to support Cults?

You like Cults and you want to help us continue the adventure independently? Please note that we are a small team of 3 people, therefore it is very simple to support us to maintain the activity and create future developments. Here are 4 solutions accessible to all:

  • ADVERTISING: Disable your banner blocker (AdBlock, …) and click on our banner ads.

  • AFFILIATION: Make your purchases online by clicking on our affiliate links here Amazon.

  • DONATE: If you want, you can make a donation via Ko-Fi 💜.

  • WORD OF MOUTH: Invite your friends to come, discover the platform and the magnificent 3D files shared by the community!


Sharing and downloading on Cults3D guarantees that designs remain in makers community hands! And not in the hands of the 3D printing or software giants who own the competing platforms and exploit the designs for their own commercial interests.

Cults3D is an independent, self-financed site that is not accountable to any investor or brand. Almost all of the site's revenues are paid back to the platform's makers. The content published on the site serves only the interests of its authors and not those of 3D printer brands who also wish to control the 3D modeling market.

100% secure payment by credit card, PayPal, Apple Pay, Google Pay, etc.
View all payment options.