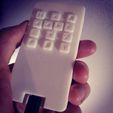
** Introduction ** This is an Arduino Pro Micro-driven custom mini-keyboard prototype for editing text when using a smartphone or tablet.
The code/keys are for arrows, shift+left/right arrows (to select text), home, select all, copy/paste, undo/redo, and delete. But you can redesign and recode the keyboard to do anything you want using Arduino's Keyboard Modifiers guide: https://www.arduino.cc/en/Reference/KeyboardModifiers
It is just a prototype. We want to gather some user experience and see where to go from here.
** Parts **
- (13) mini-push button switches (4 pins, 2.5mm tall button);
- (2) M3 x 15mm bolts and nuts;
- (2) M3 x 10mm bolts and nuts;
- (1) Arduino Pro Micro;
- (1) Perfboard cut to 46x79mm;
- (1) USB-micro-USB cable with OTG adapter;
Your OTG adapter depends on whatever device you want to use your keyboard for. If you're using it for a desktop for some reason, the USB cable itself is adequate. Some phones use micro-USB and others use Type-C adapters.
** Electronics **
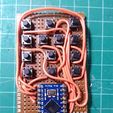
While the soldering can be tedious the circuit is very simple. Using 2 pins on the same side of the mini-push buttons, connect the left leg to the corresponding i/o pin on the Arduino. Connect the right leg to the GND (ground) pin on the Arduino.
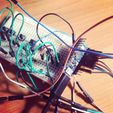
Test the circuit out on a prototyping board using jumper wires first to make sure everything is working.
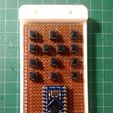
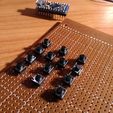
Then cut some perfboard down to 46x79mm. Place your buttons and the Arduino with its headers onto the perfboard and assemble the entire keyboard including with the keys to ensure everything lines up and fits together before soldering anything.
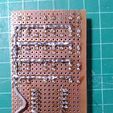
We used wires to connect the left legs to their respective pins on the Arduino and solder tracing (also called solder bridging) on the back of the perfboard to connect the ground legs together, and then to a single ground pin on the Arduino.
Programming
We included the INO file. The "define" section should be rearranged into a more orderly manner. Ours reflects a mistake when wiring the buttons to their pins on the Arduino. It's not a huge mistake as it is easy in the code to assign buttons to pins. If you make a wiring mistake, just change the number of the pin versus the "switch" (mini-push button) it is assigned to in the code.
You can trace the wires from the buttons to the pins or use a multimeter's continuity function. You should also use the continuity function to ensure your connections work, especially your ground arrangement if you're using solder traces.
** Assembly **
- Friction weld or glue M3 nuts into space provided on the back of the front cover piece;
- Place the assembled electronics board on the support rails of the back cover piece;
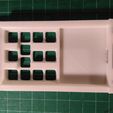
- Place the keys through the key openings on the front case;
- Place the back cover with electronics on top of the front case piece;
- Drive the M3 x 15mm (top 2 holes) & 10mm (bottom 2 holes) bolts into the back cover;
We've designed the keys so that the indentation for it to interface with the actual press button is forgiving just in case you didn't cut your perfboard perfectly or seat your buttons perfectly.
** Operation **
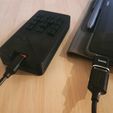
Simply plug a micro-USB/USB cable into the Arduino's exposed micro-USB port and the other side into your mobile device using an OTG adapter.

/https://fbi.cults3d.com/uploaders/14763281/illustration-file/fce50df9-10a3-4dce-a71e-1a9e82d635b9/IMG_20190731_215950_307.jpg)


