The linear rails on aluminum extrusion versus smooth rods bouncing in the air (includes bearing type, stiffness, accuracy, longevity),
and Marlin's Dual Z feature for auto leveling the X at the start of each print versus manually leveling the X, that is, no need for leveling spacers.
The 3-point lock mounted hot bed has been on the Mi3 since I built it, and once leveled and locked, it stays level.
All I have been doing with it is feeding it filament and gcode, and perfect parts just keep rolling off the plate.
So yeah, I wanted another Mi3.
I started by converting the base of my Maker to linear rails, and accommodating my existing GulfCoast Robotics (GCR) Front Z-Brace.
This is only a temporary project, as In the long run, I’ll put the Maker back to stock and finish the 2040 upper end for the new base frame.
My Maker already had the one-piece Y-plate, with the hot bed 3-point lock mounted on it, with a PEI over borosilicate glass build plate, held with binder clips.
You can read more about that is THIS shameless plug:
https://www.thingiverse.com/thing:3415460
I replaced the base with 2040 aluminum and MGN12 linear rails, put the existing Y axis on top of it, and designed/printed a new control box.
It's running RAMPS 1.6+ on Marlin 1.1.9 with TMC2208’s, and an external Hot Bed MOSfet.
Dual Z end stops/steppers are also present/enabled in Marlin, as on my Mi3, so the X axis self-levels at the start of every print.
Also replaced the existing 10x10mm extruder cable chain with a 10x15mm to eliminate the strain on the cables.
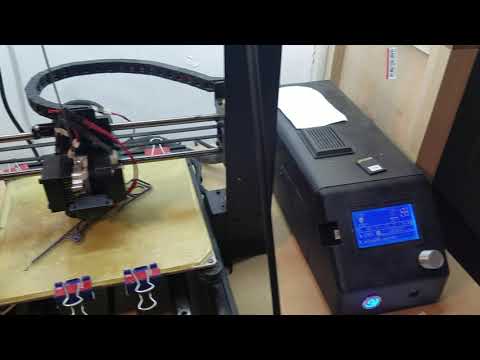
Now, as with my Mi3, I just feed it gcode.
And it's VEWY VEWY QUIet. https://www.youtube.com/watch?v=KowvrJhnW70
Base Frame:
The replacement frame is 6 lengths of 2040 aluminum extrusion (some drilling/counter boring/tapping done), with 2 MGN12 linear rails carrying 3 MGN12 Carriage Blocks.
Using M5x25mm socket head cap screws through counter bored and into tapped holes, the frame box bolts together with no bracing needed.
The frame box then bolts to the gantrys in the same manner as the stock setup: 1 bolt inward and 1 bolt outward on each side, connecting the sheet metal to the aluminum, and vice versa.
Dimensioned drawings for the aluminum specs are included as PDFs.
(Please note that the base frame is specific to the Maker, and will need to be changed/widened when I complete the 2040 top end.)
Plastic:
It needed a number of designed printed parts: Y motor mount, Y belt bed bracket assembly, Y belt tensioner assembly, Y end stop switch housing assembly, adjustable Z end stop switch mounts, linear rail end caps, corner feet, gantry feet, cable chain standoffs, a new control box, 4 different wire clip styles to manage the wiring, and for appearances only, an extruder fan shroud and grilles, and an extruder wiring shroud. The Y axis parts are the same as on my Mi3.
I am using one of my designed Things to manage the hot bed wiring as it exits the back of the bed: https://www.thingiverse.com/thing:3452399
There are designed feet for the four corners as well as the gantry bases. There is a thin layer of black foam double-stick taped to the bottom of each foot. The corner feet are retained by M4 screws with T-nuts, and the gantry feet slip on.
Simply put, it’s the bottom half of an AM8-MGN12-BLV build, just still wearing Maker gear up top.
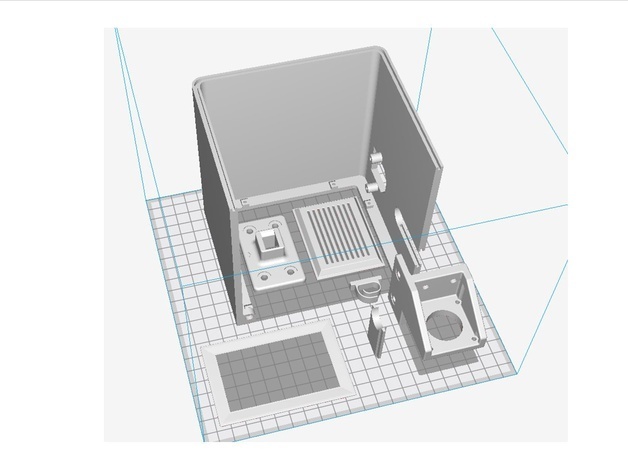
Control Box:
The PS sits, contained, in the bottom of a new control box design, and needs no screws to retain it.
The controller and MOSfet boards mount on a printed insert plate that rests on top of the PS and is held in place by 1 screw on each side thru the side vent slots. Thusly, the PS has nowhere to go.
The design should be able to accommodate different mounting plates based on the type of gear you want to use.
Currently, the only design I have is for RAMPS with a BIQU MOSfet as illustrated.
As the SLDPRT and STEP files are also included, feel free to mod it as you need.
The top is 2 halves glued together, and can be solid, or you can utilize a grill insert option that allows for tall heatsink/stepper protector configurations, with more direct ventilation.
It simply pushes/lifts off and is retained by 3x6mm neodymium magnets, 2 in each of the 4 corners.
Unlike the stock metal control box, it’s a piece of cake to make any repairs, do testing, etc.
In the back panel you’ll find a 92mm Arctic F9 fan (with an interior fan grille), for excellent and quiet airflow and cooling.
Interior wiring is tamed by the sidewall wire clips that glue to the interior along with a wire bundle standoff that attaches to the insert plate with an M3 screw.
The front houses a 12864 LCD Smart Display with its SD card port, an extended USB port from the Arduino, and a lighted push button power switch.
In the rear sides of the box are the Power and Data exits. 4 different configurations exist across 2 files: mirror in your slicer as desired.
There are 6 rubber feet on the bottom to allow air to flow up and in through the vent holes in the bottom of the front under the LCD display.
The 2 halves of the box glue together with printed splines, while the front and rear end caps use M3 hardware threaded into M2.5 holes in the plastic.
Z End Stops:
The machine now has 2, one for each Z motor, and dedicated stepper drivers for each motor.
They are each 2 pieces, and secure to the sheet metal through drilled holes in the sheet metal using M3 bolts with locknuts.
These are remixed from someone’s design from when I found it a year or so ago, so I can’t take initial credit.
They use long M3 bolts with locknuts and small springs.
Easily adjustable, but solid, reliable and consistent.
The Dual Z functionality is a feature of Marlin, and will self-level the X axis at the start of every print, by taking separate inputs from the two Z end stop switches.
This overcomes the tendency of an i3-style printer’s two Z motors, running in parallel off a single source, to go “out of sync.”
Y End Stop Switch:
I copied the feature of enclosed end stop switches from my Mi3 onto the Maker.
It’s bad form when you snag a switch with a sleeve and damage it beyond repair, and you’ve got no replacement.
That doesn’t happen now, at least not with the Y.
Extruder Cable Chain:
After recently having to replace the extruder cable, I designed some new mounting brackets and such to accommodate a 10 x 15mm chain, versus the stock 10x10, which was, in my opinion, too small, and caused issues in the wiring.
It required some designed mounting plates to accommodate the larger chain: at the extruder, the right side rear of the X axis, and at the bottom right side gantry.
Extruder:
I designed a fan shroud and a few different grilles so as to hide that awful cream color of the Noctua fan on the extruder.
The grilles only differ in their face appearance, as one has “boltheads” and the others don’t.
I also designed an extruder cover/shroud, which hides the majority of the exposed wiring without adding too much weight.
The extruder setup you see on the Maker (sans the shroud) is the same as on my Mi3, as I built this one first, way back, and then cloned the entire setup for my Mi3.
It’s Micro Swiss all metal everything, CNC plate and Lever, hardened SS .04 nozzle, cartridge heater, hex screw-in thermistor, Noctua cooling fan: everything can be replaced at the extruder, no need to un-route wires.
Linear rails/Carriages:
The linear rails being used here are from Misumi USA.
They work quite well, but are not, to me, that substantially better than what you could get from BangGood or AliExpress or Amazon.
These ARE somewhat quieter, but IMHO really not worth what I’m not going to tell you I paid for them.
There you have it.
Just the control box/RAMPS/Marlin upgrade itself is a great way to take your Maker to the next level.
The rest is up to you.
STL, SLDPRT and STEP files are included for all the designed plastic parts.
Kindly post your Makes/Remixes.
Thank You!