Skip to content

DREM Mount for Emulator II+HD

Advertising
Advertising
?
Creation quality: 5.0/5 (1 vote)
Evaluation of members on the printability, utility, level of detail, etc.

  • 1.5k views
  • 2 likes
  • 8 downloads

License
3D design format
PDF and STL Folder details Close
  • DREM_Front_Panel_artwork.pdf
  • drem-bracket-10s.stl
  • drem-front-10s.stl
  • drem-lens-01.stl

Learn more about the formats

Publication date 2020-02-05 at 00:03
?
Published to Thingiverse on: 2019-04-10 at 21:25
Design number 105041

3D printer file info

3D model description

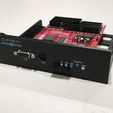
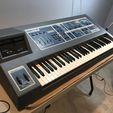
This is a bracket for mounting a DREM hard drive emulator in an E-mu Emulator II+HD sampling keyboard. It will also work in any situation where you want to mount a DREM in a single height 5.25" drive bay.

I printed the bracket and front panel in black ABS, and the lenses in clear PET-G.

Assembly instructions:
1) Print the bracket and front, clean up all holes etc.
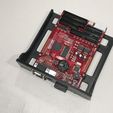
2) Taking proper anti-static precautions, dry-assemble the front to the bracket (it should be a friction fit) and test fit the DREM. Make sure the snapshot button doesn't bind.
3) Prepare the front panel overlay. I used a color laser printer to print the overlay, covered it with matte lamination vinyl for scratch resistance, and used 3M transfer tape on the back. It came out okay but could be better. I tried Avery 6579 water-resistant labels which are plastic, but these did not work well with the vinyl overlay. For some reason the vinyl would not lay down as smoothly as it did on paper.
4) Affix the overlay to the front panel, and using a sharp X-acto knife, cut all holes.
5) Print four lenses using clear PET-G. They are intentionally longer than necessary to account for the stringiness of PET-G. Trim them flush with the inside surface of the front panel.
6) Insert the lenses. Use a dab of solvent cement (such as Plastruct Plastic Weld or MEK) on the inside to glue them in place.
7) Glue the front panel to the bracket using solvent cement.
8) Mount the DREM using four #4x3/8" screws.
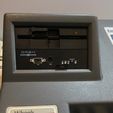
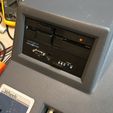
9) Mount the assembly in the Emulator II.

Many thanks to PortaOne, Inc. for creating the DREM and to ///E-Synthesist for creating the EXMP software. Their contributions are invaluable in keeping this great musical instrument alive.

Links:
DREM: https://www.drem.info/
EXMP: http://users.skynet.be/emxp/index.htm

Advertising


Issue with this design? Report a problem.

Would you like to support Cults?

You like Cults and you want to help us continue the adventure independently? Please note that we are a small team of 3 people, therefore it is very simple to support us to maintain the activity and create future developments. Here are 4 solutions accessible to all:

  • ADVERTISING: Disable your banner blocker (AdBlock, …) and click on our banner ads.

  • AFFILIATION: Make your purchases online by clicking on our affiliate links here Amazon.

  • DONATE: If you want, you can make a donation via Ko-Fi 💜.

  • WORD OF MOUTH: Invite your friends to come, discover the platform and the magnificent 3D files shared by the community!


Sharing and downloading on Cults3D guarantees that designs remain in makers community hands! And not in the hands of the 3D printing or software giants who own the competing platforms and exploit the designs for their own commercial interests.

Cults3D is an independent, self-financed site that is not accountable to any investor or brand. Almost all of the site's revenues are paid back to the platform's makers. The content published on the site serves only the interests of its authors and not those of 3D printer brands who also wish to control the 3D modeling market.

100% secure payment by credit card, PayPal, Apple Pay, Google Pay, etc.
View all payment options.