Skip to content

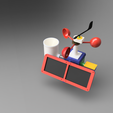
Arduino Weather Station Enclosure

Advertising
Advertising
?
Creation quality: 5.0/5 (1 vote)
Evaluation of members on the printability, utility, level of detail, etc.

  • 2.5k views
  • 1 like
  • 38 downloads

License
3D design format
STL Folder details Close
  • Blanking_Plate.stl
  • Bottom.stl
  • Bottom_Stem.stl
  • Stem.stl
  • Top.stl

Learn more about the formats

Publication date 2020-02-05 at 03:34
Design number 105197

3D printer file info

3D model description

Note: Work in progress. Will change significantly over the next few weeks. Note that all STLs are in random orientations, not the suggested print orientation. When I have finalized design, I will orient them properly in the final revision.

Central control box for my Arduino weather station.

https://www.thingiverse.com/SeanTheITGuy/collections/arduino-weather-station

This box is designed to be weather-tight(ish) and house the requisite electronics and batteries to power the rest of the system. I designed it around a NodeMCU Arduino unit, and a trio of 18650 Lithium batteries.

Update 2019-03-26: I have rethought the power system and have decided it makes more sense, from an efficiency standpoint, to charge a trio of 18650s directly from the 12v output of the solar panel, and then step that stored power down to ~5v through the buck box. To that end:

3S Lithium Charger

18650 3.7v Battery

LM2596 DC DC Step Down

NodeMcu ESP8266 Dev Board

All of the other sensor assemblies will mount to this box's 70x70 mount points. There is a blank included to cover up any of the mount ports that aren't used.

The mounting post is a 1.5" stem, the only non metric measurement used, for mounting with basic hardware to whatever location you wish.

Programming and wiring diagrams to follow.

Update 2019-06-23: I have not abandoned this. I have, however, had some shipping issues of the sensors from China. I currently have the temp and humidity sensors on hand, with some basic code making them work and upload data to ThinkSpeak, which I think will be the method I use to gather and collate data.

I will continue to optimize the code and will sketch out some wiring diagrams as soon as time allows, and will create a github repository for all such data shortly.

Advertising


Issue with this design? Report a problem.

Would you like to support Cults?

You like Cults and you want to help us continue the adventure independently? Please note that we are a small team of 3 people, therefore it is very simple to support us to maintain the activity and create future developments. Here are 4 solutions accessible to all:

  • ADVERTISING: Disable your banner blocker (AdBlock, …) and click on our banner ads.

  • AFFILIATION: Make your purchases online by clicking on our affiliate links here Amazon.

  • DONATE: If you want, you can make a donation via Ko-Fi πŸ’œ.

  • WORD OF MOUTH: Invite your friends to come, discover the platform and the magnificent 3D files shared by the community!


Sharing and downloading on Cults3D guarantees that designs remain in makers community hands! And not in the hands of the 3D printing or software giants who own the competing platforms and exploit the designs for their own commercial interests.

Cults3D is an independent, self-financed site that is not accountable to any investor or brand. Almost all of the site's revenues are paid back to the platform's makers. The content published on the site serves only the interests of its authors and not those of 3D printer brands who also wish to control the 3D modeling market.

100% secure payment by credit card, PayPal, Apple Pay, Google Pay, etc.
View all payment options.