Skip to content

Lack Enclosure HEPA Filter System

Advertising
Advertising
?
Creation quality: 5.0/5 (2 votes)
Evaluation of members on the printability, utility, level of detail, etc.

  • 11.9k views
  • 13 likes
  • 109 downloads

License
3D design format
STL Folder details Close
  • Alignment_Pegs.stl
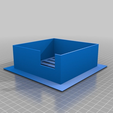
  • Bezel.stl
  • Bezel_Coupler.stl
  • Lower_Fan_Housing.stl
  • Lower_Filter_Housing.stl
  • Sleeve.stl
  • Upper_Fan_Housing.stl
  • prefilter_spacer.stl

Learn more about the formats

Publication date 2020-02-17 at 11:50
?
Published to Thingiverse on: 2019-01-22 at 20:19
Design number 109332

Cybertron3D

3D printer file info

3D model description

This design is a build off my initial fan/filter design. Once I saw how much dust was coming off the printer, I decided to upgrade to a proper HEPA filter.

This design is a touch over engineered since I was working with some specific constraints.

  • I wanted to use the same hole and sleeve I had already cut into my Lack enclosure from the previous design.
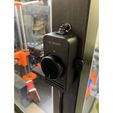
  • I wanted to use the same brand fan so I could use the variable speed control.
  • I wanted to use a specific HEPA filter.

Notes

  • If you did my previous design, you can print and adapt this one right in without any modifications to your current enclosure.
  • The fan I used here is louder than the one I used in the previous design. I didn't care about noise, I care about filtration.
  • On top of the HEPA filter, which has its own built in carbon pad, I added two more pre-filter carbon pads.
  • I printed this in PETG, but no reason you can't do it in PLA. Nothing is really structural.

Here are the parts you need to purchase, note this is assuming you did not do the previous design.

Enclosure Modification & Install
(First time install only, if using previous design you can skip)

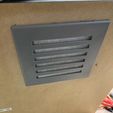
  • Cut hole in lack table the same size as the sleeve, this piece goes in from the underside of the table and will be flush with the top. I used hot glue on the flange and that was more than enough to secure it to the table.
  • NOTE - Make sure you place the notch in the sleeve in the same direction you plan to run the wire to the leg. That notch is for the cable.
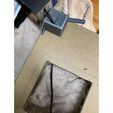
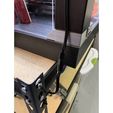
  • To run the wire to the fan, you can easily drill a hole through the top of the leg, the printed corner piece, and the underside of the table as the legs are hollow. The inside of the table is paper, so easy to push through. See the attached picture of how I completed this.
  • I did have to cut the wire to run it and added a molex connector to it so I could also disconnect the fan later if needed. Note the notch in the top of the lack table, this is to get the bezel past the wire.
  • The wire runs down the leg and there is an additional molex connector for when I need to remove the top of the enclosure.

Assemble Filter

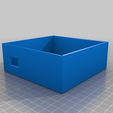
  • Glue Bezel Coupler to the inside of the Bezel. You can use your favorite glue of choice, expoy, CVA, or Hot Glue.
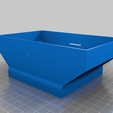
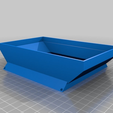
  • Glue lower filter housing to the coupler you just glued into the bezel piece.
  • Install fan into upper fan housing, using screws that come with it. You will have to trim the screws.
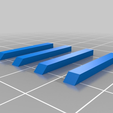
  • Insert alignment pegs into upper fan housing. This will help line up the upper and lower pieces.
  • I used hot glue to attach the upper and lower fan housing pieces together. That way if I ever need to get the fan out, a heat gun will loosen it enough to pull it apart. Yet, it will keep a nice air seal.
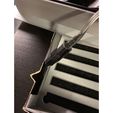
  • Insert HEPA filter into lower filter housing. Note the notices in the sides of the housing match up to the notches on the HEPA filter itself. This is to lock it in place and to make sure it is installed in the right direction.
  • Slide the fan assembly over the lower filter assembly.
  • For the power wire, this is up to you. In my case, I used a molex connector on the other side of the bezel that connects to the lead wire molex connector. This way it was cleaN and all inside the table. The fan wire disconnects at the fan as well, so you have two ends you can connect/disconnect it from. If you have questions here, let me know.

Carbon Pre-Filter

  • Cut two pieces of the carbon filter to the size of the sleeve that is installed in the Lack enclosure.
  • Place the first piece inside the sleeve
  • Place in the first pre-filter spacer
  • Place the second pad in.
  • Place the second space on top of that pad.

These spaces will lock in place once the fan assembly is inserted. They also keep the pads flat and uniform under the air pressures. I notice these get debris in them pretty quick, so they should be changed often.

If you have any questions, please let me know!

Advertising


Issue with this design? Report a problem.

Would you like to support Cults?

You like Cults and you want to help us continue the adventure independently? Please note that we are a small team of 3 people, therefore it is very simple to support us to maintain the activity and create future developments. Here are 4 solutions accessible to all:

  • ADVERTISING: Disable your banner blocker (AdBlock, …) and click on our banner ads.

  • AFFILIATION: Make your purchases online by clicking on our affiliate links here Amazon.

  • DONATE: If you want, you can make a donation via Ko-Fi πŸ’œ.

  • WORD OF MOUTH: Invite your friends to come, discover the platform and the magnificent 3D files shared by the community!


Sharing and downloading on Cults3D guarantees that designs remain in makers community hands! And not in the hands of the 3D printing or software giants who own the competing platforms and exploit the designs for their own commercial interests.

Cults3D is an independent, self-financed site that is not accountable to any investor or brand. Almost all of the site's revenues are paid back to the platform's makers. The content published on the site serves only the interests of its authors and not those of 3D printer brands who also wish to control the 3D modeling market.

100% secure payment by credit card, PayPal, Apple Pay, Google Pay, etc.
View all payment options.