3D model description
The Sentinel Grub
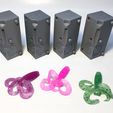
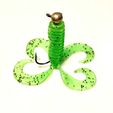
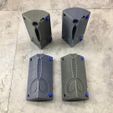
This is a four piece injection type mold for making a soft plastic 4 tail grub fishing lure. I don't think (currently) that there is a four tail grub on the market so this is quite a unique lure.
This is a 3D printed plastic mold so you have to be careful with your temps and injection pressure. I printed this mold in PLA+ and try to inject my Plastisol at or around 300°. (I use Dead On Plastix's brand of Plastisol) You also need to use very little pressure on the injector when shooting these types of mold. If you use a lot of pressure when injecting a 3D printed Mold... you can/will blow through the mold. Start light and work up with the pressure if you do not get a full injection or you have bubbles. It's better to have a misformed bait or two than ruin the mold.
The Video link below shows How to Inject a 3D Printed Mold, I'd recommend watching before purchasing my molds.
https://www.youtube.com/watch?v=_FeUszxAK8s
Video of this mold in use and it's action can be seen at https://youtu.be/ESSYNRm5MjI
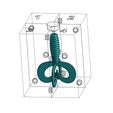
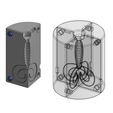
The pieces of the mold are identical but I made them four separate pieces and numbered them individually so the mold always goes back together the same every time. This way if there is any warping this should (but not always) ensure the split lines stay as tight as they can.
I do not know the longevity of a printed mold. Your results may vary depending on brand/type of filament used.
A few more pictures can be seen at https://www.theneverendingprojectslist.com/fishingprojects/fourtailgrub/
Edit 11-10-2020
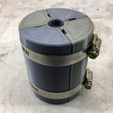
Added a round version (all four pieces are the same) that can be printed with the pieces standing up. Print the pins separate and glue them in place (2 per piece).
The four piece can easily be clamped together for injecting with Hose Clamps.
**02-22-21
I have printed and tested the 4 piece round version and it works well. Overall it is faster to print and easier to use with the pipe clamps but after some testing the pieces might tend to start warping more and lead to more flashing. The flashing is easy to remove but it's something to think about before choosing which design to go with.
If there are any problems with the STL's or you have questions please let me know.
NOTICE - My files and designs are all Copyrighted © and are exclusively for private and personal use. Even if you purchased these files that Copyright means you are NOT allowed to sell the model or any derivative of the model for economic or financial gain. For example, you cannot sell the digital model, a derivative or adaptation of that model, nor can you sell prints of the model. I do however grant permission for persons who purchase any soft bait molds to sell the rubber soft baits you make with one of my printed soft bait molds.... but again you CAN NOT sell the actual models of the baits.
3D printing settings
I print this mold in PLA+ with the following settings
(You'll have to experiment with what works best for you.)
Layer Height = .10mm
Top Solid Layers = 15
Bottom Solid Layers = 3
Outline/Perimeter Shells = 4
Supports = I did use supports on the side of the tail piece but it my not be required.
Infill = 25%
I print the mold parts with the pins facing up. The alignment pins may need sanding and I usually ream the pin holes with a .25" drill bit to clean them up.
Print times for me were about 6 hours per piece (I printed them one at a time) so the mold takes about 24 hours of print time.
Round Version Print Setting
Layer Height = .20mm
Top Solid Layers = 8
Bottom Solid Layers = 3
Outline/Perimeter Shells = 6
Supports = I did not use any
Infill = 25%

/https://fbi.cults3d.com/uploaders/12934067/illustration-file/f764a8bc-dac5-4b72-a935-46e6ae4084b5/4%20Tail%20Grub-001.jpg)


.jpg)
.jpg)


.jpg)
.jpg)


