Skip to content

Multi-Lampshade Bouquet

Advertising
Advertising
?
Creation quality: 5.0/5 (1 vote)
Evaluation of members on the printability, utility, level of detail, etc.

  • 2.8k views
  • 14 likes
  • 124 downloads

License
3D design format
F3D and STL Folder details Close
  • Lamp_Ring.f3d
  • Lamp_Ring.stl
  • Lamp_Ring.stl
  • Shade_1.f3d
  • Shade_1.stl
  • Shade_2.f3d
  • Shade_2.stl
  • Shade_3.f3d
  • Shade_3.stl
  • Shade_4.f3d
  • Shade_4.stl
  • Shade_5.f3d
  • Shade_5.stl

Learn more about the formats

Publication date 2020-03-24 at 09:19
?
Published to Thingiverse on: 2018-02-24 at 03:12
Design number 121126

3D printer file info

3D model description

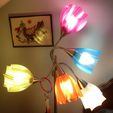
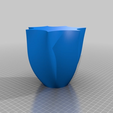
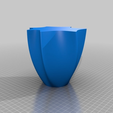
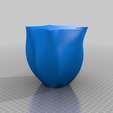
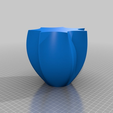
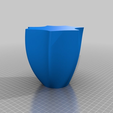
A couple of years ago, my wife purchased two of these five-light floor lamps from 'Bed, Bath, and Beyond': https://www.bedbathandbeyond.com/store/product/studio-3b-trade-5-light-floor-lamp/1013906068?Keyword=floor%20lamp. Some time later, one of the shades from one of the lamps became damaged, and she could not find a replacement. I told her not to worry, because we could just print another one. But what she told me to do instead was not to print a replacement shade, but to print a whole set of them in different colors, and to 'make it look like a bouquet of flowers'.

Either shortly before or shortly after she asked me to make these shades (I don't remember which), I saw a wonderful video from Angus on his 'Maker's Muse' YouTube channel showing how to use the loft feature in Fusion 360 to make vases with organic shapes (https://youtu.be/4UVEDKz2c5w). It seemed to me that the 'vases' that he made would make perfect lampshades for my wife's lamp. So, using the techniques that Angus showed in his video, I made these five lampshades, and my wife and I loved the result.

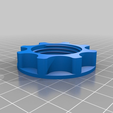
Also, when it came time to put these lampshades on the lamp, we found that we were missing one of the threaded rings that clamps the lampshade in place. However, this was not a problem either; I simple measured one of the existing threaded rings, and designed my own version of the ring in Fusion 360. The ring worked perfectly. (This awesome video from the YouTube 'CNC Kitchen' channel was very useful to me in helping me to create the threads for this part: https://youtu.be/1nhcKn7Kt8w.)

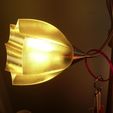
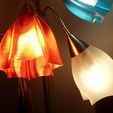
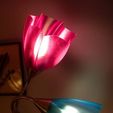
The colored lampshades in the photos were printed using blue, red, yellow, and purple transparent "AMZ3D-brand PLA filament (available on Amazon.com). The white lampshade was printed using 3D-Solutech 'Natural Clear' PLA (which I also purchased from Amazon). I printed the lampshades on my Anycubic 'pulley-type' Kossel printer, but they can be printed on any decent 3D printer using the 'spralize' or 'vase-mode' setting of your slicer.

As well as the STL files for printing, I have included my Fusion 360 files for all of these parts as well. I specifically designed these shades for our 5-light floor lamps, but with the Fusion 360 files the design could (probably) be customized for hanging lamps and other lamp types as well.

I strongly advise against using incandescent light bulbs with these shades. I found that even the stock plastic shades for this lamp could be damaged by the heat from an incandescent lamp. LED light bulbs will work best, and of late, they have become fairly inexpensive.

I hope the community enjoys printing and using these lampshades. I want to thank my wife for her 'lampshade bouquet' idea (which is something that I would never have thought of on my own), Angus from Maker's Muse for giving me the inspiration for this design, and CNC Kitchen for showing me how to make threads in Fusion 360.

3D printing settings

Printer:
Anycubic Kossel, 0.4 mm nozzle

Rafts:
No

Supports:
No

Notes:
Note that the lampshade models are not 'shelled'; you must use the Cura 'spiralize outer contour' setting (or vase-mode setting in other slicers) to print the lampshades. I printed mine at a layer height of 0.3 mm, a bottom thickness of 0.8 mm, and a line-width setting of 0.6 mm. (I wanted the wall to be thicker than the 0.4 mm nozzle width in order to make the lampshades stronger, and make the translucent color of the filament show up deeper. When I print in spralize mode, I sometimes will set the line-width to be different from the nozzle width.) I printed the threaded lamp ring with the layer height at 0.1 mm (in order to capture the thread detail), wall thickness at 0.8 mm (with a 'standard' line-width setting of 0.4 mm), top and bottom thickness at 0.6 mm, infill percentage at 20%, and speed at 45 mm/sec.

Advertising


Issue with this design? Report a problem.

Would you like to support Cults?

You like Cults and you want to help us continue the adventure independently? Please note that we are a small team of 3 people, therefore it is very simple to support us to maintain the activity and create future developments. Here are 4 solutions accessible to all:

  • ADVERTISING: Disable your banner blocker (AdBlock, …) and click on our banner ads.

  • AFFILIATION: Make your purchases online by clicking on our affiliate links here Amazon.

  • DONATE: If you want, you can make a donation via Ko-Fi πŸ’œ.

  • WORD OF MOUTH: Invite your friends to come, discover the platform and the magnificent 3D files shared by the community!


Sharing and downloading on Cults3D guarantees that designs remain in makers community hands! And not in the hands of the 3D printing or software giants who own the competing platforms and exploit the designs for their own commercial interests.

Cults3D is an independent, self-financed site that is not accountable to any investor or brand. Almost all of the site's revenues are paid back to the platform's makers. The content published on the site serves only the interests of its authors and not those of 3D printer brands who also wish to control the 3D modeling market.

100% secure payment by credit card, PayPal, Apple Pay, Google Pay, etc.
View all payment options.