Skip to content

Sliding repeating bow

Advertising
?
Creation quality: 5.0/5 (1 vote)
Evaluation of members on the printability, utility, level of detail, etc.

  • 15.5k views
  • 25 likes
  • 22 downloads
  • 1 collection
  • 4 comments

License
3D design format
PDF, STEP, and STL Folder details Close
  • BackLever.STL
  • BackLock.STL
  • BackStop.STL
  • Bracket.STL
  • Bracket_1.STL
  • Bracket_2.STL
  • CentralFlanc.STL
  • CentralFlanc1.STL
  • Flancs_X2Mirror.STL
  • FrontStop.STL
  • Fronthandle.STL
  • Handle.STL
  • Handle_LeftTT.STL
  • Handle_RightTT.STL
  • Lever.STL
  • ShortArrowAdapter.STL
  • Sight_Back00.STL
  • Sight_Front01.STL
  • SlidingrepeatingBowManualV1.3.pdf
  • Trigger.STL
  • TriggerAluThumb.STL
  • TriggerAlu_AP203.STEP
  • TriggerAlu_AP214.STEP

Learn more about the formats

Last update 2020-07-10 at 18:18
Publication date 2020-03-24 at 10:49
Design number 121223

syl20mm

3D printer file info

3D model description

News in V1.3 :

bow bracket enhancement

front handle enhancement

short arrow adapter

News in V1.2 :

Aluminium trigger is now better for the string

The sight is now operational

News in V1.1 :

STEP files to have the trigger done in aluminium + trigger improvement + documentation improvement

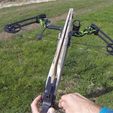
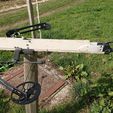
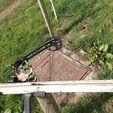
This is a hybrid Wood/3D printed sliding repeating bow. Here is the video of the first shooting test I made:

https://youtu.be/lyPXGM5R--o

here is te latest test I did:

https://youtu.be/jqxMp1IbqTU

Nearly all the ideas in this system come from JΓΆrg Sprave's Instant Legolas, I just made a 3D printed version, and so most the credits should be his. Here is one of his video about his system:

https://www.youtube.com/watch?v=f3fcNyZoEIw.

The build manual is available here:

https://drive.google.com/open?id=1RD5iw1qI5nfNlczbd70f5E7fhNj2LtFV

The goal was to have the easiest woodwork as possible. Neverteless the arrow rail is still a difficult work to achieve. So I asked a professional wood worker to get a really straight rail.

I use it with a Mission Hammr compound bow.

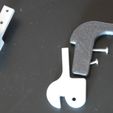
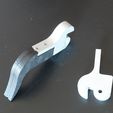
I printed all the parts in with ASA filament since it is pretty similar to ABS and can endure a lot of stress. The trigger is the critical part since the draw weight can be really high on a compound bow and I would advise to have the Triggered done in aluminium. Nevertheless, the 3D printed ASA filament trigger worked fine for 20 pounds draw weight, but I would not count on it on the long run. An assembly manual is provided, and the system can be used for both lefty and righty.

This represents several 10th of hours work, and improvement are to come soon, depending on the feedback I get. That is why I do not give it for free but for a really cheap price.

Parts list:

Bracket on the bow

  • Bracket.STL

  • Bracket_1_x2.STL

Front Block:

  • CentralFlanc.STL

  • CentralFlank1.STL

  • FrontStop.STL

  • Lift.STL

  • FrontHandle.STL

Rear Block (Handle):

  • BackLock.STL

  • BackStop.STL

  • Flanks_X2Mirror.STL

  • Handle.STL

  • Handle_LeftTT.STL

  • Handle_RightTT.STL

  • Trigger.STL

  • TriggerAlu_AP203.STEP

  • TriggerAlu_AP214.STEP

  • TriggerAluThumb.STL

  • BackLever.STL <-- To properly hold the arrows in place.

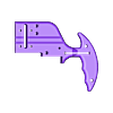
Be careful of the Flanks which should be printed twice, and one is mirrored. Bracket attached to the bow:

Wood parts:

  • 1x rail 800x42x10mm

  • 2x sides 670x65x10mm

Screws & bolts & springs:

The 3D printed parts are designed to work with M3 screws which are really common all around.

The world except for those using imperial units. But I am sure there is a x/64th inch screw which would fit really nicely.

  • 11x M3 wood insert bolt

  • 8x M3 Metal insert bolt

  • 8x M3 nuts for the left & right handle

  • 22x M3 x 14-16mm screws

  • 1x M3 x 25mm screws with no thread at the base for the trigger

  • 1x M3 x 30mm screws with no thread at the base for the lever

  • 3x M3 x 40mm screws

  • 2 or 4x 5mm diameter compression spring for the trigger an the lever

  • Some washers to even the screws heads pressure on the woods.

Improvements are coming, like a dedicated sigh and a better front handle.

3D printing settings

ASA filament:

layer heigt: 0.3mm

3 floor and ceilling layers

3 layer walls

Advertising


Page translated by automatic translation. See the original version.
Issue with this design? Report a problem.

Would you like to support Cults?

You like Cults and you want to help us continue the adventure independently? Please note that we are a small team of 3 people, therefore it is very simple to support us to maintain the activity and create future developments. Here are 4 solutions accessible to all:

  • ADVERTISING: Disable your banner blocker (AdBlock, …) and click on our banner ads.

  • AFFILIATION: Make your purchases online by clicking on our affiliate links here Amazon.

  • DONATE: If you want, you can make a donation via Ko-Fi πŸ’œ.

  • WORD OF MOUTH: Invite your friends to come, discover the platform and the magnificent 3D files shared by the community!


Sharing and downloading on Cults3D guarantees that designs remain in makers community hands! And not in the hands of the 3D printing or software giants who own the competing platforms and exploit the designs for their own commercial interests.

Cults3D is an independent, self-financed site that is not accountable to any investor or brand. Almost all of the site's revenues are paid back to the platform's makers. The content published on the site serves only the interests of its authors and not those of 3D printer brands who also wish to control the 3D modeling market.

100% secure payment by credit card, PayPal, Apple Pay, Google Pay, etc.
View all payment options.