Skip to content

Wishbon 2 - A Tool for Sharpening Small Drill Bits

Advertising
Advertising
?
Creation quality: 5.0/5 (1 vote)
Evaluation of members on the printability, utility, level of detail, etc.

  • 11.2k views
  • 4 likes
  • 34 downloads
  • 1 collection

License
3D design format
PDF and STL Folder details Close
  • WB2.STL
  • WB2sup.STL
  • Wishbon2-By-3DLadnik.pdf

Learn more about the formats

Last update 2020-06-16 at 21:31
Publication date 2020-03-26 at 11:21
Design number 123750

3D printer file info

3D model description

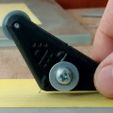
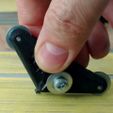
It was always difficult for me to sharpen a drill with a diameter of less than 3 mm. Most of the available tools for sharpening drills are not designed for this, and manual sharpening was not always obtained. Sharpening drills with a diameter of less than 1 mm did not work at all.

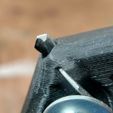
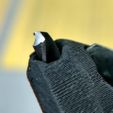
Once I came across a description of a little-known tool Wishbone for sharpening small drills and I decided to do something similar, but suitable for manufacturing on an FDM printer. The result is Wishbone 2. This tool allows you to quickly and efficiently sharpen drills with a diameter of 4 mm to 0.5 mm without any special skill.

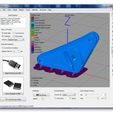
Made using 3D printing on an FDM printer, easy to assemble, inexpensive.

The work of Wishbone 2 is shown in the video: https://youtu.be/7oEiV30UQRU
Assembly instructions are in the PDF document.

Project page: https://3dladnik.wixsite.com/workshop/wishbon-2

P.S.
The angle of sharpening ϕ1 at the apex can be changed simply by changing the offset of the drill. Preservation of symmetry is ensured by an equal number of passes on the abrasive, or corrected by additional passes. It is better to control the quality of sharpening small drills with optics.

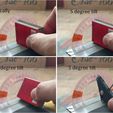
The rear cutting angle α is set “by eye”, with sufficient accuracy, it is not difficult, it can be estimated as follows:

1 - take a matchbox, place it vertically, on a narrow long edge,
2 - put the school protractor to a short edge and notice how it looks at the same time,
3 - tilt the box to the right by 5 degrees, mark the difference with the previous position,
4 - now tilt the box to the right 40 degrees

  • A tilt of 5 to 17 degrees provides a rear cutting angle α
  • A slope of 25 to 40 degrees provides a second angle

From my own experience, the rear angle α is obtained with a deviation of +/- 2 degrees, which is quite enough.

3D printing settings

nozzle 0.5 mm
layer height 0.2 mm

Advertising


Issue with this design? Report a problem.

Would you like to support Cults?

You like Cults and you want to help us continue the adventure independently? Please note that we are a small team of 3 people, therefore it is very simple to support us to maintain the activity and create future developments. Here are 4 solutions accessible to all:

  • ADVERTISING: Disable your banner blocker (AdBlock, …) and click on our banner ads.

  • AFFILIATION: Make your purchases online by clicking on our affiliate links here Amazon.

  • DONATE: If you want, you can make a donation via Ko-Fi 💜.

  • WORD OF MOUTH: Invite your friends to come, discover the platform and the magnificent 3D files shared by the community!


Sharing and downloading on Cults3D guarantees that designs remain in makers community hands! And not in the hands of the 3D printing or software giants who own the competing platforms and exploit the designs for their own commercial interests.

Cults3D is an independent, self-financed site that is not accountable to any investor or brand. Almost all of the site's revenues are paid back to the platform's makers. The content published on the site serves only the interests of its authors and not those of 3D printer brands who also wish to control the 3D modeling market.

100% secure payment by credit card, PayPal, Apple Pay, Google Pay, etc.
View all payment options.