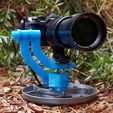
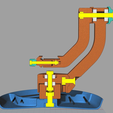
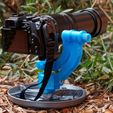
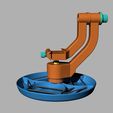
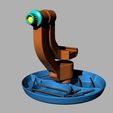
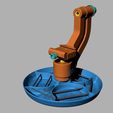
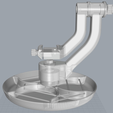
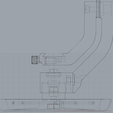
This is a ground pod, and camera gimbal for wildlife and macro photography. It is mostly 3D printed, and just requires a couple of bearings and some nuts and bolts. It is quite strong enough to hold my camera (~ 1.6 Kg) and I wouldn't expect any problems, with decently robust printing up to 2 Kg at least.
First, a couple of notes. The photos are of the prototype, and have a few minor differences. The upper bearing has been raised 10mm in the design posted here, to allow for the Arca plate. The main arm joins the lower pivot in a neater fashion. I need to acquire/design a longer Arca plate to balance the camera (as you can see, this setup is typically back heavy, and I ran out of adjustment room), and for macro work with short lenses, an adaptor has to be developed to raise and move forward the arca mount for better balance.
This design includes circular storage spots to store lens caps, teleconverters, etc. There are holes already in place to run shockcord. The storage spots are easily wide enough for a 72mm lens cap.
The design rotates very smoothly. All axes have bearings and very little friction.
There are two variants of the skimmer pod. The original has a curved base so that it is better on uneven ground. This also makes it challenging to print, so I've also included a flat base option.
There are also two spacers included that can be added to the skimmer pod if you either want a higher setup, or cannot get 3/8 bolts short enough. They aren't really complete. They should have some way of being permanently attached so they can't fall off, but I decided I wouldn't need them and didn't do any further work on them. :P
In the future if I get around to it, axis clamps should be added so that a camera can be locked into position.
Hardware needed is:
2 thrust bearings 9 ID x 20 OD x 7 high.
2 x 608 bearings
1 3/8" nut and 3/4" long bolt (to give the skimmer pod a common tripod bolt thread, and to allow the gimbal to screw onto it.
1 x 30 mm M8 bolt and nut for the vertical axis of the gimbal.
1 x 25mm M8 bolt with countersunk head and not for gimbal arm attachment
1 x 60mm M8 bolt and nut for upper gimbal axis
1 x 50mm M5 bolt and nut for Arca clamp.
To put together:
1) Insert 3/8 bolt into base of skimmer pod. Seal with appropriate skimmer pod bolt holder. A drop of glue may be needed to prevent the cover falling out.
2) Insert the 3/8 nut into the side of the gimbal baseplate, and push it down into the lower position.
3) Then place an M8 nut into the M8 nut clamp and place it into the side of the gimbal baseplate. It should align with the hole at the top of the baseplate.
4) Place the lower thrust bearing on the baseplate, then the top plate, then the second thrust bearing, then the top bearing cover, and bolt them all in place with the 30mm M8 bolt. The top plate should turn freely.
5) Drop an 8mm nut into the side of the top plate, and screw the gimbal arm to it using the 25mm m8 counter sunk bolt.
6) insert a 608 bearing into each side of the top of the gimbal arm. Place the 60mm bolt through the gimbal bearing knob, then through the bearings, then the camera arm bearing plate, the camera arm, and secure with an 8mm nut.
7) Drop the 5mm nut into the hole of the arca plate mount. Put the 5mm bolt through the arca clamp knob, the arca clamp and into the 5mm nut.
8) Put a camera on it. Take some photos.

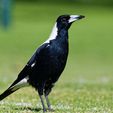
/https://fbi.cults3d.com/uploaders/14883452/illustration-file/802f917e-d14b-436f-bcb4-f9d12d27d056/P5230060_DxO.jpg)


