Skip to content

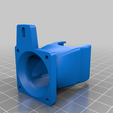
Adimlab E3D V6 Parts Cooler

Advertising
Advertising
?
Creation quality: 5.0/5 (1 vote)
Evaluation of members on the printability, utility, level of detail, etc.

  • 1.2k views
  • 6 downloads

License
3D design format
STL Folder details Close
  • Hotend_Cooler_Side_Duct_v2.stl
  • Parts_Cooler_Blower_Mount.stl
  • Parts_Cooler_Mount_v2.stl
  • Parts_Cooler_Part_1.stl
  • Parts_Cooler_Part_2.stl
  • Parts_Cooler_Part_3.stl

Learn more about the formats

Publication date 2020-04-02 at 03:52
?
Published to Thingiverse on: 2019-12-29 at 02:29
Design number 127080

3D printer file info

3D model description

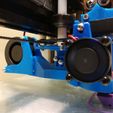
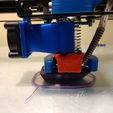
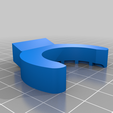
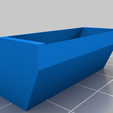
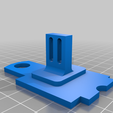
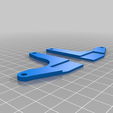
This is a remix of cmelson's Adimlab modifications parts cooler so it will mount from behind with magnets like the popular cobra cooler does. The heatsink duct is a very slight remix of "E3D V6 Fan Duct for MendelMax standard X Carriage".

  1. Use a magnet to mount it to the underside of the x carriage. I used one of these. https://www.amazon.com/gp/product/B07542LWKK/ref=ppx_yo_dt_b_asin_title_o01_s00?ie=UTF8&psc=1

  2. A 5015 blower fan should be used.

  3. You will also need a few M3 screws and nuts.

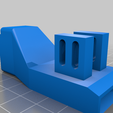
  4. Use some glue to attach the blower mounts to the back end of the parts cooler. The blower fits into the end of the cooler pretty tightly, but I added the mounts to keep it more secure. Place the mounts onto the fan, check for fit and when satisfied put some glue on it. Clamp it in place until it dries. I used a 3D printed ratcheting C clamp.

  5. The parts cooler has been upgraded so it has more clearance to the heatbed and won't hit on bed clips. It is now in three parts that are designed to be glued together. Part 1 is the back of the cooler, Part 2 is the parts cooler head and Part 3 is a coupler to enable Part 1 and Part 2 to be connected. Print all three of these parts as oriented with support touching the bed only. *** IMPORTANT *** *** The coupler has a little triangular bit on the inside. This part goes on the bottom towards Part 1. ***

  6. The heatsink cooler goes to the left side. You can leave it loose or put a screw in the slot.

Advertising


Issue with this design? Report a problem.

Would you like to support Cults?

You like Cults and you want to help us continue the adventure independently? Please note that we are a small team of 3 people, therefore it is very simple to support us to maintain the activity and create future developments. Here are 4 solutions accessible to all:

  • ADVERTISING: Disable your banner blocker (AdBlock, …) and click on our banner ads.

  • AFFILIATION: Make your purchases online by clicking on our affiliate links here Amazon.

  • DONATE: If you want, you can make a donation via Ko-Fi πŸ’œ.

  • WORD OF MOUTH: Invite your friends to come, discover the platform and the magnificent 3D files shared by the community!


Sharing and downloading on Cults3D guarantees that designs remain in makers community hands! And not in the hands of the 3D printing or software giants who own the competing platforms and exploit the designs for their own commercial interests.

Cults3D is an independent, self-financed site that is not accountable to any investor or brand. Almost all of the site's revenues are paid back to the platform's makers. The content published on the site serves only the interests of its authors and not those of 3D printer brands who also wish to control the 3D modeling market.

100% secure payment by credit card, PayPal, Apple Pay, Google Pay, etc.
View all payment options.