Skip to content

Adimlab Gantry Adjustable Z Stop Remix (Geared)

Advertising
Advertising
?
Creation quality: 5.0/5 (1 vote)
Evaluation of members on the printability, utility, level of detail, etc.

  • 1.9k views
  • 3 likes
  • 41 downloads

License
3D design format
STL Folder details Close
  • Block.stl
  • Bracket.stl
  • Gear_Large.stl
  • Gear_Small.stl
  • Turn_Wheel.stl

Learn more about the formats

Publication date 2020-04-02 at 04:00
?
Published to Thingiverse on: 2020-03-25 at 03:22
Design number 127086

3D printer file info

3D model description

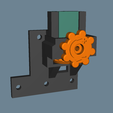
This is a remix of the "ADIMLab Z-Axis End Stop Adjustment" by Rabbit1210. What this remix does is add a couple of gears and a turn wheel that replace the original adjustment knob. The aim is to make adjustment easier and the parts more robust.

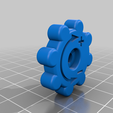
The gears and the knob come from this thing which inspired this remix. https://www.thingiverse.com/thing:2757323 I only made a slight change to the knob so a 18mm screw would fit flush on the gear side. I have included the other gears here from the above thing for a single download.

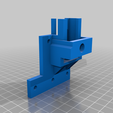
3/27/20: Testing in progress, added hardware, assembly & installation instructions. Model Changes: Thickened the bracket by .5mm, realigned the bracket and block adjustment holes, sized block for 4mm adjustment screw, decreased depth of turn wheel center so 18mm screw would not be too long. Uploaded the newest STL files.
3/24/20: Uploaded all models.

*** HARDWARE: ***

  1. The main adjustment screw, M4 x 35 or longer. I recommend M4 x 50, M4 x 35 is the bare minimum. You will also need an M4 square nut that will go into the block.

  2. To attach the turn wheel and the small gear you will need an M4 x 18 screw.

  3. For the gears 1 nylock M4 nut for the larger gear and 1 M4 nut for the smaller gear. Recommend using some blue locktite for security.

  4. To attach the z stop to the block, 2 M3 square nuts, and 2 M3 x 12 screws.

  5. To attach to the printer 4 M4 extrusion nuts and 4 M4 x 10 screws.

*** ASSEMBLY: ***

  1. Start with the large gear by pushing a nylock nut into the gear.

  2. insert the large gear into the bracket with the nut facing up. Insert the M4 x 50 screw through the bottom of the bracket and into the gear. Tighten it all the way. You may need to place something into the gear to jam it so you can tighten the screw. Be careful to use something plastic so you don't gouge the gear. If desired also use some blue locktite.

  3. Test fit the block to ensure it goes over the adjustment screw smoothly all the way down.

  4. Press an M4 nut into the small gear and insert it into the housing so it will engage the large gear.

  5. Place the turn wheel onto the bracket, insert the M4 x 18 screw and tighten it all the way. Jam the gears as necessary so you can tighten it. If desired use some blue locktite.

  6. Turn the knob and ensure the gears turn smoothly.

  7. Press the M4 square nut into the side of the block, then place the block over the adjustment screw with the z stop mount to the top.

  8. Turn the turn wheel knob until the block is lowered into position with about 1/4 inch or about 6mm of the block over the top of the bracket.

*** INSTALLATION: ***

  1. Put all the M4 x 10 and extrusion nuts onto the bracket and tighten till just snug. Also, make sure they are aligned with how they will be on the printer.

  2. If not already done, remove the old Z-stop bracket and the Z-stop from the bracket. Go ahead and press in the M3 square nuts in the top of the block. The z-stop can be mounted before mounting the bracket or afterward.

  3. Place the assembly onto the printer and one at a time loosen each mounting screw 3-4 turns then tighten up so the extrusion nut will engage in the 2020 frame.

  4. Fish the z-stop connector into the square hole below the turn wheel and connect to the z-stop

*** All Done! You can now easily adjust your z-stop for your print surface. Enjoy! ***

Advertising


Issue with this design? Report a problem.

Would you like to support Cults?

You like Cults and you want to help us continue the adventure independently? Please note that we are a small team of 3 people, therefore it is very simple to support us to maintain the activity and create future developments. Here are 4 solutions accessible to all:

  • ADVERTISING: Disable your banner blocker (AdBlock, …) and click on our banner ads.

  • AFFILIATION: Make your purchases online by clicking on our affiliate links here Amazon.

  • DONATE: If you want, you can make a donation via Ko-Fi πŸ’œ.

  • WORD OF MOUTH: Invite your friends to come, discover the platform and the magnificent 3D files shared by the community!


Sharing and downloading on Cults3D guarantees that designs remain in makers community hands! And not in the hands of the 3D printing or software giants who own the competing platforms and exploit the designs for their own commercial interests.

Cults3D is an independent, self-financed site that is not accountable to any investor or brand. Almost all of the site's revenues are paid back to the platform's makers. The content published on the site serves only the interests of its authors and not those of 3D printer brands who also wish to control the 3D modeling market.

100% secure payment by credit card, PayPal, Apple Pay, Google Pay, etc.
View all payment options.