Skip to content

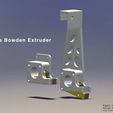
Kis Bowden Extruder

Advertising
Advertising
?
Creation quality: 5.0/5 (1 vote)
Evaluation of members on the printability, utility, level of detail, etc.

  • 1.1k views
  • 1 like
  • 11 downloads

License
3D design format
STL and ZIP Folder details Close
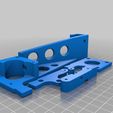
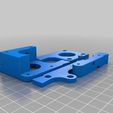
  • Kis_Bowden_Extruder_MK7_print_layout.STL
  • Kis_Bowden_Extruder_MK7_print_layout_no-arm.STL
  • Kis_Bowden_Extruder_MK7_separate-parts.zip
    • seperate-part_baring-holder.STL
    • seperate-part_baring-plate.STL
    • seperate-part_cover.STL
    • seperate-part_stepper-plate.STL
    • seperate-part_stepper-plate_no-arm.STL
  • Kis_Bowden_Extruder_MK8_print-layout.STL
  • Kis_Bowden_Extruder_MK8_print-layout_no-arm.STL
  • Kis_Bowden_Extruder_MK8_separate_parts.zip
    • seperate-part_baring-holder.STL
    • seperate-part_baring-plate.STL
    • seperate-part_cover.STL
    • seperate-part_stepper-plate.STL
    • seperate-part_stepper-plate_no-arm.STL

Learn more about the formats

Publication date 2020-04-02 at 17:26
?
Published to Thingiverse on: 2014-04-13 at 14:37
Design number 127360

3D printer file info

3D model description

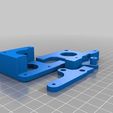
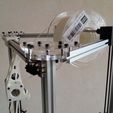
My previous extruder broke so I had to make a new one, I decided to go with a new design since I was planning to hang it from the top of the printer. It became a mix from some previous extruders I used. The acrylic one from http://www.blueeaglelabs.com that came with their Kossel Clear printer and another one also here on Thingiverse from ChiggerPepi http://www.thingiverse.com/thing:245677

Until now it works really well for me, but I'm still tweaking the design for easier and more all round use. If you decide to build it I would love to know how it works for you, so please let me know if you think there is stuff that could be improved. You can download the print ready slt files or the zip files if you want the parts separate.

For information about what version you need, MK7 or MK8 check this: http://reprap.org/wiki/Drive-gear

3D printing settings

I printed the parts with .5mm bottom, top and shell thickness, a layer height of ).15mm and a infill of 30%. Be careful not to drill all holes up to 3 mm after printing. Two holes in the barring_plate need to be threaded with M3. It should work to thread with the M3 bolds directly. Also the holes where the tubing goes are now 4.2mm to allow the use of the tube-nuts version, you will need to drill these out to 4.5mm if you want to use tube connectors with M5 threading.

The design is made for use of 1.75mm filament but you could possibly use it for 3 mm filament also if you drill out the holes were the tubing goes.

Advertising


Issue with this design? Report a problem.

Would you like to support Cults?

You like Cults and you want to help us continue the adventure independently? Please note that we are a small team of 3 people, therefore it is very simple to support us to maintain the activity and create future developments. Here are 4 solutions accessible to all:

  • ADVERTISING: Disable your banner blocker (AdBlock, …) and click on our banner ads.

  • AFFILIATION: Make your purchases online by clicking on our affiliate links here Amazon.

  • DONATE: If you want, you can make a donation via Ko-Fi πŸ’œ.

  • WORD OF MOUTH: Invite your friends to come, discover the platform and the magnificent 3D files shared by the community!


Sharing and downloading on Cults3D guarantees that designs remain in makers community hands! And not in the hands of the 3D printing or software giants who own the competing platforms and exploit the designs for their own commercial interests.

Cults3D is an independent, self-financed site that is not accountable to any investor or brand. Almost all of the site's revenues are paid back to the platform's makers. The content published on the site serves only the interests of its authors and not those of 3D printer brands who also wish to control the 3D modeling market.

100% secure payment by credit card, PayPal, Apple Pay, Google Pay, etc.
View all payment options.