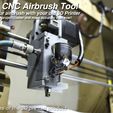
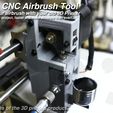
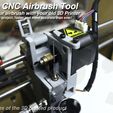
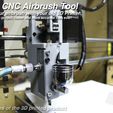
Take a look to the video
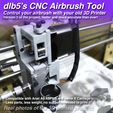
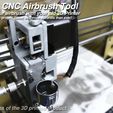
This is the third iteration of this design. A few things have changed from previous V2, specially the way the paint quantity is controlled (the E stepper) and the air flow (servo) haven't changed, but the mechanical way in which the stepper pulls the airbrush needle is now much effective and requires less parts and weight.
Now all parts needed in the "Tool Head" takes aprox the same volume than a standard extruder would do. Another "great" improvement from previous version is that now you can easily mount it over you Anet A8/A8 Plus or Prusa if they have the same X carriage type. The airbrush tip will be mostly in same position than your extruder nozzle ;)
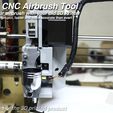
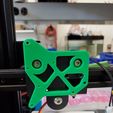
Also now, thanks to htaige cults user, you can mount it in your Ender 3 V2 using 3 M3x6 screws through the stock mounting holes on the ender 3 v2 gantry; take a look to the last photos and use the proper plate he designed.
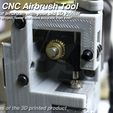
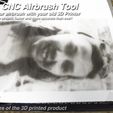
The mechanical advantages are related to the way the "E Stepper" pulls the needle. Now the motor has to turn a lot less to pull the needle 1mm back so it can perform movements a lot faster and with 0db noise. In some of my photo raster experiments I'm moving it just 0.5mm up and down... you practically can't see the extruder movement but... It's doing the work :)
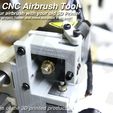
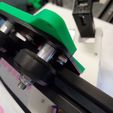
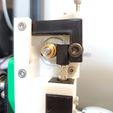
The same way your extruder gear push and pull the filament in your 3d printer, it will pull/push the airbrush needle. Same distance from the motor axle so, no need to re-define steps/mm of your E extruder like in previous version. If you take a close look, you will see that some part of the back of the needle is covered with a black TPU printed part. THIS SOFT MATERIAL PART IS ESSENTIAL for this design, as it lets the extruder gear have a very good grip over the needle.
IDEAL SCENARIO:
If you have an old Anet A8 or similar, maybe not working because a clogged extruder or a malfunctioning bed, now you can re-use it and mod it to experiment with this design. Your drawing area would be something like 200x200 or 220x220, which could be enough to try to "print" 13x18cm images or maybe you decide to expand your Y axe to 30cm to be able to work in A4 size ;)
My Stock Anet A8 mainboard got the bed heating system damaged, so I can't use the heatbed. This application doesn't require the bed or extruder heating systems or temp sensors. But we will need to be able to move the E extruder motor in our gcode so we will need to allow "cold extrusion" and a few more things in firmware. YES, we need to prepare and upload a new firmware (a few simple mods in configuration.io of the Marlin firmware).
The physical connection of the servo will be easy in a RAMPS... just connect it to servo1 socket. But in Anet A8 1.0 you will need to take GND 5V and Signal from somewhere. I used the Pin3 of the LCD connector (unused in stock anet LCD) and Pin1 and Pin2 of the LCD connector for ground and 5V (check the polarity). So... I'm not actually using the LCD as I control the machine trough a PC with Repetier Host software. I'm sure you can do it better and you find a way to connect it (maybe soldering a little cable to pin3 in the other side of the LCD connector and taking 5V and GND from the J3 connector pins)
ALT SCENARIOS:
If you have a CNC with the possibility to control a servo and know how to implement it in the firmare you have walked most of the way. In this particular case, I'm sure you know a lot more than me about CNC "heavy and expensive" machines, so probably I won't be able to help you much with the hardware part.
But maybe you want to do as I did time ago and build your own CNC!!! Maybe a MPCNC, Lowrider, or any other DIY CNC you can build can be controlled with Arduino+RAMPS as I did. In my particular case for my big CNC I'm electrifying my NEMA23 steppers at 30V from different PowerSupply than the rest of my RAMPS, which uses 12V, but using standard Stepper drivers in my RAMPS to control them. In fact, the setup is identical to a 3D printer but for those 30V for the steppers. I mean you can control your DIY CNC with Arduino+RAMPS if you can check stepper drivers temperature and maybe adding a fan if you need it to keep the drivers fresh.
In this case using Arduino+RAMPS to control your own CNC is what you need to easy understand this project. Modifying Marlin Firmware is quite easy if you know what you are looking for and what to change.
So, if you want to "burn" the right Marlin Firmware in your Anet A8 1.0 mainboard or in a RAMPS setup to be able to use this design, I can help you with it.
The parts needed maybe will be just a few, but the related "knowledge" to fully take control over this "tool" will probably harder to "source"... You can learn about all the related skills needed on your own just reading the right internet forums and maybe some gcode in the wikipedia ;)
To help those of you who want to give a try to my designs I have created recently a Discord Server in which you will find a channel to ask, discuse or show what you need about this project. The same way I will try to describe the "deepest" way all the process there.
This project is not new and some people have tried my previous version before. To see where everything began you can visit my previous publication of V2 in thingiverse (https://www.thingiverse.com/thing:2396745) and its related group (https://www.thingiverse.com/groups/cnc-airbrushing). You will be able to learn a lot there specially about the free software chain to create a raster like I do and see how others used it, maybe take a look to my first line attemps.... ;) is up to you
So the idea is, after you buy this design, I will invite you to my Discord Server, and you will be able to see there the rest of the info you need and will be able to ask and show the other "Airbrushers" and me :)

/https://fbi.cults3d.com/uploaders/13597891/illustration-file/a033e119-a2c7-4176-8d5b-edcd38fdf1a0/dlb5s_CNC_AHC_V3_MAIN_2048x2048_C3D.jpg)
