3D model description
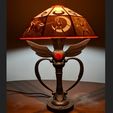
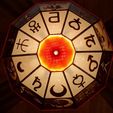
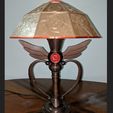
Sailormoon inspired lamp. Lamp Body base is based off of the Kaleidomoon Scope. Base is based on the transformation broach. Lamp is sliced to be printed on a 120x120 bed. If you want just the Lamp Body it is available for free on another listing. What you are paying for here is the shade parts and the effort it took me to create these parts and convert the images to their current form. I do not own the source material nor have rights to it and will take this down immediately if the company who own the rights would like it removed.
Parts needed and rough assembly instructions:
NOTE: you need some rough knowledge of wiring for this project but it is not that complex make sure to consult the instructions with your components and follow all rules for your area. I am not an electrician and any work with electricity should be done carefully and is done at your own risk.
5mmX1mm disc magnets (optional suggested)
Magnetic finishing nails (optional suggested)
Approx. 9 inch long threaded lamp pipe/rod with appropriately sized lamp nuts (4) and washers (1)
Approx. 1 inch long threaded lamp pipe/rod
Standard lamp socket 1.25 inch diameter
(https://www.amazon.com/gp/product/B06X6MVNSR/ref=ppx_yo_dt_b_asin_image_o00_s00?ie=UTF8&psc=1)
Push button singe circuit switch
(https://www.amazon.ca/Creative-Hobbies-Switches-Circuit-Stripped/dp/B00T6I8TTG/ref=sr_1_9?dchild=1&keywords=lamp+push+switch&qid=1603492970&sr=8-9)
Lamp cord
Weights for base (lots of things work, just think heavy not flammable and small enough to fit in the hollows of the base optimally sand or poured concrete)
LED bulb (must be LED to reduce heat output and prevent damage to the plastic)
Print 2 sets of the arms, 2 wings and 10 corner pieces.
Do not print the finial or center piece until after assembly then scale to fit the opening. You will get some variance in the size of the top opening based on how accurate your assembly is and it is best to just do this after and get a tight fit to what you end up with vs trying to force a perfect fit.
Assemble the main lamp
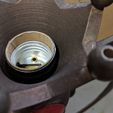
Screw the lamp rod to the socket and test fit it into the lamp. The socket should sit within the gem holder and crown pieces and be hidden.
Check the length of the rod and trim as needed, it should almost touch the table top when the lamp is upright.
Thread a nut and washer on the cord and insert the cord through the lamp rod.
Wire the socket and screw it to the lamp rod.
Use the washer and nut to tighten the lamp rod inside the base.
Cut the hot side of the wire and wire in the switch
Connect the switch to the lamp base using the included nuts and washers.
Cross your fingers and test it. If it does not work google it.
Add your weights
Cover the bottom with cardboard or thin wood and something non slip
Attach finishing nails to the bottoms of the harp arms
Glue the magnets into the holes in the top of the crown
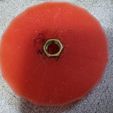
Embed a nut into the gem top finial (I suggest you heat it and melt it in for a tight fit ensuring it is perfectly centered
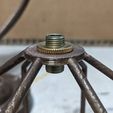
Attach the 1 inch rod to the harp using nuts
The best way to assemble the shade is to use a wood burner and filament to weld the individual cells together. The corner support pieces will help with holding the peices in place and get you a clean bottom edge. You can also use filament and friction welding though this is a much harder technique. I suggesting printing a few test cells and practicing this before doing final assembly with your lithophanes.
Put the harp onto the crown ensuring the magnets get a good grip.
Place the completed shade over the rod on the harp
Screw the top gem onto the rod and adjust the rod length using the nuts on the harp to get a tight fit
Good luck, if you don't want to do all this work but still want one of these please reach out to subtlyfantastic@gmail.com. Due to the effort involved in assembling this piece the cost will be between 250 and 300 CAD depending on level of finish.
3D printing settings
Best possible setting for your printer for the main lamp. The lamp pictures is printed with PLA then painted and finished. For the shade use lithophane setting for your printer. You can find starting settings online but this will take some fiddling to get right.

/https://fbi.cults3d.com/uploaders/14395796/illustration-file/aa828469-13d9-4d4c-b6a4-e2f8add49f1e/Lamp%20lit.JPG)
