Skip to content

Da Vinci Webcam Mount

Advertising
Advertising
?
Creation quality: 5.0/5 (1 vote)
Evaluation of members on the printability, utility, level of detail, etc.

  • 1.8k views
  • 13 downloads

License
3D design format
SLDPRT and STL Folder details Close
  • PTW-00-1-PT-0195__Mount_Camera_DaVinci_.STL
  • PTW-00-1-PT-0195__Mount_Camera_DaVinci__Proto1.STL
  • PTW-00-1-PT-0195__Mount_Camera_DaVinci__Proto2.STL
  • PTW-00-1-PT-0195__Mount_Camera_XYZPrinting_DaVinci_.SLDPRT

Learn more about the formats

Publication date 2020-10-25 at 08:57
?
Published to Thingiverse on: 2015-01-18 at 18:48
Design number 216964

3D printer file info

3D model description

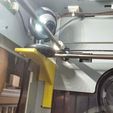
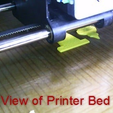
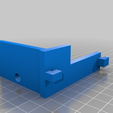
A shelf that attaches to the holes in the interior wall of a Da Vinci 1.0, 1.0A, and 2.0 printer, to mount a webcam (or other accessory).

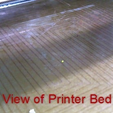
Specifically, I am using the TeckNet C016 USB HD 720P Webcam, 5 MegaPixel, 5G Lens, USB Microphone & 6 LED (~$14, http://www.amazon.com/gp/product/B000Q3VECE ) because it has a close manual focus, and its own LED lights for when the Da Vinci's internal light turns itself off.

##Specs:

+ Dimensions: 4.504"W x 1.250"D x 3.595"H (each)

+ Volume: 1.88 cubic inches

+ Weight: ~0.04 pounds

##Files:

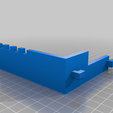
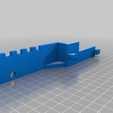
+ Shelf: PTW-00-1-PT-0195 (Mount, Camera, DaVinci).STL

+ Prototype Shelf: PTW-00-1-PT-0195 (Mount, Camera, DaVinci) Proto1.STL - Small shelf to mount the camera in the corner, inside the rails, but my camera was too big to fit.

+ Prototype Shelf: PTW-00-1-PT-0195 (Mount, Camera, DaVinci) Proto2.STL - Vertical shelf, but I didn't want to mount the camera sideways ultimately.

##NOTES:

+ .STL names do not match .SLDPRT name because Da Vinci will not print file names over 56 characters.

3D printing settings

  1. Print the shelf. Took ~2h:15m, and used 9.7m of filament. The settings I used are:
    A. Quality: Excellent
    B. Layer height: 0.20mm
    C. 3D density: High (50%)
    D. Supports: Yes
  2. Carefully remove the supports from under the hooks. This is the only place they should have been created.
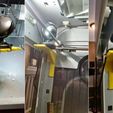
  3. Test fit the shelf in your printer, in the front left corner, where the door opens. See picture for interior holes to use.
  4. Test installation of your webcam.
  5. Remove shelf, and secure webcam to the shelf with a cable tie, or other method.
  6. Reinstall shelf. Nothing should touch the metal rails, since they spin.
  7. Route wire, out door handle opening or side vent.
  8. Adjust webcam positioning and focus.
Advertising


Issue with this design? Report a problem.

Would you like to support Cults?

You like Cults and you want to help us continue the adventure independently? Please note that we are a small team of 3 people, therefore it is very simple to support us to maintain the activity and create future developments. Here are 4 solutions accessible to all:

  • ADVERTISING: Disable your banner blocker (AdBlock, …) and click on our banner ads.

  • AFFILIATION: Make your purchases online by clicking on our affiliate links here Amazon.

  • DONATE: If you want, you can make a donation via Ko-Fi πŸ’œ.

  • WORD OF MOUTH: Invite your friends to come, discover the platform and the magnificent 3D files shared by the community!


Sharing and downloading on Cults3D guarantees that designs remain in makers community hands! And not in the hands of the 3D printing or software giants who own the competing platforms and exploit the designs for their own commercial interests.

Cults3D is an independent, self-financed site that is not accountable to any investor or brand. Almost all of the site's revenues are paid back to the platform's makers. The content published on the site serves only the interests of its authors and not those of 3D printer brands who also wish to control the 3D modeling market.

100% secure payment by credit card, PayPal, Apple Pay, Google Pay, etc.
View all payment options.