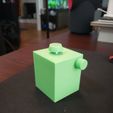
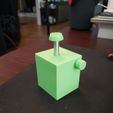
3D model description
What is it?
A small "box jack" that allows height adjustment via a knob from the side while loaded with weight. Has an adjustment range of about 40mm. Tested up to 13kg, but can probably go higher. About 10 rotations per mm for a standard bolt (explained below).
Background/reason it exists
I needed a small jack where I could use three to level a platform, each making contact with the platform. A lab jack came close to what I needed, but I found the size of the platform at the top of that design unsuitable for my needs, and I was unable to find any jacks of other designs that were small enough.
I find it useful for leveling printer platforms, fish tanks, other things of that nature.
Assembly
0. You'll need a 5/16in x 2in fully threaded bolt, 5/16in hex nut, and 5/16in washer from the hardware store. There's a channel in the support post of the housing: that is for a rotation-lock pin, which you will have to make. Drill a center hole in the bolt, 2mm from the end of the threads (not on the head end), make the hole big enough for the diameter of a 12mm length of coat-hanger wire to slide through. Drill carefully, and don't mess up the threads, you'll need the nut to still be able to screw on. Use the 12mm coat-hanger wire for the pin.
1. Push the ends of the worm-drive (the cylindrical one) into the circular recesses near the top of the housing, with the square hole in the drive facing the circular hole in the housing wall (that's where the knob goes through). It's a tight fit to get in, but once in place it should spin freely, you might need a little bit of help from a flat-head screwdriver. You might also need some plastic-friendly lubrication depending on your printer and material.
2. Push the nut into the circular worm-gear, again it's a tight fit, but that is by design.
3. Slide the housing-lid onto the bolt (smooth side of the lid toward the head of the bolt), thread the nut/worm-gear onto the bolt, slide the washer onto the bolt, then slide the pin into the bolt. Take that whole assembly and insert it into the channel in the support post of the housing, pin first (it only fits one way). I recommend threading the nut most of way up the bolt as you work that assembly into place.
4. Seat the washer into the circular depression at the top of the support post, push the bolt down, and thread the nut down a couple millimeters.
5. Work the the worm-drive and nut into place so that the worm-drive seats into the worm-gear, and the nut makes contact with the washer.
6. Rotate the housing lid so that it seats flush on all sides of the housing (it only goes one way properly), and seat into place.
7. Push the stand-cap into the head of the bolt, and insert the knob into the square hole of the drive gear.
8. Use some CA glue (super glue) on the knob and the lid if you like, just to keep anything from popping off. Don't get any glue on the "business" parts that need to move against each other.
Feel free to contact me through this site if you run into problems, I'm happy to talk you through it!
3D printing settings
Print in the orientations supplied
0.2mm layer height
0.4mm or smaller nozzle diameter
PLA or ABS or PET
Recommend 100% infill on the worm-drive, worm-gear, and stand-cap; 25% gyroid or cubic infill on the housing; 20% grid or linear infill for the rest of the parts.


