Skip to content

Full adjustable slot car chassis

Advertising
Advertising
?
Creation quality: 5.0/5 (1 vote)
Evaluation of members on the printability, utility, level of detail, etc.

  • 6.4k views
  • 8 likes
  • 135 downloads
  • 1 collection

License
3D design format
3MF and ZIP Folder details Close
  • Adjustable popsical chassis.3mf
  • full-adjustable-slot-car-chassis.zip
  • version 2.3mf

Learn more about the formats

Last update 2021-06-27 at 14:44
Publication date 2020-11-17 at 02:37
Design number 229147

beardy56

3D printer file info

3D model description

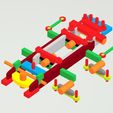
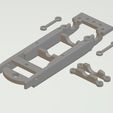
This is a fully adjustable chassis based on the "popsicle stick" designs.
You can adjust the wheel base, the width and motor brackets to suit any motor. The guide height can be changed as can it position. The chassis can be screwed to body mounting posts or the side mounts can be use. Its suitable for all types of slot car body, plastic resin, 3D printed or vac-formed.

This is still in development and some trimming and filing will be needed at this point. At the moment the axle bearings and motor will need to be glued in place.

The chassis is set up to take a Scalextric slimline motor as supplied.

The instructions and more info are here {link} (https://www.slotforum.com/threads/lets-make-a-3d-printable-chassis-a-very-basic-guide-to-3d-design.201635/#post-2447517)

The model has been designed in Microsoft Windows 3D Builder and does not seem to load correctly in other software. At the moment you will need to load in to 3D Builder to edit and then save as a STL file for printing.

A second version is now available that includes 2 part motor brackets and rear axle bearing holding straps.

The instructions are the same but the easiest way to do the top motor bracket is to delete the ones at the side of the chassis, included to show what you need. the one any re-sizing is done select the 6 parts the make up one of the top bracket parts and duplicate these parts. With all parts selected rotate them 180 deg. if you de-select the screw rods you can the settle the object on the print bed and the select just the screw rods and lower below the print rod. These rods can then be subtracted. Then repeat for the other bracket.

The screw rods, all 4, for the axle bearing straps need to be subtracted then the rest of the red strap parts on the chassis can be deleted.

3D printing settings

I print at the following
0.1 layer height
Solid in fill
with supports

Advertising


Issue with this design? Report a problem.

Would you like to support Cults?

You like Cults and you want to help us continue the adventure independently? Please note that we are a small team of 3 people, therefore it is very simple to support us to maintain the activity and create future developments. Here are 4 solutions accessible to all:

  • ADVERTISING: Disable your banner blocker (AdBlock, …) and click on our banner ads.

  • AFFILIATION: Make your purchases online by clicking on our affiliate links here Amazon.

  • DONATE: If you want, you can make a donation via Ko-Fi πŸ’œ.

  • WORD OF MOUTH: Invite your friends to come, discover the platform and the magnificent 3D files shared by the community!


Sharing and downloading on Cults3D guarantees that designs remain in makers community hands! And not in the hands of the 3D printing or software giants who own the competing platforms and exploit the designs for their own commercial interests.

Cults3D is an independent, self-financed site that is not accountable to any investor or brand. Almost all of the site's revenues are paid back to the platform's makers. The content published on the site serves only the interests of its authors and not those of 3D printer brands who also wish to control the 3D modeling market.
100% secure payment by credit card, PayPal, Apple Pay, Google Pay, etc.
View all payment options.