Oculus Rift S Flip Mount Adapter


Oculus Rift S Flip Mount Adapter
Published 2020-04-20T20:58:50+00:00
Update May 4th 2020
Uploaded headset connector v1.1.2 which has the feet to hold more securily in place.
Update May 3rd 2020
I have uploaded a v1.1 version of both the headset and strap connectors. Main change is a redesigned hinge that is much stronger and secure. It now requires a 50mm M3 bolt (or two 25mm) to be inserted post print.
-------
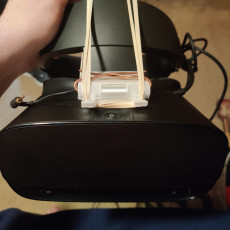
This adapter converts the Rift S into a headset that can flip up. It does that by adding two brackets, one that slides into the cavity in the headset and one that slides over the top strap connector.
The intended use case is VR development, where you'd constantly put on and take off the headset. With the flip up hinge you can quickly switch between development and testing.
The hinge uses rubber bands to stay locked in the two positions. The red rubber band in the picture locks the headset during play. It is hooked into groove that slides into the headset and loops around the head strap. The purple rubber bands provide more force to hold the headset at a 90 degree angle when flipped up.
This mod can be fully reversed and the stock mechanism to mount the headstrap is untouched.
The hinge used in v1.0 is based on the Poly Panels Snaps https://www.myminifactory.com/object/3d-print-polypanels-snaps-only-89595
------
Installation Steps (v1.1):
- Clean all parts of left overs from support material, they might otherwise scratch the headset
- Connect both parts using a 50mm M3 bolt or two 25mm bolts
- Detach face gasket and unhook the top strap
- Slide headphone cable through the top strap connector piece
- Insert rubber band into the groove that slides around the Rift S
- Slide mod into headset. It will be tight
- Attach rubber band to top strap and hooks (purple rubber bands in the pictures)
- Insert headphone cable
- (Optional) reattach face gasket. I'm wearing glasses and I find it more comfortable without. Light leakage is less of a concern when quickly testing things
Installation Steps (v1.0):
- Clean all parts of left overs from support material, they might otherwise scratch the headset
- Detach face gasket and unhook the top strap
- Slide headphone cable through the top strap connector piece
- Insert rubber band into the groove that slides around the Rift S
- Slide Rift S connector into headset. It will be tight
- Connect both parts, the conenctors will snap together
- Attach rubber band to top strap and hooks (purple rubber bands in the pictures)
- Insert headphone cable
- (Optional) reattach face gasket. I'm wearing glasses and I find it more comfortable without. Light leakage is less of a concern when quickly testing things


0.2mm layer height
50% infill
Supports enabled for Rift S connector, no supports for the strap connector
I printed them facing upward, but you can also print them on their side, which will require less support and potentially make the hinge (v1.1) stronger.
Parts are designed with very small tolerances, so you might need to sand some surfaces.
| Date published | 20/04/2020 |
| Time to do | - 180 minutes |
| Material Quantity | 42 grams, 342mm @ 1.75mm filament |
| Dimensions | 175.29mm × 148.00mm × 21.80mm |
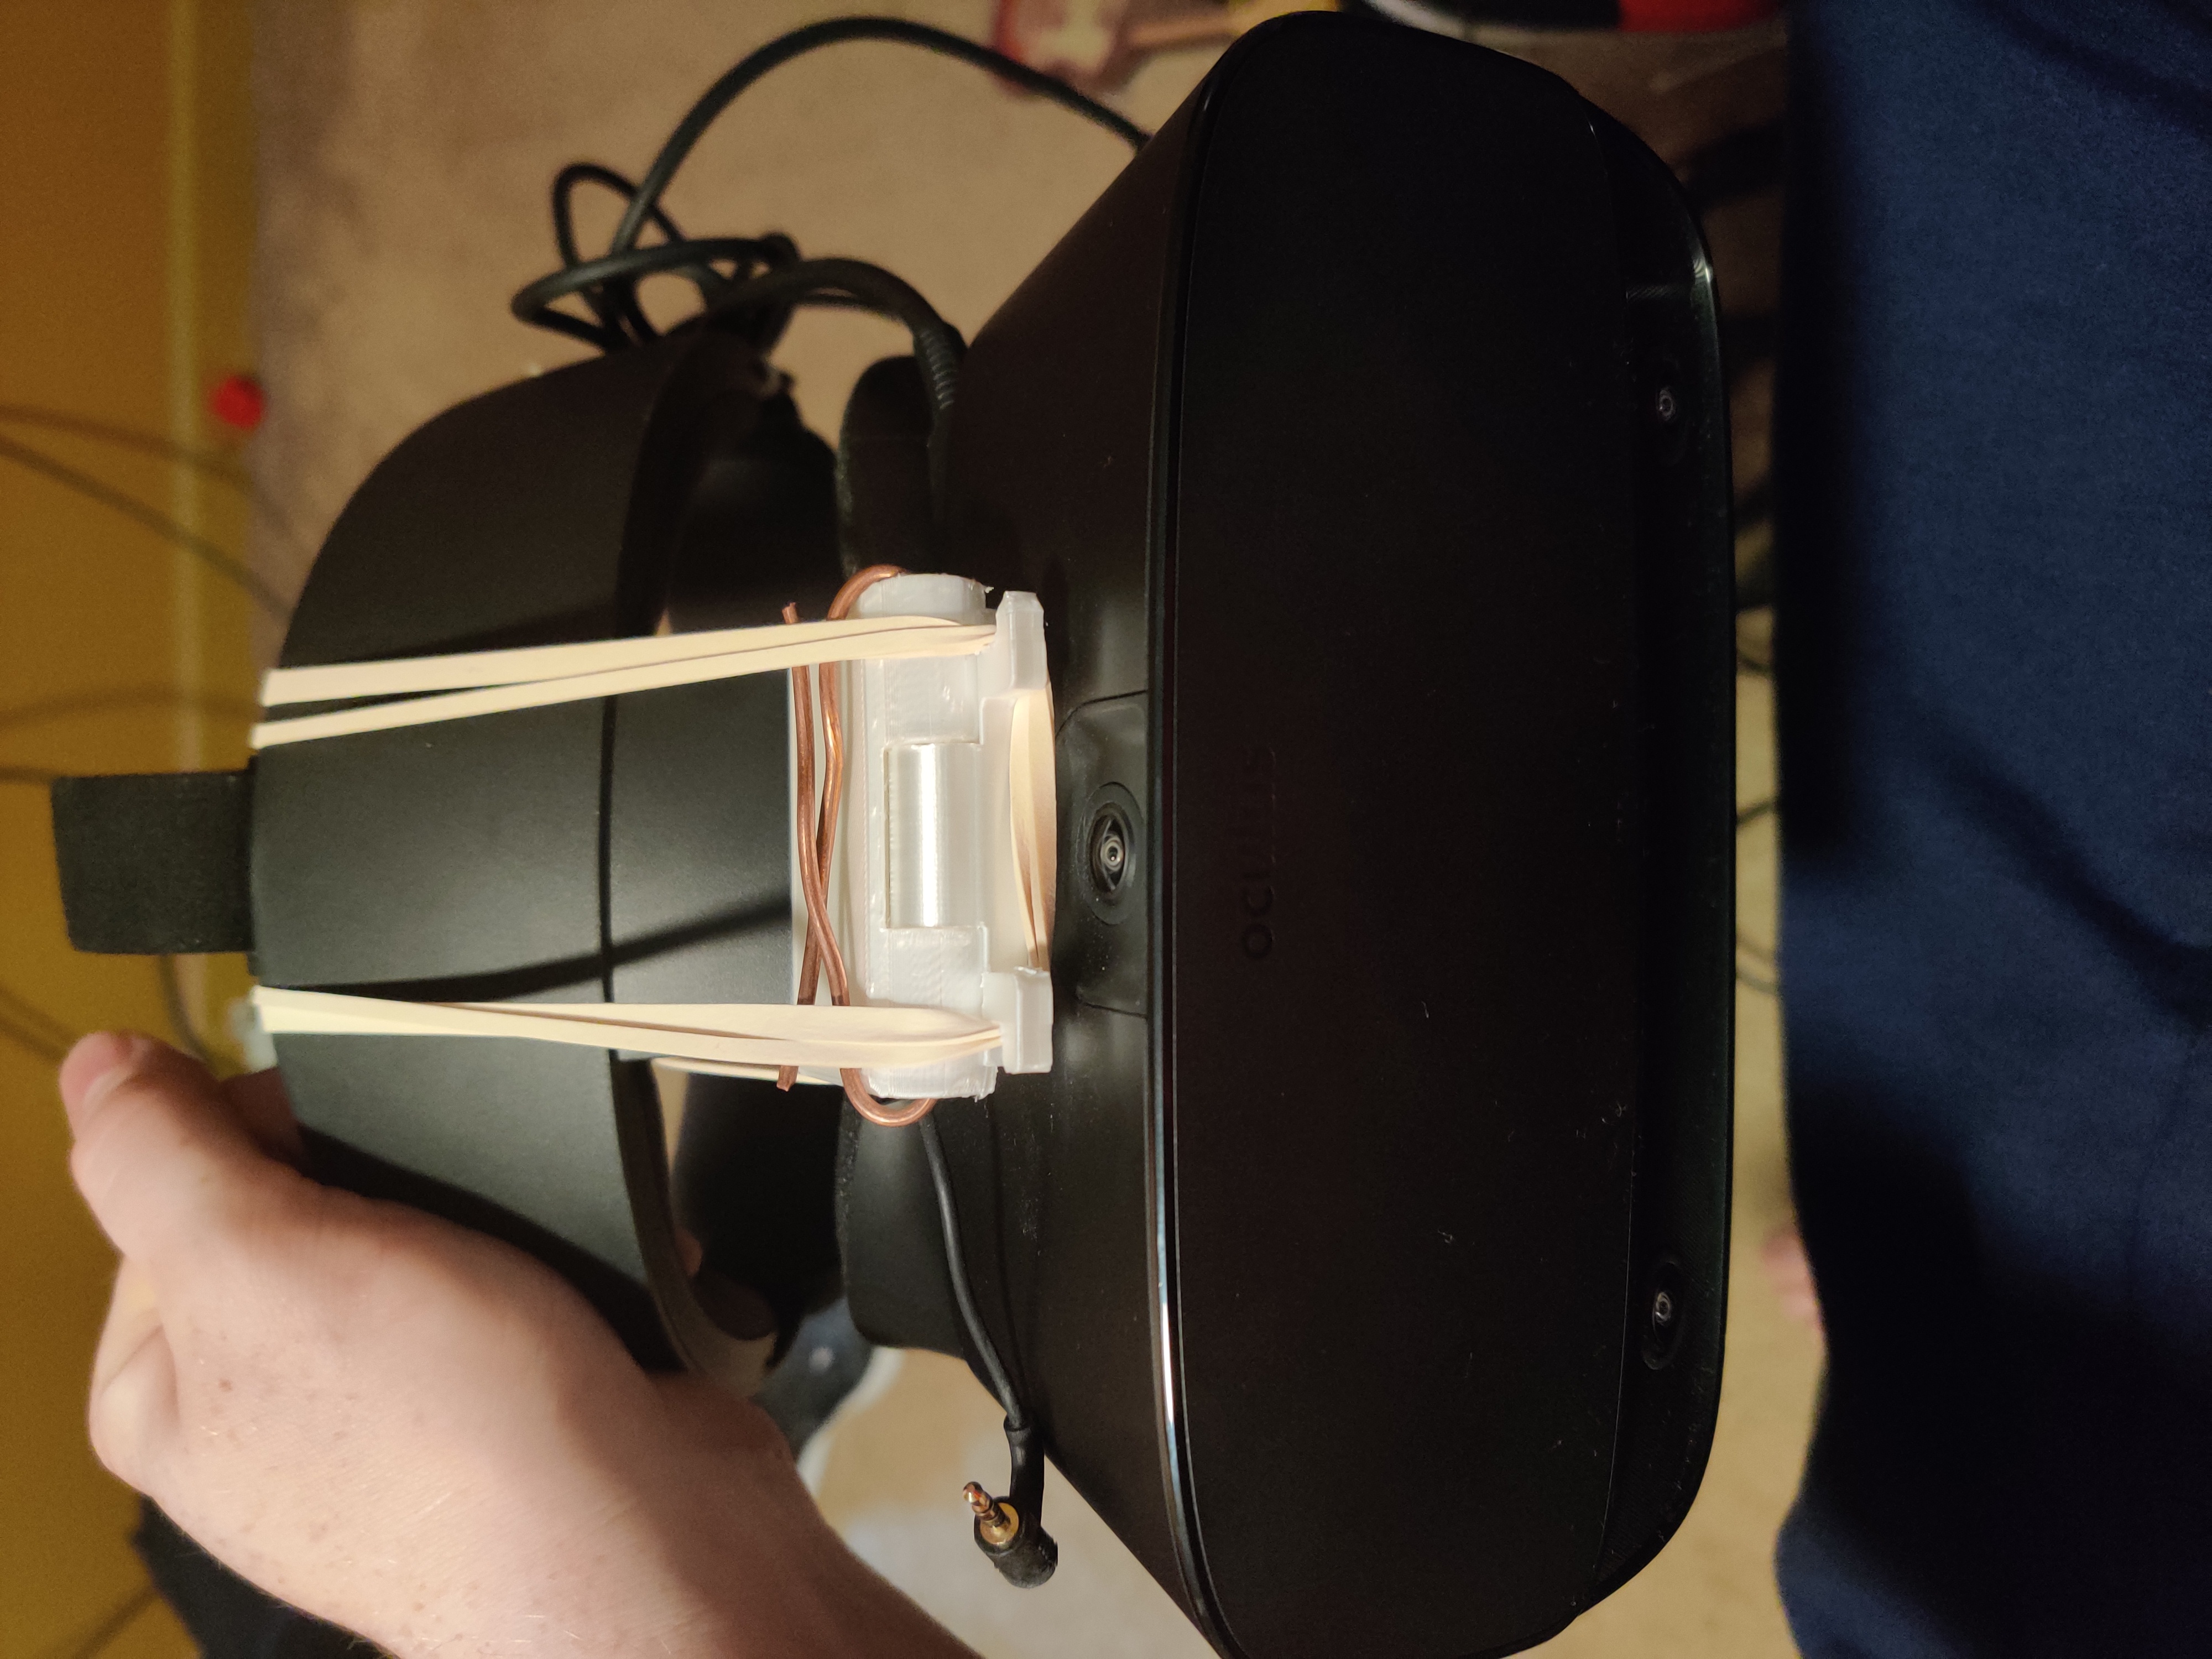

Didn't have the proper screws, held it on with copper wire for now.