Briss Moto design
Just to make things clear, my designs are protected by copyrights laws. It is not authorized to distribute or sell any of my designs without prior written authorization from myself. Even if you modified my original design. Thank you
2022-04-20: Ender 3v2 models V4.41, made the support bigger on ender CR touch mount and also made a fix to hold the nut in the fang for the rear hole.
2022-03-30: Corrected the MS linear rail models with proper bulge position.
2022-03-13: update on the Aquila model 4.41 with proper positionning of the holes. But i can't make it compatible with leveling probes, holes position interferes with that.
2022-01-31: I have been notified there might be an issue with the height of the CR touch mount. The mount on the fang is indeed 1.5mm higher than the metal mount supplied from creality. But there should be a 2mm gap between the nozzle and the plate when the CR touch is fully extended. The design intention of the fang is to be 1.5mm higher than the nozzle. If your fang is higher than that this might be the issue. Anyway, i've added a "CR touch spacer" in the STL's for those who want the exact height creality set their mounts at. The BL touch is longer than the CR touch and this spacer should not be needed. Thanks for the feedback everyone.
2021-11-25: update to V4.4 For ender 3 pro, ender 3 max and Ender 3 with microswiss linear rail.
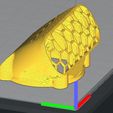
V4.4 fang with integrated BL/CR touch mount, the holes don't go through for a very specific reason. It's a single layer that doesn't go through, it allows to print bridges across so you don't need supports to get that part printed properly. Then you trim off the single layer to clear the holes. I did that because when you try to print a bridge that has a hole in the middle it does not print very pretty, or you need to add support which adds a lot of time to the print for nothing. Now it prints well without supports and takes 10 seconds to trim off the single layer for the bolts to go through. Enjoy :)
2021-11-14, V4.4 versions for the Voxelab Aquila, including with BL-touch / CR-touch mount.
2021-11-13 New V4.4 with tip angle corrected for better airflow orientation, Built-in BL-touch/CR-touch mount with additional bolt hole for better rigidity (Offset: X = 44mm, Y = 7.5mm). For Ender 3 V2 and ender 3 microswiss direct drive kit. Update for the other models will follow up. Printing with the built-in CR-touch mount does not require supports at all anymore. There is a small tower support built in the model that you just snip off at the end.
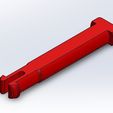
Also adding the Microswiss DD spacer without holes for the extruder knob.
2021-05-04: adding Fan duct up V2, which has integrated grill on top. More tricky to print than the original so i'll leave both files here.
2021-05-01: Adding a model that fits Voxelab Aquila and one that fits Microswiss linear rail kit. Still have to design a BL touch adaptor for the Aquila
V4.2
-Now compatible with micro swiss direct drive M2601 M2602. You need to print the fang, the spacer and the extruder knob. (will be coming up with a BL touch mount for this configuration in the coming week or 2)
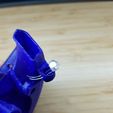
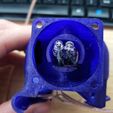
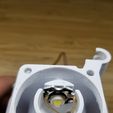
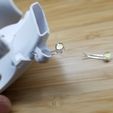
-All models available with integrated LED lights (5mm straw hat LEDs up front and possible to put a 20mm star inside). Both files are available, with or without lights. It's a little more tricky to print the one with lights, has small features.
-Made the mid bolt tab larger, more robust and easier to print (ender 3 pro and microswiss)
-slotted the wire hole for the front fan
V4.1
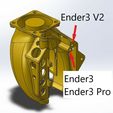
-modified the mounting a little for Ender3 & Ender 3 pro. Now a different file than the Ender 3 V2.
-Added a slot for the front fan wires
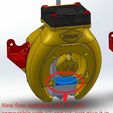
2021-02-04: Adding a tiny optional add-on part that goes under the hot end fan to complete the duct to get absolute maximum efficiency. leaving this as a separate part from the fang because it would prevent from printing it without support. Just glue it in place after. Compatible with V3 and V4 fang. STL named :BRISS fang V3 V4 flow control.
Versions:
V4.0 Same geometry as the V3 but with minor improvements for better printability and added a hole for Ender 3 pro (+ BL touch bracket for the 3 pro)
-Added insert in the middle of the part cooling fan to reduce turbulence and help with efficiency.
-Shifted the Fang a little bit to the left for better centering on the hot end
-shortened the hooks a little(mounting points on the right) to make it easier for instalation.
-made the insert for the top fan full again to aid bed adhesion
-added a bridge to join the chimney to the top fan flange to help those with adhesion issues
-made a notch in the hot end cooling duct to help clear the bolt when pivoting it in, easier instalation
-made the hole a tiny bit bigger for the front fan wires, allows to pass some tiny bullet connectors.
-Added a 2nd hole at the back that aligns with the original Ender3 / Ender3 Pro back plate.
-BL touch bracket specific for each versions
2021-01-03 edit: I added the STL for the front fan duct to prevent sucking every debris and filaments from the build plate. Prints without any support, just lay it flat on the fan flange. For installation you need the longer push pins (STL named "holder pin 4020 fan + duct")
V3.0 has much larger ducts than the V2. Flows a lot more air to your parts. The duct is also wider so it cools the part properly when doing straight lines in the Y direction. BL touch brackets specific for each versions
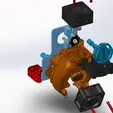
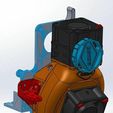
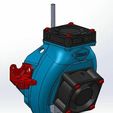
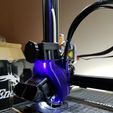
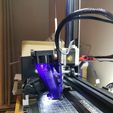
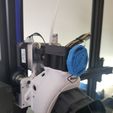
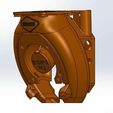
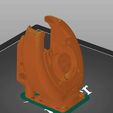
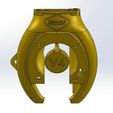
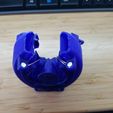
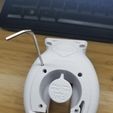
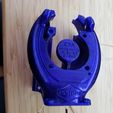
Sleek compact fang allows the use of dual 40mm fans. Easy to print and easy to use, it's a single part that attaches similar to the original fan cover on the Ender 3 v2. Prints up side down with no supports at all. You can use 10 or 20 mm thick fans. I included the STL file for tool less push pins to fix both size of fans but it also has recesses for M3 nuts to bolt both fans on. M3 nuts should have a 5.5mm hex and maximum 2.5mm thickness.
The idea behind this project was to be able to use two silent 4020 fans. Together with my 120mm PSU fan duct noise levels are down to about 50db (15 DB quieter than original) and i still need to change the top fan for a 4020. I used a sunon MF40202V2-1000U-A99 fan (bought on digikey). It is more noisy with M3 bolts than the pushpins tho... seems like it transmits more vibration through stiff bolts. I added a 330 ohm resistor to the sunon hot end cooling fan to reduce speed and noise (brings down the voltage to the fan to about 18v)
Note: it's very compact and a tight fit, i had to remove the silicone sock on the hot end in order to get it in and put the sock back on after. Heater wires tuck in nicely in between both ducts and i made a chimney to tie them in with a cable tie and prevent fatigue failure of the wires. I also made holes on the fan mount face for the wires to go through the inside for a clean installation.
For the doubters, perfect bridging till 40-50mm with the stock 4010 hot end fan on top. Still manages to bridge the 100mm but looks horrible. This is PLA. Would be better with a 4020 fan but that's more than enough for what i need.
Made BLtouch mount that prints separately if needed. This one needs some support tho. Offset -44mm and -8mm
will fit the CR-10 just with the shorter ender3-5 hot end***
Printed Orbiter direct drive extruder mount that has been designed for the fang.
https://www.thingiverse.com/thing:4885389
Here is a link for a printed direct drive conversion that was made to fit the fang.
https://www.thingiverse.com/thing:4787846
Elias did a super nice install video of the fan if anyone wants to have all the details on how to install this.
https://www.youtube.com/watch?v=MQC6NVd42q0&ab_channel=Randomecticly&fbclid=IwAR2KmPdp5_auHxrN__kBUmhRZAtyqxc8Zgz6rmZ_RI7E9oedNEcYEx_3A6c

/https://fbi.cults3d.com/uploaders/16192082/illustration-file/36922bd0-9f8f-4c32-887b-47dff2e7032e/40x20-fan-assembly.gif)
