Skip to content

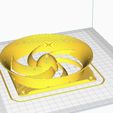
Ender3 V2 silent 120mm fan for power supply and motherboard

Advertising
Advertising
?
Creation quality: 4.8/5 (6 votes)
Evaluation of members on the printability, utility, level of detail, etc.

  • 26.6k views
  • 39 likes
  • 276 downloads
  • 4 comments

License
3D design format
STL Folder details Close
  • 120mm fan grill.STL
  • 120mm fan velocity stack.STL
  • THIN ender3 v2 PSU + ECU manifold 120mm-ECU p1.STL
  • THIN ender3 v2 PSU + ECU manifold 120mm-ECU p2.STL
  • THIN ender3 v2 PSU manifold 120mm.STL
  • ender3 v2 PSU + ECU manifold 120mm- fan support.STL
  • ender3 v2 PSU + ECU manifold 120mm-ECU p1.STL
  • ender3 v2 PSU + ECU manifold 120mm-ECU p2.STL

Learn more about the formats

Last update 2021-01-04 at 06:51
Publication date 2020-11-23 at 06:10
Design number 232322

3D printer file info

3D model description

in the pursuit of silence on my ender 3 V2

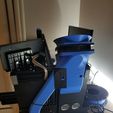
Stock was 62-65dBa, now it's 50-54 dBa with this and my 4020 hot end fan (see my other parts for this mod). Note, it's about 1dB louder with the 120mm velocity stack than with nothing on the fan. I also included a model for a slimmer, more regular fan grill but i did not test this one.

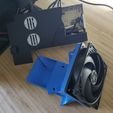
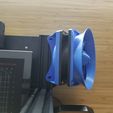
I used an Arctic P12 fan and it's plugged in the psu fan connector. But it flows too much air to the psu, fan often stops mid print. I guess the motherboard shoud have airflow non stop so i plugged it into a buck converter to the 24v output so the fan is always on. Fan and fan grill/velocity stack are bolted with regular PC fan screws.

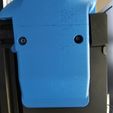
For the PSU part i cut both the PSU cover and the black cover creality put over it. Furthermore, i used a 1.5" hole saw in that black cover to free the vent holes. Creality seem to have missed this one, they put a pannel over the vent holes from the factory PSU cover...

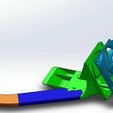
Duct is printed in 2 parts and used jbweld to put it back together. And just used duct tape to secure it to the manifold. I made the lips at the end of the duct to use double sided tape or screw it in the printer but it's pretty snug under there so it just rests in place under the printer. i even had to put 2mm shims under the printer to clear the duct. The Manifold is bolted at the bottom with the two original screws holding the PSU mount and at the top you can add 2 T-nuts to fix it in the channel.

I also include STL's with 1mm thin ducts instead of 2mm. faster to print and no need for 2mm boosters under the printer feets.

P.S. i also used 2 t-nuts in the top chanel to bolt down the fan support part.

3D printing settings

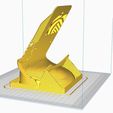
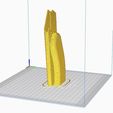
The big manifold needs support to print the bell shaped part, otherwise the duct part prints well without support. Both ducts and the velocity stack prints well without support too. About 17h of print time with a 0.8mm nozzle.

Advertising


Issue with this design? Report a problem.

Would you like to support Cults?

You like Cults and you want to help us continue the adventure independently? Please note that we are a small team of 3 people, therefore it is very simple to support us to maintain the activity and create future developments. Here are 4 solutions accessible to all:

  • ADVERTISING: Disable your banner blocker (AdBlock, …) and click on our banner ads.

  • AFFILIATION: Make your purchases online by clicking on our affiliate links here Amazon.

  • DONATE: If you want, you can make a donation via Ko-Fi πŸ’œ.

  • WORD OF MOUTH: Invite your friends to come, discover the platform and the magnificent 3D files shared by the community!


Sharing and downloading on Cults3D guarantees that designs remain in makers community hands! And not in the hands of the 3D printing or software giants who own the competing platforms and exploit the designs for their own commercial interests.

Cults3D is an independent, self-financed site that is not accountable to any investor or brand. Almost all of the site's revenues are paid back to the platform's makers. The content published on the site serves only the interests of its authors and not those of 3D printer brands who also wish to control the 3D modeling market.

100% secure payment by credit card, PayPal, Apple Pay, Google Pay, etc.
View all payment options.