Skip to content

Installation of inductive sensor M8 / Montáž indukčního snímače M8

Advertising
Advertising
?
Creation quality: 0.0/5 (0 votes)
Evaluation of members on the printability, utility, level of detail, etc.

  • 1.1k views
  • 1 like
  • 1 download

License
3D design format
SCAD and STL Folder details Close
  • SHR-EVO1_koncak_Z.scad
  • SHR-EVO1_koncak_Z_spodek.stl
  • SHR-EVO1_koncak_Z_vozik.stl
  • SHR-EVO1_koncak_Z_vrch.stl

Learn more about the formats

Publication date 2020-12-16 at 09:51
Design number 245781

Sharkus

3D printer file info

3D model description

[CZ]
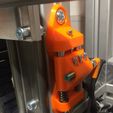
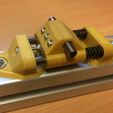
Jednoduše nastavitelná montáž pro indukční (případně kapacitní, či optické) snímače ve standardním pouzdře M8 s rozsahem nastavení > +- 5mm na hliníkový profil Rexroth-Bosh 45x45.

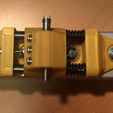
Montáž se skládá ze tří tištěných dílů. Spodní a horní díl slouží pro uchycení k profilu a jsou v nich upevněny hlazené kulatiny 8mm dlouhé 70mm. V horním dílu je taktéž zatavená závitová vložka M3 ( DREMEC DR11M3 ) pro nastavovací šroub.

K připevnění k profilům slouží 4ks šroubů M6x16 s plochou hlavou (průměr 16mm) opatřené maticemi do profilů. Dále je potřeba 1ks šroubu M3x25 pro nastavování polohy. Pro zajištění čidla slouží 3ks samo řezných šroubů do plastu 3x15, Případně po vyříznutí závitů klasické M3x15.

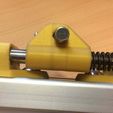
Pro vytvoření zpětného odporu vozíku s čidlem jsou použity dvě pružiny s vnitřním průměrem 8.5mm a délkou cca 30mm v klidovém stavu (10mm zcela stlačené). Pro snadný chod je vhodné protáhnout vodící otvory vozíku výstružníkem 8mm.

[ENG]
Easily adjustable mounting for inductive (or capacitive or optical) sensors in a standard M8 housing with a setting range> + - 5mm on an Rexroth-Bosh 45x45 aluminum profile.

The assembly consists of three printed parts. The lower and upper part is used for attachment to the profile and they are mounted smoothed logs 8mm long 70mm. The upper part also has a sealed M3 threaded insert (DREMEC DR11M3) for the adjusting screw.

4 M6x16 flat head screws (diameter 16 mm) provided with nuts for profiles are used for fastening to profiles. You also need 1 piece of M3x25 screw to adjust the position. To secure the sensor, there are 3 self-tapping screws for plastic 3x15, or after cutting the threads of the classic M3x15.

Two springs with an inner diameter of 8.5 mm and a length of approx. 30 mm at rest (10 mm fully compressed) are used to create the return resistance of the trolley with the sensor. For easy operation, it is advisable to pass the guide holes of the trolley through an 8mm reamer.

https://youtu.be/ChzTCTP5mMM

Advertising


Issue with this design? Report a problem.

Would you like to support Cults?

You like Cults and you want to help us continue the adventure independently? Please note that we are a small team of 3 people, therefore it is very simple to support us to maintain the activity and create future developments. Here are 4 solutions accessible to all:

  • ADVERTISING: Disable your banner blocker (AdBlock, …) and click on our banner ads.

  • AFFILIATION: Make your purchases online by clicking on our affiliate links here Amazon.

  • DONATE: If you want, you can make a donation via Ko-Fi 💜.

  • WORD OF MOUTH: Invite your friends to come, discover the platform and the magnificent 3D files shared by the community!


Sharing and downloading on Cults3D guarantees that designs remain in makers community hands! And not in the hands of the 3D printing or software giants who own the competing platforms and exploit the designs for their own commercial interests.

Cults3D is an independent, self-financed site that is not accountable to any investor or brand. Almost all of the site's revenues are paid back to the platform's makers. The content published on the site serves only the interests of its authors and not those of 3D printer brands who also wish to control the 3D modeling market.

100% secure payment by credit card, PayPal, Apple Pay, Google Pay, etc.
View all payment options.