Skip to content

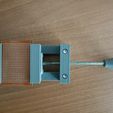
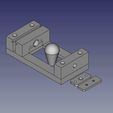
Vice for electronics

Advertising
Advertising
?
Creation quality: 0.0/5 (0 votes)
Evaluation of members on the printability, utility, level of detail, etc.

  • 903 views
  • 2 likes

License
3D design format
STL Folder details Close
  • Base.stl
  • Blocco Dado.stl
  • Blocco Fisso.stl
  • Blocco Mobile.stl
  • Manopola.stl
  • Placca Bassa.stl
  • Placca Blocco Mobile.stl

Learn more about the formats

Publication date 2020-12-22 at 13:12
Design number 249479

3D printer file info

3D model description

Morsa per elettronica, apertura massima 70 mm, per il montaggio servono: quattro Dadi M4, quattro Viti a brugola M4 lunghe 25 mm, un due dadi M6, un pezzo di barra filettata M6 lunga 125 mm e una ranella larga M4, quattro piccole viti autofilettanti lunghe da 5/8 mm con 3 mm di diametro, per il montaggio: inserite i dadi M4 nelle loro sedi, montate la parte posteriore, inserite la ranella larga M4 nel foro della parte mobile, inserite la barra filettata con un dado bloccato all'estremità, io l'ho bloccato forandolo e inserendo un piccolo perno, ho poi limato per non farlo sporgere, inserite la placca di blocco e avvitatela tramite le viti autofilettanti, avvitate la barra filettata nella parte posteriore con il daado all'interno e fissate poi la parte posteriore con le viti M4 a brugola da 25 mm, avvitate la piastra sotto alla parte mobile trimite le viti autofilettanti, infine avvitate la manopola alla barra fino in fondo e prima di farlo mettete della colla all'interno per fissarla.

Vice for electronics, maximum opening 70 mm, for mounting you need: four M4 nuts, four M4 Allen screws 25 mm long, one two M6 nuts, a piece of M6 threaded rod 125 mm long and a wide M4 washer, four small screws 5/8 mm long self-tapping screws with 3 mm diameter, for assembly: insert the M4 nuts in their seats, mount the rear part, insert the wide M4 washer in the hole of the mobile part, insert the threaded bar with a nut locked to the 'end, I blocked it by drilling it and inserting a small pin, I then filed it to prevent it from protruding, insert the block plate and screw it with the self-tapping screws, screw the threaded bar in the back with the nut inside and fasten then the rear part with the M4 25 mm Allen screws, screw the plate under the moving part trim the self-tapping screws, finally screw the knob to the bar as far as it will go and before doing so put some glue inside to fix it .

3D printing settings

Pla, Petg, Abs ecc, infill 50%, the plates infill 100%

Advertising


Issue with this design? Report a problem.

Would you like to support Cults?

You like Cults and you want to help us continue the adventure independently? Please note that we are a small team of 3 people, therefore it is very simple to support us to maintain the activity and create future developments. Here are 4 solutions accessible to all:

  • ADVERTISING: Disable your banner blocker (AdBlock, …) and click on our banner ads.

  • AFFILIATION: Make your purchases online by clicking on our affiliate links here Amazon.

  • DONATE: If you want, you can make a donation via Ko-Fi 💜.

  • WORD OF MOUTH: Invite your friends to come, discover the platform and the magnificent 3D files shared by the community!


Sharing and downloading on Cults3D guarantees that designs remain in makers community hands! And not in the hands of the 3D printing or software giants who own the competing platforms and exploit the designs for their own commercial interests.

Cults3D is an independent, self-financed site that is not accountable to any investor or brand. Almost all of the site's revenues are paid back to the platform's makers. The content published on the site serves only the interests of its authors and not those of 3D printer brands who also wish to control the 3D modeling market.

100% secure payment by credit card, PayPal, Apple Pay, Google Pay, etc.
View all payment options.