*
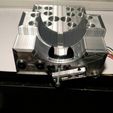
My goal was to automate tool changing in the simplest way, but to achieve that I had to modify spindle circuitry to have variable speed and reversible rotation.
- fits for almost all CNC, not only mine
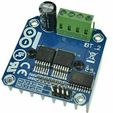
- 40A H-Bridge BTS7960, very good and simple to manage, cheap enough and affordable
- nut+collet solution, they're cheap, to ease tool insertion.
- number of tools supports can vary from 2 to 8, so, for your convenience, I made seven types of support
- supports from 4 to 8 places have addictional fixing holes to avoid horizontal torsional effects
- can use tools size from 3 to 6,35mm
- fixed distance of 35mm among supports middle points
- modular bottom covers to allow exposed lenght of tools from 20mm. to 30mm
- automatic chuck unscrewing
- unscrewer only body available
Lock-unlock test
Description
I assume that first (left) body's center is at X30 Y495.
From there on, every further body is exactly 35mm to the right; all tools_n and tools_n_off are based on this.
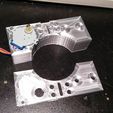
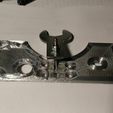
The unscrewer body is necessary because the starting force of the motor may be not enough to directly unscrew the chuck nut; so the Nema23 power and a 50mm lever do the job.
This way the chuck nut is loosened by a quarter of a turn; the remaining unscrewing is done directly once inserted in the body.
Unlike other ATC, the footprint of all the stuff is really small and the cost is kept to minimal.
Instructions
For each support place:
- make with the grinder an about 5.2mm wide slot, about 2.5-3mm deep, to the socket wrench
- insert fully the socket wrench from below
- insert spring and bottom cover
- insert the M3x10mm screws, tapping the body
- align socket slot with the 5mm screw hole center
- insert, threading the plastic, the M5x10mm
- check carefully that the wrench slides up and down freely
Wrenches:
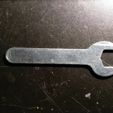
- shape the two wrenches as per dummy wrenches uploaded with a grinder or a file
- thread lock wrench hole with M3
Stepper
- cut away the two fixing eyelets
Locker
- grease well the sliding zone
Software
Postprocessor
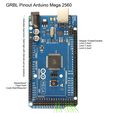
GRBL used: fra589 grbl-Mega-5X-1.1l
I've provided TOOL.VBS script to post-process your .nc file and substitute all "M6 Tx" instructions with appropriate routine to change tool, taking in account its number.
TOOL.VBS script parameter must contain full path to the file you want to work on.
Syntax from command line: tool.vbs (disk):(filename).(extension)
Ex.: tool.vbs Z:\test.nc
The first M6 T(x) found will only load first tool, all subsequent M6 instructions will unload the old tool before loading the new one.
You must use two files for every tool you use, x is tool number (fisical position from left):
- tool_x.txt contains the necessary instructions to load the tool
- tool_x_off.txt contains the necessary instructions to unload the tool
They're tailored around my CNC, you'll have to modify them to your needs.
GRBL Mega 5X 1.1l
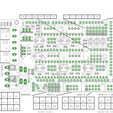
axis A on E0 socket
Set stepper driver trimpot at 0.5V (1000mA)
$1=100 step idle delay (very important)
$103=180.00 steps/mm
$113=3000.00 max rate
$123=300.00 acceleration
$133=360 max travel (degrees)
(blue wire on 2B pin)
30° from unlock to lock position, so, to test, try:
(blue wire on 2B pin)
G01A30F3000 to lock
and
G01A0F3000 to unlock
or
(blue wire on 1B pin)
G01A0F3000 to lock
and
G01A30F3000 to unlock
BOM
- n. 1 H-Bridge 40A BTS7960
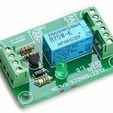
- n. 1 5VDC DPDT relay
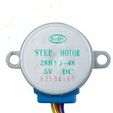
- n. 1 28BYJ-48 5VDC stepper
- n. (n) 17mm socket wrench OD 24mm H 30mm
- n. (n) ER-11 chuck nuts Type A
- n. (n) ER-11 collets (3mm, 3.15mm, 6mm, 6.35mm at your choice)
- n. 2 threaded rod plates for Nema23
- n. 2 13mm flat wrench 2mm thick
- n. 1 neodymium magnet 8x3mm
- n. (n) M5x10mm screws
- n. (n) OD 15-20mm spring, height 10mm
- n. 1 M3x25 mm screw
- n. 6 M3x1mm washer
- n. 1 M3 nylock nut
- n. 3 M5x35mm flat head screws
- n. 4 M5x20mm flat head screws
- n. 2 M5x1mm washers
- n. 2 M3x5mm point grub screws
- n. 2 605Z ball bearings
- n. 1 M5x24mm spacer

/https://fbi.cults3d.com/uploaders/15451373/illustration-file/6550b066-a352-46aa-a8ad-395cc28c8b87/0.jpg)


