Using the OpenScad library
It is better to generate your own STL from the OpenSCAD library, since you can tweak parameters, in particular define larger walls for high-resolution printing. In addition you could design your own castles.
Install OpenScad ( http://openscad.org/ )
The OpenScad file is self-documented. Alternatively (and easier to read), a beginning of the manual is at http://edutechwiki.unige.ch/en/Doblo_factory.
To play:
* Load doblo-factory-examples.scad into OpenScad and comment/uncomment example modules
* This should include the doblo-factory-x-y.scad library file. You may have to adjust the version number.
Versions:
* Take the latest version (new versions include bug fixes, more features, but maybe new bugs ...)
General printing tips
* Tested from 0.1 to 0.4 layers (any resolution should work in a way)
* Fill of 0.1 should be ok (I usually use between 0.2 and 0.25)
* Use PLA on large objects to prevent warping
* Keep the nozzle very close to the platform and print the first layer very slowly (this is standard procedure, btw.)
* Printing wide blocks with nibbles underneath may be difficult: Plastic may bond with nibbles underneath in a strange way since it also bonds sideways, then create a messy first layer of the roof, cool down, and then cause the nozzle to rip the model off the platform). Turning off the fan can help in this case. Slowing down and/or using fatter layers also will help. Best solution is a lot of fill (like 35% or even more), but then you have to wait longer ...
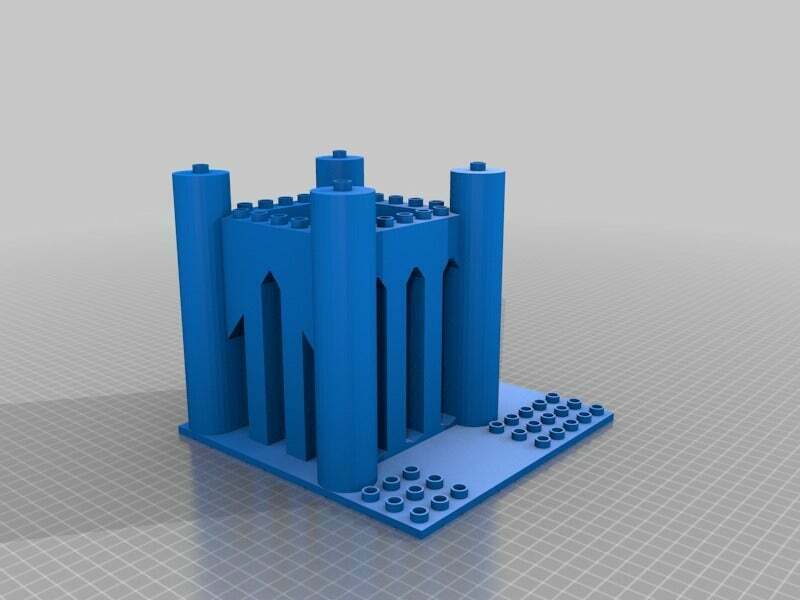
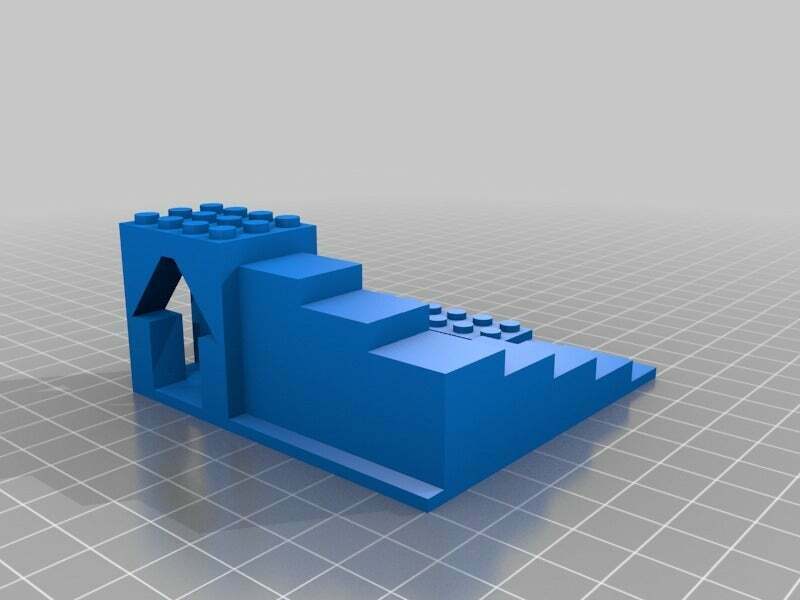
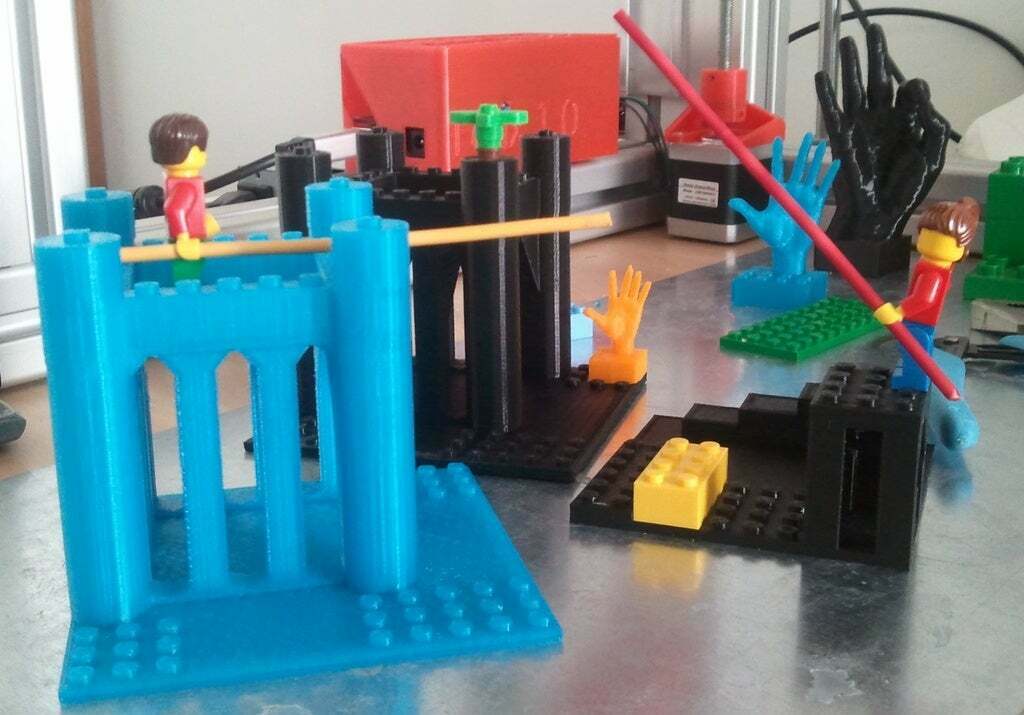
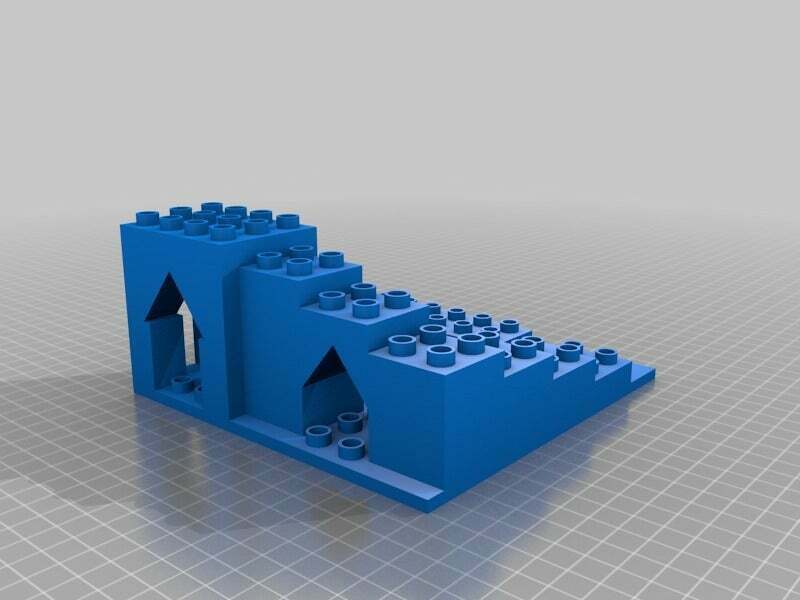
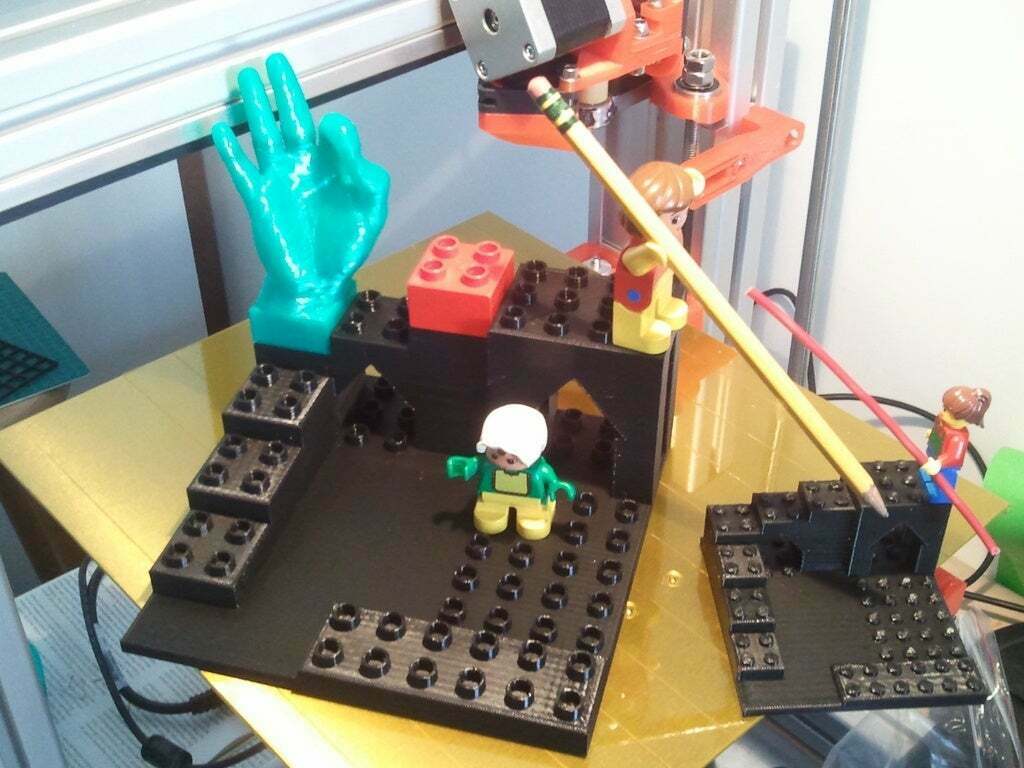
Printing the castles
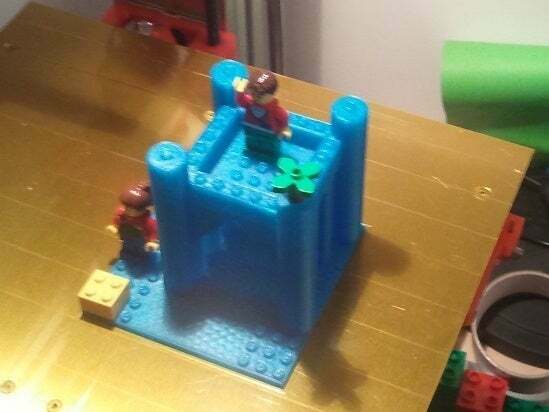
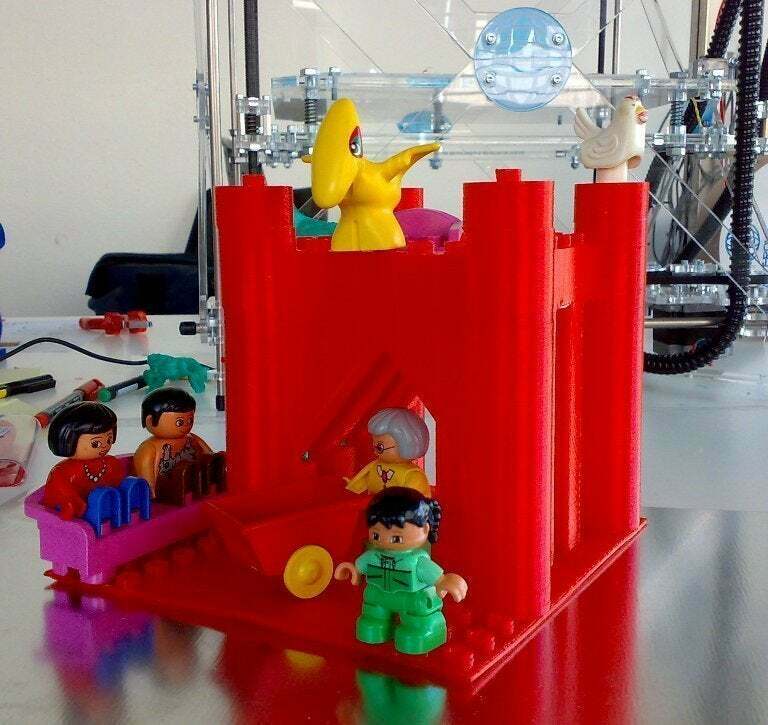
In 2012 I made the code much more Lego-compatible. Also I changed the base plate. Just print the first layer very slowly. A prior version of the first big Duplo castle (the red one in the pictures) was downloaded 144 times, but I have no idea whether someone else than me printed it.
If you use a PLA printer, printing should not be difficult, but it could take ages. For the DUPLO-compatible version, 0.3mm or even 0.4mm layers are ok. For optimal quality use 0.2mm and slow printing. Then wait.
Important: In order to get the first layer right, make sure that the nozzle is very close to the platform. In addition, either configure your slicer to use a very slow speed for the 1st layer and (maybe) slow speed for the roofs. Otherwise, use your control software to print the 1st layer at 25-30% of the normal speed. I repeat: The first layer is mission critical and IMHO any printer can do it iff you do it very very slowly !
In addition, you could:
* Tune down antistringing a bit. Small strings on vertical towers can be simply blown away with a hot air pistol or fire
* Use a fairly strong fill (e.g. 0.3 to 0.4). This will help printing the bottom floor, i.e. plastic will bond downwards as opposed to sideways.
* Use a simple fill pattern (as opposed to a bee structure)
* Print a bit warmer than usual. Print quality will suffer, but warmer usually leads to better plastic flow.
* You may slow down with respect to what you would call "normal" on your printer. Personally, I do use normal (between 60 and 80 mm/s) since I hate to wait for 20 hours, except for the first layer that I print at 15 to 20 mm/s.
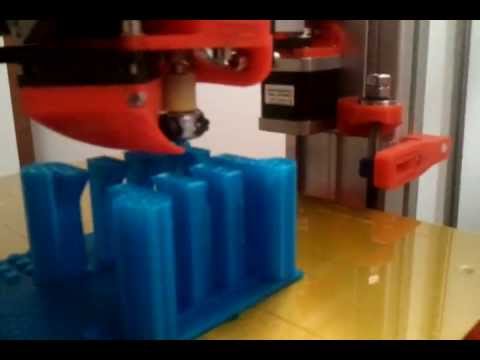
A YouTube video show the printing of a Lego-compatible castle (snapshot at about 75%, 2h39 min. to go ...):
http://youtu.be/kmPa2irDzjI
On a modern PLA printer (mine was a Felixprinter), the small Lego-compatible stairs world can be printed in about 2.5h, the stairs/exhibit world in about 3.5h and the stronghold in about 10h. These models can be done faster or more more slowly for better quality. The Duplo-compatible stairs/exhibit model took about 16h at "normal" speed, i.e. 80mm/s for fills and 35mm/s for perimeters. According to Repetier-host, the castle would take 33 hours at "normal" speed, but it's likely more than that.
NB: If your print leads to an extruder jam after 8 hours of printing, then first check your filament. I just may include "knots" that won't pass through the extruder or nozzle hole. Happend to me (I had a roll that gave me five aborts in radom places ... before I figured out that it was the roll and not my slicing skills...)
Some printing hints for the Rapman 3.1 and other very old printers (skeinforge settings)
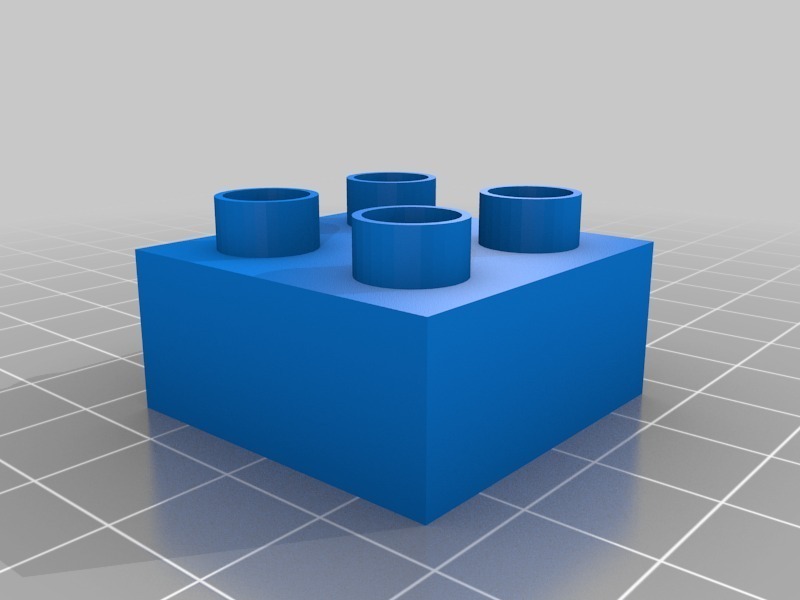
- Try small objects first, e.g. a 3x3x3 doblo brick
- Then adjust the parameters in the OpenScad file. Depending on your print settings, you should change all the parameters that define nibble radius. The problem is the following: I measured real DUPLO dimensions, but depending on the layer thickness and the width over layer thickness ratio, etc. you'll have to "cheat". Read more about these issues in http://edutechwiki.unige.ch/en/Doblo_factory#Calibration.
- PLA Temperature: 210 (all) and Fan on
- PLA raft (if required): One interface layer
- Flow rate: At least 380 (for horizontal structures)
- Solid Surface Thickness for both ABS and PLA: 4
Warning: The stronghold example will take about 20-28 hours to print with speed = 16. With PLA it is ok to put the printer on hold (ESC) while you eat, work or sleep. Read http://edutechwiki.unige.ch/en/G-code for a tip on print abort recovery ;)
Printing tips for the FelixPrinter (or similar, e.g. Prusa i3 designs)
Prints do fine using the "normal" SFACT settings. OpenScad code is now optimized for this printer or more generically: for a 0.2mm layer capable 0.35 nozzle PLA printer. I only made slight modifications, essentially: 1 extra shell for the first layer, 1 extra layer for flat bridges (roofs), very slow speed for the first layer and slower speed for roofs, and finally more fill (about 0.35).
But it's easy to change parameters if you need to do adaptations for your printer. IMHO, any printer with similar specs ought to be able to print at either Lego or Duplo size.
Printing tips for the fabbster (dead product)
Use one of my print styles (e.g. UMA): http://edutechwiki.unige.ch/en/Netfabb_engine_for_fabbster_build_styles if you use filament rolls. I did not try to print a castle since I don't have a heated print bed, but smaller blocks work fine.
Use sticks and an official "normal" style for better quality. Don't try the castles without a heated print bed.
Using the uploaded Blocks for mashups
e.g. for lettering:
- Position all the parts with Netfabb (free version), then export each part
- Do the lettering also with Netfabb using maximal resolution
- Merge with Meshlab (import each part) as explained in http://edutechwiki.unige.ch/en/Meshlab_for_RapMan_tutorial
:format(webp)/https://fbi.cults3d.com/uploaders/16869756/illustration-file/d56f4556-dc9b-4198-83ff-b0baa8212ea2/doblo-factory-v1-exhibit2_display_large.jpg)


/https://preview3d-images.cults3d.com/variants/dxuel1xvvxragmdzs4i71g6jv9n3/9ce1a1278a90847fe525f7bdea66ae6081035e320afa813bf6efbbbe4c5d9f85)
/https://preview3d-images.cults3d.com/variants/emncgmbnodz9c3s8xa042be7v9nf/9ce1a1278a90847fe525f7bdea66ae6081035e320afa813bf6efbbbe4c5d9f85)
/https://preview3d-images.cults3d.com/variants/z1fi7n426ekewdo3qwhzh5x7jhcy/9ce1a1278a90847fe525f7bdea66ae6081035e320afa813bf6efbbbe4c5d9f85)
/https://preview3d-images.cults3d.com/variants/o8lar489h9yw0wrwy7zyu6gh42pu/9ce1a1278a90847fe525f7bdea66ae6081035e320afa813bf6efbbbe4c5d9f85)
/https://preview3d-images.cults3d.com/variants/82gj67uucyn1ollw2986kwkh1zv8/9ce1a1278a90847fe525f7bdea66ae6081035e320afa813bf6efbbbe4c5d9f85)
/https://preview3d-images.cults3d.com/variants/if3qnayel7lrgjdda2h97aeyu5li/9ce1a1278a90847fe525f7bdea66ae6081035e320afa813bf6efbbbe4c5d9f85)
/https://preview3d-images.cults3d.com/variants/0yl8wcwtj8vfw5shxdgexwv7jpn6/9ce1a1278a90847fe525f7bdea66ae6081035e320afa813bf6efbbbe4c5d9f85)
/https://preview3d-images.cults3d.com/variants/porbj044vpgm6i2i0373sdvfn96p/9ce1a1278a90847fe525f7bdea66ae6081035e320afa813bf6efbbbe4c5d9f85)
/https://preview3d-images.cults3d.com/variants/hq5992li7ngw2hc6zcv7aulpcq62/9ce1a1278a90847fe525f7bdea66ae6081035e320afa813bf6efbbbe4c5d9f85)
/https://preview3d-images.cults3d.com/variants/pxxid317prjd1k5lrv1naxabldah/9ce1a1278a90847fe525f7bdea66ae6081035e320afa813bf6efbbbe4c5d9f85)
/https://preview3d-images.cults3d.com/variants/ygqi2y4lxq78uf1ufb7jt9g9lf2u/9ce1a1278a90847fe525f7bdea66ae6081035e320afa813bf6efbbbe4c5d9f85)
/https://preview3d-images.cults3d.com/variants/cdr6icmg9sa8zqp9192k6x4m07fp/9ce1a1278a90847fe525f7bdea66ae6081035e320afa813bf6efbbbe4c5d9f85)
/https://preview3d-images.cults3d.com/variants/tye3ql2tajbmv3ohhley3vtk55i0/9ce1a1278a90847fe525f7bdea66ae6081035e320afa813bf6efbbbe4c5d9f85)


