Skip to content

Crocodile Vise Clamps (attachment for Solder Helper Hands)

Advertising
Advertising
?
Creation quality: 5.0/5 (1 vote)
Evaluation of members on the printability, utility, level of detail, etc.

  • 5.4k views
  • 8 likes
  • 8 downloads

License
3D design format
STL Folder details Close
  • Croc_clamp_15mm.STL
  • Croc_clamp_25mm.STL
  • Top_clamp.STL
  • knob.STL

Learn more about the formats

Last update 2021-01-21 at 09:15
Publication date 2021-01-13 at 21:03
Design number 263555

3D printer file info

3D model description

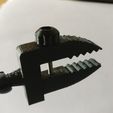
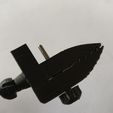
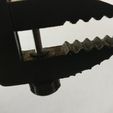
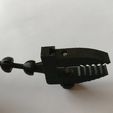
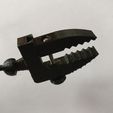
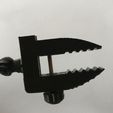
Crocodile Vice/Vise Clamps


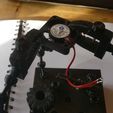
I designed this crocodile vice/vise clamp as an attachment onto the articulated arm for a solder helper hand. It has a 8.25mm sphere ball to sit into the cup of the articulating arm. This will fit perfectly into this thingiverse item:
Thingiverse #3386400 (https://www.thingiverse.com/thing:3386400)


This comes in two separate versions. One with a 15mm span and another with a 25mm span. You get both of these on the same order.

NOTE: 15mm and 25mm indicates the maximum jaw opening size of the clamp.

HARDWARE NEEDED:

1 x M3 nut
1 x 40mm M3 screw (preferrably cap head screw, button head works too as I use these myself.) for the 15mm version
OR
1 x 50mm M3 screw for the 25mm version

INSTALLATION:

  1. Dry fit the clamps and lube the dovetails with PTFE lubricant. Work it back and forth a few times until it runs fairly smooth. It should be fairly tight at first but will loosen up after a few runs back and forth. It will not loosen until there is slop/play, as long as there is minimal catching, that's sufficient. When you thread the screw later in Step 5, if the assembly is not moving smoothly, disassemble and re-work the part (although this shouldn't be necessary). Bear in mind, you need to be printing accurate parts which means you will need to calibrate your printer before you take this on. If you're printing accurate parts, there is also no sanding necessary.
  2. Melt the M3 nut into place onto the Top Clamp with a soldering iron. Clean up the threads so that the screw will thread in smoothly. You want this to thread in and out without too much resistance or the clamp will be difficult to operate. Spray some PTFE lube and run the screw in and out as many times needed until it's smooth. You can also use a tap if you have access to one. Clear off any plastic burrs that are caught on the threads.
  3. Remove supports off the bottom clamp. Thread the screw into the knob until it bottoms out. Next, melt the screw until it sinks into the knob and sits recessed inside the knob. Let it cool down.
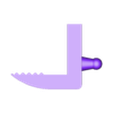
  4. Run the screw through the bottom clamp (the bit with the negative of the dovetail, or in other words, the part that looks like an L shape). Thread the retention nut (round threaded nut that was printed together with the knob) onto the screw. This is a really tight fit and is designed that way so it holds in place and the screw doesn't fall out. You will need to grab this round nut with pliers and use a hex-head to screw into it. Thread it all the way as far as you can go so the screw will have as little slop as possible. You don't want the screw to be pinched tight (otherwise, you won't be able to move the top clamp up and down).
  5. Spray some PTFE lube into the dovetail. Install the top clamp into the dovetail. Push it down and turn the screw with the knob until the screw catches onto the nut.
  6. Enjoy clamping things securely while you do your soldering work.

3D printing settings

You need to be able to print accurate parts for this to work. The tolerances are pretty tight so that there is no slop on the clamp when it's in use.

I printed with PETG at 65% infill. 0.12 layer height, 0.42mm width. I printed with linear advance enabled, and a fairly slow speed since it is PETG (around 15-30mm/s)

Top clamp is printed with the jaws facing down onto the bed (without supports)
Bottom clamp (L-shaped clamp) is printed with the jaws facing up (with supports enabled - touching baseplate only). Do not print this on the side as your dovetail might not come out accurately (and cleaning off supports inside a dovetail is no fun).
Retention nut and knob are printed with the top of the knob facing up. (without supports)

I did not test this with PLA but it should work although your mileage might vary as this is intended to be a working part/tool.

Advertising


Issue with this design? Report a problem.

Would you like to support Cults?

You like Cults and you want to help us continue the adventure independently? Please note that we are a small team of 3 people, therefore it is very simple to support us to maintain the activity and create future developments. Here are 4 solutions accessible to all:

  • ADVERTISING: Disable your banner blocker (AdBlock, …) and click on our banner ads.

  • AFFILIATION: Make your purchases online by clicking on our affiliate links here Amazon.

  • DONATE: If you want, you can make a donation via Ko-Fi πŸ’œ.

  • WORD OF MOUTH: Invite your friends to come, discover the platform and the magnificent 3D files shared by the community!


Sharing and downloading on Cults3D guarantees that designs remain in makers community hands! And not in the hands of the 3D printing or software giants who own the competing platforms and exploit the designs for their own commercial interests.

Cults3D is an independent, self-financed site that is not accountable to any investor or brand. Almost all of the site's revenues are paid back to the platform's makers. The content published on the site serves only the interests of its authors and not those of 3D printer brands who also wish to control the 3D modeling market.

100% secure payment by credit card, PayPal, Apple Pay, Google Pay, etc.
View all payment options.