Skip to content

Anycubic i3 Mega S Y-carriage Belt Tensioner

Advertising
Advertising
?
Creation quality: 5.0/5 (1 vote)
Evaluation of members on the printability, utility, level of detail, etc.

  • 11.3k views
  • 8 likes
  • 27 downloads

License
3D design format
STL Folder details Close
  • Carriage.STL
  • Carriage_mk2.STL
  • Frame.STL
  • Knob.STL
  • Knob_hexnut.STL

Learn more about the formats

Last update 2022-04-04 at 00:31
Publication date 2021-01-21 at 07:56
Design number 268592

3D printer file info

3D model description

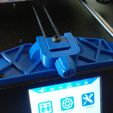
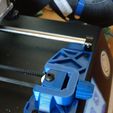
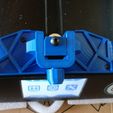
Anycubic i3 Mega S Y-Carriage Belt Tensioner


UPDATE:

Added a Carriage_mk2 file which features a slightly sturdier back. I noticed after a year of use and perhaps slight over-tensioning on my part, the screw that pulls the carriage back has started eating into the carriage and is now protruding a little on the back-side. Nothing has failed yet so far but I decided to beef up the carriage a little.


Failing to find any good stream-lined design out there, I went ahead and designed my own Y-carriage belt tensioner. The only one available had a nut and bolt that protruded past the LCD screen which I didn't think much of. Also it was ugly.


DESIGN SPECIFICATIONS:

Streamlined design with zero interference.
Reinforced ribs for rigidity.
Print without supports.
Ease of installation with the use of existing holes without the need for drilling into the machine.


HARDWARE NEEDED:

3 x M3x12mm screws (doesn't matter if it's socket head or buttons head)
1 x M5x20mm screw (has to be button head - for clearance)
1 x M5 nut
1 x M5 washer
1 x M2x25mm screw (has to be button head - for clearance)
1 x M2 brass hot-melt insert nut. (or you can use a M2 nut if you don't have a hot-melt insert.Use the knob_hexnut.stl file for this)
3 x M2 washers


INSTALLATION:

  1. Press fit the M5 hex nut into the underside of the carriage. Make sure to press it until it sits flush.
  2. M2 screw with one M2 washer goes into the small hole in the carriage. Screw this in but be aware that it is a tight fit so that it holds in place. The reason is so that when you screw the knob over it during usage, this screw will not spin.
  3. Loop the belt over the pulley and slide the pulley into the carriage. Screw the M5 button-head screw into the carriage, securing the pulley into place. Do not overtighten or the pulley will catch! Test to make sure pulley still spins freely.
  4. Install frame by removing 2 of the inside screws of the linear rod mounts, and one of the screw that holds the power supply. Screw in the M3 screws into the respective places. Make sure the frame is flush to the machine. Screw it tight. Around quarter turn after hand-tight should do it.
  5. Hot-melt the insert into the knob. Make sure that you thread a screw in and check that it runs smoothly after you've hot-melted the insert. Wouldn't hurt to spray whatever lube you have in the threads (i.e PTFE, WD-40 etc). Clean off any plastic residue from hot melting. If you have a tap, now would be a good time to dust off the cobwebs on that and use it here. (TIP: I usually put a screw into the insert way and hot melt it with the screw in place so that any bulging plastic from hot-melting does not go into the insert cavity. Just be sure to wait until it is cold before removing the screw.)
  6. Assemble everything together. Slide carriage into carriage slot of the frame. Place the 2 M2 washers stacked on top of each other on the other-side of the frame (this is so that the plastic knob doesn't rub on the frame plastic knob cavity. Screw your knob on and tension the belt.

NOTE:

The design is dimensionally accurate. If you are not getting accurate parts, then your printer needs to be tuned and calibrated to print accurate parts. The design has been printed and checked for dimensional accuracy.


3D printing settings

Printed in PLA with 30% infill for the frame. 40% infill for the pulley carriage and knob. I would not recommend 100% infill on something as large as the frame as you may get warpage and it will result in inaccurate parts. For the small parts, it should be OK but I did not test it with such high infill rates.

You should use ASA or ABS if you're constantly printing high temperatures as the longevity of the PLA parts will be affected when subjected to such high temperatures near the bed. PETG would also be a better option than simply PLA.

As mentioned above, you need to have a calibrated printer that prints accurate parts. All of the dimensions have a tolerance of 0.05mm.

Advertising


Issue with this design? Report a problem.

Would you like to support Cults?

You like Cults and you want to help us continue the adventure independently? Please note that we are a small team of 3 people, therefore it is very simple to support us to maintain the activity and create future developments. Here are 4 solutions accessible to all:

  • ADVERTISING: Disable your banner blocker (AdBlock, …) and click on our banner ads.

  • AFFILIATION: Make your purchases online by clicking on our affiliate links here Amazon.

  • DONATE: If you want, you can make a donation via Ko-Fi πŸ’œ.

  • WORD OF MOUTH: Invite your friends to come, discover the platform and the magnificent 3D files shared by the community!


Sharing and downloading on Cults3D guarantees that designs remain in makers community hands! And not in the hands of the 3D printing or software giants who own the competing platforms and exploit the designs for their own commercial interests.

Cults3D is an independent, self-financed site that is not accountable to any investor or brand. Almost all of the site's revenues are paid back to the platform's makers. The content published on the site serves only the interests of its authors and not those of 3D printer brands who also wish to control the 3D modeling market.

100% secure payment by credit card, PayPal, Apple Pay, Google Pay, etc.
View all payment options.