Skip to content

Low Profile AS15 Helmet Mount

Advertising
Advertising
?
Creation quality: 5.0/5 (1 vote)
Evaluation of members on the printability, utility, level of detail, etc.

  • 1.6k views
  • 1 like
  • 15 downloads

License
3D design format
STL Folder details Close
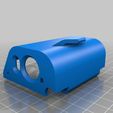
  • AS15-Body.stl
  • AS15-Door.stl
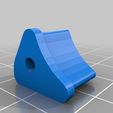
  • AS15-Plug.stl

Learn more about the formats

Publication date 2021-01-27 at 20:56
?
Published to Thingiverse on: 2014-07-14 at 13:19
Design number 275047

3D printer file info

3D model description

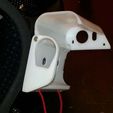
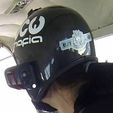
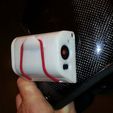
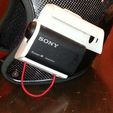
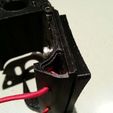
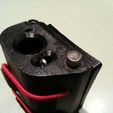
This is a low profile, snag resistant helmet side mount for the Sony AS10, AS15 and AS30 Action Cam. Originally developed for skydiving.

3D printing settings

In order to assemble this mount you'll need the following:

3 x M3x10mm hex nuts

2 x M3x25mm Socket Set Cap Screws (or Philips head)

1 x M3x10mm Thumb Screw

3 x M3 Washers

1 x 3mm Bungy (shock) cord 150mm long

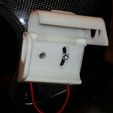
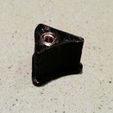
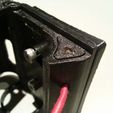
Place two of the M3x10mm hex nuts in the recesses located at the top of the Door (either side of the hinge) and one in the recess in the Door plug, they should be press fit and may need a small amount of force to seat them properly.

Place the Door onto the Body so that it is in its closed position. Fix the two M3x25mm screws (and washers) into the holes at both ends of the Body at the top of the hinge. Use some Loctite so that the screws are fixed in place firmly and won't inadvertently come unscrewed. Be sure not to tighten the screw too tight, this needs to act as a hinge and move freely.

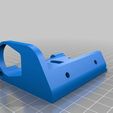
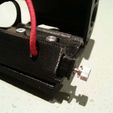
Push one end of the bungy cord through the front hole (on the beveled section of the body's base) until it pops out of the plug recess at the back. Tie a knot in the end and pull the cord back through until it stops (you may need to adjust the size of the knots so that it doesn't pull through the hole).

Push the other end of the bungy cord through the other hole towards the back of the Body and pull it through as in the previous step. You'll need to work out where to put the next knot so that there is sufficient tension on the cord to hold the door closed.

Trim off excess cord and tuck it inside the body. Press the Door plug in the plug recesses until it seats flush. When the door is closed you can use the M3x10mm thumb screw to lock the door closed in case the bungy cord breaks or comes off.

You can fix the mount to a helmet by placing M5 socket set cap screws through the counter-bored holes in the body of the mount. Don't forget to drill the corresponding holes in the helmet. You'll notice the back hole is slotted on a curve to allow for angular adjustment.

Enjoy.

Advertising


Issue with this design? Report a problem.

Would you like to support Cults?

You like Cults and you want to help us continue the adventure independently? Please note that we are a small team of 3 people, therefore it is very simple to support us to maintain the activity and create future developments. Here are 4 solutions accessible to all:

  • ADVERTISING: Disable your banner blocker (AdBlock, …) and click on our banner ads.

  • AFFILIATION: Make your purchases online by clicking on our affiliate links here Amazon.

  • DONATE: If you want, you can make a donation via Ko-Fi πŸ’œ.

  • WORD OF MOUTH: Invite your friends to come, discover the platform and the magnificent 3D files shared by the community!


Sharing and downloading on Cults3D guarantees that designs remain in makers community hands! And not in the hands of the 3D printing or software giants who own the competing platforms and exploit the designs for their own commercial interests.

Cults3D is an independent, self-financed site that is not accountable to any investor or brand. Almost all of the site's revenues are paid back to the platform's makers. The content published on the site serves only the interests of its authors and not those of 3D printer brands who also wish to control the 3D modeling market.

100% secure payment by credit card, PayPal, Apple Pay, Google Pay, etc.
View all payment options.