UPDATE - January 10, 2022: Due to popular demand, I designed a version with screws that screw in from the front side.
Video instructions:
Front-Screw Version: https://youtu.be/o3nJqhl_ax8
Hidden-Screw Version: https://youtu.be/4qO1j1uNAfY
This thing is licensed under the Creative Commons - Attribution - Share Alike license. If you wish to sell it, attribution is mandatory. Please include the following attribution on the sales page: " This thing was designed by Cults3D user tonyyoungblood. The original files can be downloaded here: https://cults3d.com/en/creations/oculus-quest-2-wall-mount-no-supports/ "
If you download or collect this thing, please "like" it. That helps it get noticed.
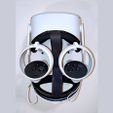
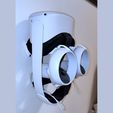
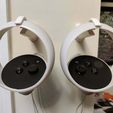
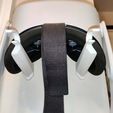
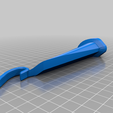
I couldn't find an Oculus Quest 2 wall hanger that I loved, so I made one. It works with the Elite strap as well as the regular strap. This hanger also works with the original Quest 1.
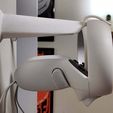
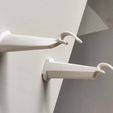
I designed it to match the curves of the headset and the controllers. It took a lot of iterations to get right, but I finally got it!
The lenses face down so dust won't fall on them.
The controllers hang on the same mounts as the headset.
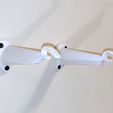
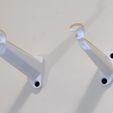
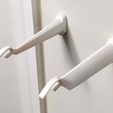
Minimalist design. Less plastic. Shorter printing times.
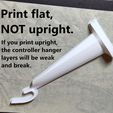
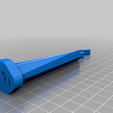
No supports required. Please print as oriented in the file. Don't print upright; it will break.
The controller hangers may look flimsy, but they actually hold the controllers way more securely than it appears. They take advantage of the controller's uneven weight distribution. The back part of the controller is heavier, causing the controllers to push up on the hangers, making the controllers fit securely. If you're still worried about knocking them off, coat the controller hanger portions in PlastiDip for an even more secure grip. Or you can wrap the tips with electrical tape or heat shrink tubing.
I recommend sanding the mounts for a smoother finish, but that's up to you.
Steps:
-1. Decide if you want the Front-Screw version or the Hidden-Screw version. Watch the videos above to compare. The Front-Screw version is way easier to mount and can be used with wider-tipped screws. The Hidden-Screw version looks cooler. Download the left and right sides. The titles start with either FrontScrews or HiddenScrews, depending on the version you want.
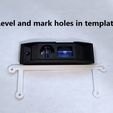
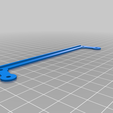
-2. Download the corresponding template -- either the 3D printed one or the paper one. I highly recommend the 3D printed template. It prints super quick, and you can rest a level on top. (Template_3DPrint_FrontScrews.stl or Template_3DPrint_HiddenScrews.stl.) If you decide to use the paper template, download either the A4-paper or letter-paper (8 1/2" x 11") version. The front-screw and hidden-screw templates are on the same piece of paper. Make sure you print "actual size" and measure the scale to ensure correct sizing.
-3. Print the files. Supports are not required. Make sure you print as they files are oriented. DO NOT print the mounts upright -- the controller tips will break. I recommend a brim for the mounts.
-4. If you printed the Hidden-Screw version, remove the tower supports from the screw holes. (These supports are embedded in the design.)
-5. Use the template to level and mark your wall with where the screws will go. You won't need the template after this. It's not part of the design.
-6. See videos for further instructions, especially if you printed the Hidden-Screw version.
Enjoy!

/https://fbi.cults3d.com/uploaders/14936297/illustration-file/0f76fd89-c130-4220-bcf6-0c2ec70e5c59/cults3d.jpg)
