Skip to content

Korean Fighting Kite

Advertising
Advertising
?
Creation quality: 5.0/5 (1 vote)
Evaluation of members on the printability, utility, level of detail, etc.

  • 2.1k views
  • 1 like
  • 33 downloads

License
3D design format
STL Folder details Close
  • kite-center-connector.stl
  • kite-connectors-plate.stl
  • kite-corner.stl
  • kite-t-connector.stl

Learn more about the formats

Publication date 2021-02-03 at 09:10
?
Published to Thingiverse on: 2011-09-21 at 23:59
Design number 282804

3D printer file info

3D model description

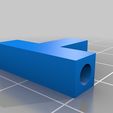
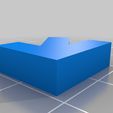
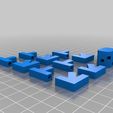
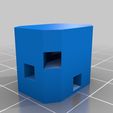
These are simple connectors for building your own Korean fighting kite.

My son needed to build one for his project on Asia so I designed and printed out corner connectors, t-connectors, and a central connector with my Cupcake.

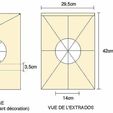
I went with this design for our kite:

http://www.kiteplans.org/planos/coreen/coreen.html

You will need to use Google Translate to translate the page from French to English. One thing that I did was up-scale the dimensions of the kit a bit so that they're slightly larger than the metric-to-english conversion on the above design.

There are similar designs on http://www.kiteplans.org/pln_1564/ as well.

3D printing settings

Print out the kite-connectors-plate.stl (prints a spare corner and t-connector for you). It'll just fit on a Makerbot build platform. If you want to print each part separately (or need a spare) you'll need to print 1 kite-center-connector.stl, 4 kit-corner.stl, and 4 kite-t-connector.stl.

You will also need enough 1/8" dowel rod for the following:

3 - 13" lengths (horizontal supports)
3 - 18" lengths (vertical supports)
2 - 22" lengths (diagonal supports)

I just used an exacto knife to cut the dowel rod to length. Also the holes were a bit tight (which I liked for the corner pieces but not so much for the T-connectors). I drilled out the corner holes and the short vertical in the t-connector with a 1/8" bit to make the dowel rod slip in easier. I then used a 9/64" bit to ream out the horizontal holes in the t-connector and in the center connector holes so that it went all the way through so that the dowel rod would slide through easily.

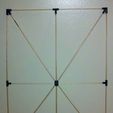
Next, assemble it per the attached photo. Hot glue the corners and leave the center connector and the horizontal through-hole in the t-connectors unglued so that the kite can flex a bit.

We then cut a piece of thin white fabric ~2" wider and taller than the kite frame, decorated it, and then hot glued it around the perimeter of the frame. We then attached the kite string per the attached image.

I'll upload an image of the finished kite once we've completed it.

Advertising


Issue with this design? Report a problem.

Would you like to support Cults?

You like Cults and you want to help us continue the adventure independently? Please note that we are a small team of 3 people, therefore it is very simple to support us to maintain the activity and create future developments. Here are 4 solutions accessible to all:

  • ADVERTISING: Disable your banner blocker (AdBlock, …) and click on our banner ads.

  • AFFILIATION: Make your purchases online by clicking on our affiliate links here Amazon.

  • DONATE: If you want, you can make a donation via Ko-Fi πŸ’œ.

  • WORD OF MOUTH: Invite your friends to come, discover the platform and the magnificent 3D files shared by the community!


Sharing and downloading on Cults3D guarantees that designs remain in makers community hands! And not in the hands of the 3D printing or software giants who own the competing platforms and exploit the designs for their own commercial interests.

Cults3D is an independent, self-financed site that is not accountable to any investor or brand. Almost all of the site's revenues are paid back to the platform's makers. The content published on the site serves only the interests of its authors and not those of 3D printer brands who also wish to control the 3D modeling market.

100% secure payment by credit card, PayPal, Apple Pay, Google Pay, etc.
View all payment options.