Skip to content

Carbon fiber magnetic ball joint jig for the Cerberus, Cerberus Pup, and other Rostocks

Advertising
Advertising
?
Creation quality: 5.0/5 (1 vote)
Evaluation of members on the printability, utility, level of detail, etc.

  • 827 views
  • 5 downloads

License
3D design format
SCAD and STL Folder details Close
  • ball-joints.scad
  • ball-joints.stl

Learn more about the formats

Publication date 2021-02-03 at 09:14
?
Published to Thingiverse on: 2013-11-03 at 15:53
Design number 282829

3D printer file info

3D model description

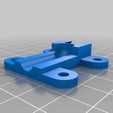
This jig is used to make consistent length magnetic ball joint arms for the Cerberus, Cerberus Pup, and other Rostock deltabot printers.

Requirements:

  1. 3/8" steel ball bearings

  2. 3/8" x 3/8" cylindrical neodymium magnets

  3. Carbon fiber shafts, such as arrow shafts

  4. High-strength glue capable of bonding metal to carbon fiber (I used Loctite Metal / Concrete epoxy, others have used JB Weld)

Print two and mount them onto a length of wood at appropriate distances using screws.

NOTE:

  • The provided STL uses a 7.28mm diameter carbon fiber rod in the model. If your CF rod has a different diameter, download the SCAD (http://www.thingiverse.com/download:334677) and edit it in OpenSCAD, adjusting the cf_rod_dia variable appropriately.

  • Assembly instructions are in the Instructions (http://www.thingiverse.com/thing:176647/#instructions) section.

3D printing settings

The way I did it to keep the epoxy from getting all over the place is I glue one ball at a time using the following procedure:

  1. Put a 3/8" x 3/8" neodymium magnet into each jig piece
  2. Put ONE ball into one of the jigs (keep the other one out)
  3. Mix a pea-sized blob of two-part epoxy
  4. Carefully scrape all of the epoxy into the inside of one end of the hollow CF rod
  5. Sit the jig vertically so the one with the ball and magnet are on the bottom
  6. Place the end WITH the epoxy in it against the ball at the bottom of the jig (since all of the epoxy is inside the CF rod, there should be no squeeze-out)
  7. Place the second ball into the other end of the CF rod and rotate it into place at the top of the jig
  8. Let it sit 30-60 minutes before performing the operation on the second ball.

When you do the second ball, rotate the jig so that the second ball is now at the bottom and repeat steps 1-8.

What this does is uses gravity to let the epoxy flow down to the ball and stick to it. It's slow, but it works. :)

Advertising


Issue with this design? Report a problem.

Would you like to support Cults?

You like Cults and you want to help us continue the adventure independently? Please note that we are a small team of 3 people, therefore it is very simple to support us to maintain the activity and create future developments. Here are 4 solutions accessible to all:

  • ADVERTISING: Disable your banner blocker (AdBlock, …) and click on our banner ads.

  • AFFILIATION: Make your purchases online by clicking on our affiliate links here Amazon.

  • DONATE: If you want, you can make a donation via Ko-Fi πŸ’œ.

  • WORD OF MOUTH: Invite your friends to come, discover the platform and the magnificent 3D files shared by the community!


Sharing and downloading on Cults3D guarantees that designs remain in makers community hands! And not in the hands of the 3D printing or software giants who own the competing platforms and exploit the designs for their own commercial interests.

Cults3D is an independent, self-financed site that is not accountable to any investor or brand. Almost all of the site's revenues are paid back to the platform's makers. The content published on the site serves only the interests of its authors and not those of 3D printer brands who also wish to control the 3D modeling market.

100% secure payment by credit card, PayPal, Apple Pay, Google Pay, etc.
View all payment options.