Skip to content

Ducted 60 mm fan for Mendel90

Advertising
Advertising
?
Creation quality: 0.0/5 (0 votes)
Evaluation of members on the printability, utility, level of detail, etc.

  • 538 views
  • 3 downloads

License
3D design format
STL Folder details Close
  • FanBracket.stl
  • Mendel90FanDuctV2.stl
  • wades_block_riser.stl

Learn more about the formats

Publication date 2021-02-03 at 18:59
?
Published to Thingiverse on: 2012-09-01 at 05:35
Design number 283572

3D printer file info

3D model description

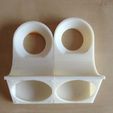
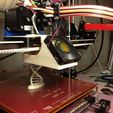
I printed a selection of fan ducts for my Mendel90. Some of them didn't fit and others just didn't work, so I designed my own. I have copied some of the best features from other designs and merged them into a model that will fit on the Mendel90 using a couple of adapters for mounting.

Update - April 2013 - my original fan duct was getting a little overheated so I finally got around to redesigning a slightly longer version which centres the nozzle better.

Update 2 - the all-metal E3D hot end needs a cooling fan and shroud fitted to it. There was not enough space to fit this so I have released an updated low-profile version at http://www.thingiverse.com/thing:91931

3D printing settings

The fan duct will end up sitting quite close to the hot end so should be printed in ABS.
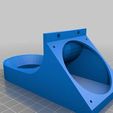
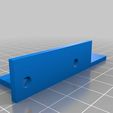
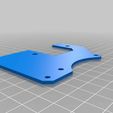
The Mendel90 X carriage has no fan mounting points so I decided to adapt my Wade's Block Riser thing (needed for the herringbone gears) to provide two mounting holes for the fan duct. This is a quick and dirty hack designed to allow me to get the fan working quickly. The whole design can definitely be improved and should be consider a work in progress.
Screw the 60 mm fan to the duct with short self-tapping screws.
Bolt the fan duct to the bracket.
Fix the bracket to the riser plate with two more bolts.
I didn't have a spare controller pin on my Sanguinololu (since adding the LCD panel and click controller) so I bought a Zalman Single Fan Controller from Amazon for Γƒβ€šΓ‚Β£4 to control the fan speed manually. The long ribbon cable provided rides piggybacked onto the main X-ribbon and the controller is stuck to the side of the X motor block.
Future improvements planned include redesigning the riser plate to lock under the X belt clamp and adjusting the duct shape to get the nozzle centred better in the ring.

Advertising


Issue with this design? Report a problem.

Would you like to support Cults?

You like Cults and you want to help us continue the adventure independently? Please note that we are a small team of 3 people, therefore it is very simple to support us to maintain the activity and create future developments. Here are 4 solutions accessible to all:

  • ADVERTISING: Disable your banner blocker (AdBlock, …) and click on our banner ads.

  • AFFILIATION: Make your purchases online by clicking on our affiliate links here Amazon.

  • DONATE: If you want, you can make a donation via Ko-Fi πŸ’œ.

  • WORD OF MOUTH: Invite your friends to come, discover the platform and the magnificent 3D files shared by the community!


Sharing and downloading on Cults3D guarantees that designs remain in makers community hands! And not in the hands of the 3D printing or software giants who own the competing platforms and exploit the designs for their own commercial interests.

Cults3D is an independent, self-financed site that is not accountable to any investor or brand. Almost all of the site's revenues are paid back to the platform's makers. The content published on the site serves only the interests of its authors and not those of 3D printer brands who also wish to control the 3D modeling market.

100% secure payment by credit card, PayPal, Apple Pay, Google Pay, etc.
View all payment options.