Skip to content

Simple one axis laser gimbal

Advertising
Advertising
?
Creation quality: 0.0/5 (0 votes)
Evaluation of members on the printability, utility, level of detail, etc.

  • 848 views
  • 2 downloads

License
3D design format
STL Folder details Close
  • Coil_Holder.stl
  • Coil_backer.stl
  • Mirror_Frame_Low_Resistance.stl
  • Mirror_Magnet_Mount.stl

Learn more about the formats

Publication date 2021-02-05 at 19:57
?
Published to Thingiverse on: 2015-03-24 at 09:09
Design number 285359

3D printer file info

3D model description

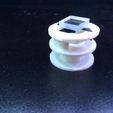
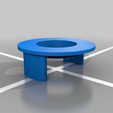
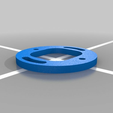
This is a simple one axis version of a laser gimbal I made that can be controlled by any MCU like an Arduino.

Uses a single coil with AC current to manipulate the angle of a mirror. Attached to the back of the mirror is a simple rare earth magnet with poles perpendicular to the coil's magnetic field. Rubber bands provide the restive force that pulls the mirror back to the center position but this can also be accomplished by reversing the current in the coil repetitively until the middle position is found.

The design inspiration for this project came from the Peachy Printer 3D printer: http://www.peachyprinter.com/

http://www.KyleORourke.com

https://www.youtube.com/watch?v=qwnjW6LFbGg

3D printing settings

1) Print parts. Duh!

2) Cut a plastic mirror to 8mm x 8mm square.

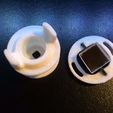
3) Glue the mirror to the mirror mount. Then glue your choice of rubber band to the mirror using Loctite super glue. (Make multiple mirror squares and mounts, you are going to mess up a bunch.)

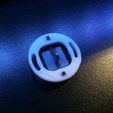
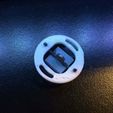
4) Glue a small magnet with the poles perpendicular to the back of the mirror. DO NOT just glue one pole-side of the magnet to the back of the mirror otherwise you will just be creating a very bad sounding speaker. (Use pictures for reference.)

5) Glue the 'Coil holder' to the 'Coil backer'.

6) Calculate the amount of windings needed for you setup using this website: http://www.production-solution.com/coil-calculator.htm

Use 14 mm for bobbin diameter and 10.5 mm for bobbin length. Leave "gap distance between solenoid and metal" blank.

7) Control the coil like you would any other DC brushed motor. Use transistors with protection diodes and capacitors for EMF. If you are not familiar with EMF or how to protect your transistors against it try using this Arduino shield to start: https://www.sparkfun.com/products/9815

8) Please be careful when playing with lasers and always wear protective goggles! (I have lost quite a bit of my color vision for not heading this advice myself!)

Advertising


Issue with this design? Report a problem.

Would you like to support Cults?

You like Cults and you want to help us continue the adventure independently? Please note that we are a small team of 3 people, therefore it is very simple to support us to maintain the activity and create future developments. Here are 4 solutions accessible to all:

  • ADVERTISING: Disable your banner blocker (AdBlock, …) and click on our banner ads.

  • AFFILIATION: Make your purchases online by clicking on our affiliate links here Amazon.

  • DONATE: If you want, you can make a donation via Ko-Fi πŸ’œ.

  • WORD OF MOUTH: Invite your friends to come, discover the platform and the magnificent 3D files shared by the community!


Sharing and downloading on Cults3D guarantees that designs remain in makers community hands! And not in the hands of the 3D printing or software giants who own the competing platforms and exploit the designs for their own commercial interests.

Cults3D is an independent, self-financed site that is not accountable to any investor or brand. Almost all of the site's revenues are paid back to the platform's makers. The content published on the site serves only the interests of its authors and not those of 3D printer brands who also wish to control the 3D modeling market.

100% secure payment by credit card, PayPal, Apple Pay, Google Pay, etc.
View all payment options.