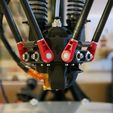
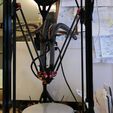
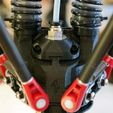
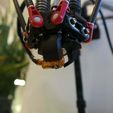
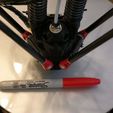
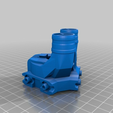
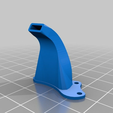
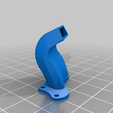
When I found out about Trick Laser's nifty ball-cup Kossel arms with plastic barbells to guarantee arm spacing and reduce joint lash (see http://www.tricklaser.com/), I was immediately intrigued, but I needed an effector to use them with -- and since I also got intrigued by the idea of Bowden cooling my hot end at about the same time, I had to design my own effector. This is the result. The photos don't really do it justice, sadly -- my fault for loving black PLA so much, I suppose -- but in this designer's opinion it looks flippin' rad, especially because it's so compact.
IMPORTANT: this is designed as a replacement for the stock effector of an Anycubic Linear Kossel XL, which comes with what appears to be an E3D V5 clone hot end. The hot end lock fits 16mm OD with a 11.9mm OD x 5.7mm tall channel, and the design is sized to expect 51.25mm (-1/+whatever) from the top of the heat break down to the top of the heating block. I don't know if this'll fit an E3D V6 or not, but I'll probably get a different hot end eventually and update the files to include options for that, as well. I'm intrigued by the new Pico that's coming out, for example.
ALSO IMPORTANT: embarrassingly, although all individual parts of the main structure are solid components in SketchUp, I could not get the final outer shell to solid up for export. I found and fixed a few very minor issues with the final component but couldn't for the life of me track down the issue; either way, though, it slices fine for me in Cura 3.2.0. I'm counting this as a work in progress anyway because I suspect I could clean up and expand the internal airways more, and the hot end lock is VERY hard to get off -- it could use a slot for inserting a screwdriver.
Anyway: How does it work? Quite well!
Design: This is a very rigid design, and geared toward quality at the expense of build height and, to a lesser degree, durability at the expense of weight. The hot end lock has a nice wedge feature that locks the front of it into the main structure as it's tightened on, so the hot end is very rigid once mounted. I purposely designed it to let the hot end protrude from the bottom to try to get the CoG more in line with the plane of the arm joints to reduce effector tilt at high accelerations, although I'm pretty sure it's still riding high. Combined with the lash-free Trick Laser arms (with fully-constrained barbells, of course), this is producing very nice prints so far.
5.12.18 UPDATE: I have now run about 100 meters of filament through the new setup, and it continues to work fine, with no signs of fatigue, loosening, or chafing on the cooling tubes, and I'm getting really excellent print quality across the board. Until I go to a flying extruder or remote-drive setup, I'm constrained to a perimeter speed of about 35mm/s at .2 layer height before filament flow through my long, long bowden becomes an issue, but I'm now running travels at 300mm/s at 6000mm/s^2 and so far I think there's still room to speed those up. Whee!
Weight: It's a massive improvement over the stock effector that came with my Anycubic Kossel XL (at least a 75g savings; without the hot end or barbells mounted the whole thing seems to come in around 50g, but I don't have a digital scale to get a proper read on this). The weight reduction has done wonders for ringing and overshoot artifacts. It's probably not the lightest effector ever, but I doubt there's anything out there as light as this with dual cooling fans.
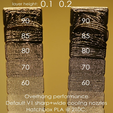
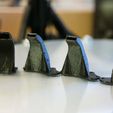
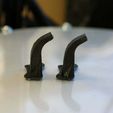
Cooling: Holy cow, this might be the best part. With 19mm cPAP tubing to provide remote cooling from some more powerful blowers, the improvement in part cooling is incredible. Even at worse-case cooling angles from the small nozzle, overhangs don't really start to fall apart until over 70 degrees at .2 layer height and 80 degrees at .1. I included some before/after pictures for the cooling nozzles, which gave the original cooling setup some trouble even at .1 layer height. Both bowden cooling tubes feed into internal air channels that split the airflow into 1/3 and 2/3rds. For the hot end cooling side, the larger feed blows across the bottom fins of the heat break, while the smaller feed maintains a vortex around the internal chamber; this can cool the hot end from 205C to 60C between 5 and 15% faster than the original on-effector cooling fan even at moderate input airflows, so I'm counting it as "probably better than before". For the part cooling side, the larger feed is pumped into a small nozzle aimed directly at the hot end's output, while the smaller feed is channeled around the front to a wider nozzle intended for general part cooling. This seems to strike a good balance for bridging and overhangs, and is substantially better for small parts than the original setup. The only downside for bowden cooling that I've detected so far is that the little blowers I've got are freakin' LOUD when fighting this pressure head, but I'm planning to seek out some bigger, quieter ones.
I experimented with supercharging the cooling by ganging and stacking two fans on each bowden and seeing how deep into water they could still blow bubbles -- with interesting results, specifically:
-- Side-by-side blowers produce little or no pressure head improvement;
-- Stacking blowers (output to input) produces something approaching double the pressure head improvement (my rough experiments showed about 85% improvement, but I think more sealing would have helped);
-- Stacking small blowers against 3' of cPAP tubing and some nozzles makes them VERY loud; and
-- Most importantly of all, one blower is almost as good as stacking two identical ones for bowden cooling, at least in terms of cooling the hot end; I measured only a 7 second improvement for 205C to 60C cooldown going from 2 .36A blowers to 1. This is especially good news considering stacking 2 .36 blowers on the part cooling circuit blew the mosfet when I ramped the PWM to 255. I'm not sure why the gain is so slight from stacking blowers when they clearly showed a nearly linear boost in pressure head performance; they might have made more difference on the part cooling, where the nozzles probably give more of a restriction to fight against, but I'd need to figure out a setup that won't burn out my board to experiment more.
I do plan to change to bigger, quieter blowers at some point, and if I get any interesting data I'll try to remember to update this space.
6.8.18 NOTE: I'm currently using these homebrew compressor fans: https://www.thingiverse.com/thing:2951796 -- They're definitely not as powerful as the .36A cheapie blowers I was using, but man are they more tolerable in the noise department. A .2A version of my compressor (with a .13A booster fan) on the hotend cooling side has proved more than adequate; a .3A version, unboosted, is working for the part cooling side, but it's not achieving the superior overhang support of the nasty-loud cheapie blowers. I plan to try boosting that side with a higher-amp case fan tapped straight into my power supply once I work out the speed control.
Durability: This design is pretty much brand-new, but I've been running it for about 20 hours of printing now and so far it's doing fine. So far I've only ever printed PLA, so I can't speak to the thermal performance if you wanted to use this for printing anything needing really hot temperatures, but the internal cooling seems to be excellent, and as long as your heater block is insulated there shouldn't be much heat transfer into the effector itself. If you're worried you could print the hot end cooling duct out of something suitable for higher temps, but the only real risk to my mind would be if the hot end cooling bowden tube detached while printing, or developed a bad tear. The cPAP tubing I got seems to be tough stuff but I'm going to be keeping a close eye on mine for wear and tear, and I'm expecting it to be a consumable part to be replaced on a schedule, much like the filament bowden tubing.
Accessories:
- This goes nicely with the carriages I designed for the Trick Laser barbells: https://www.thingiverse.com/thing:2884626
- I designed this double cPAP tubing clamp to help keep the tubes upright and keep them vertical for entry into the effector so their mass has the least impact on accelerations: https://www.thingiverse.com/thing:2884997
- I designed this retraction arm set that helps lift the tubes by the tubing clamp (but these are possibly a silly complication; bungees would probably work just as well, but they wouldn't look as cool): https://www.thingiverse.com/thing:2885014
Marlin configuration help:
This has an exactly 26 mm effector offset.
Stuff to print:
- 1 Effector
- 3 barbell lock bars
- 1 hot end lock
- 1 hot end cooling shroud
- 1 sharp nozzle*
- 1 wide nozzle*
* You can mix and match these if you want to experiment; by default, the sharp nozzle is on the high-flow port and the wide nozzle is on the lower-flow port, but they SHOULD be reversible, so you could mirror one or both to try swapping them or using the same kind on both ports. You also might need to scale them taller or shorter depending on the height of your heater block + nozzle to ensure they're aimed properly.
Components and BOM:
- 1 set Trick Laser 3/8" barbells and arms that work with them. The 300mm arms Trick Laser currently offers (since they don't do custom lengths at the moment) are really too long for an Anycubic Kossel XL (which uses 27s or 28s stock, I think) so you lose some build height, but I think there are other arms that also work with the barbells if you really care about build height. I don't.
- 1 stock Anycubic Linear Kossel XL hot end or equivalent (again, I think it's an E3D V5 clone, but I can't prove it).
- 6' of 19mm cPAP tubing (I used "blackout" cPAP tubing; check Amazon)
- A double blower setup to feed the air (I'd post my design but I think it leaves too much to be desired).
- I would STRONGLY recommend insulating your heater block for this effector, unless you want to make the lower shroud out of something besides PLA. I used a cotton facial pad and some Kapton tape for mine and it's doing fine.
- 6x M3x12 bolts for the barbells
- 6x 10mm x 1mm washers for the barbells
- 8x M3 nuts (2 for the hot end lock, 6 for the barbells)
- 2x M3x16 bolts for the hot end lock (you might need 20s or 22s to actually get the lock onto the hot end, since it's a very tight fit, but then you can swap them out)
- 10x M2x5 bolts for the lower shroud and cooling nozzles.
- 2x zip ties for the tubing.
And hey, if you use this or remix it to support other hot ends or arm types, a tip would be super-rad. This was a TON of work to design/engineer and a TON of stress to actually manufacture and mount, especially the bowden cooling -- I found out the limits of a Trigorilla's fan drivers* the hard way, for example :)
* Specifically, I now know driving 2 .36 amp blowers on one PWM fan circuit will blow the mosfet; I now also know that you can swap fan pins 7 and 9 to drive your part cooling off the FAN_1 pins. If you're curious or whatever.

/https://fbi.cults3d.com/uploaders/17180223/illustration-file/ccbecd69-001d-4676-90fa-c6f121e0c612/SAM_1423.JPG)
