Skip to content

Raspberry Pi 4 Flirc and SSD enclosure

Advertising
Advertising
?
Creation quality: 5.0/5 (1 vote)
Evaluation of members on the printability, utility, level of detail, etc.

  • 9.5k views
  • 13 likes
  • 167 downloads

License
3D design format
F3D and STL Folder details Close
  • RaspberryPI_Flrcr_SSD_-_Final_with_SD_cutout_v20.f3d
  • RaspberryPI_Flrcr_SSD_-_Final_with_SD_cutout_v20.stl

Learn more about the formats

Last update 2021-02-14 at 23:54
Publication date 2021-02-08 at 09:04
?
Published to Thingiverse on: 2021-02-08 at 02:31
Design number 287500

3D printer file info

3D model description

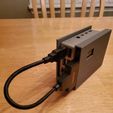
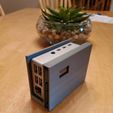
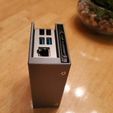
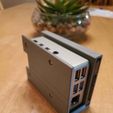
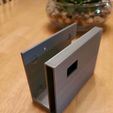
This enclosure pairs a Raspberry Pi 4, housed in an aluminum Flirc case, with a 2.5” SSD.

For more information on the Flirc case, please see: https://flirc.tv/more/raspberry-pi-4-case You can also find it on Amazon.

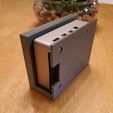
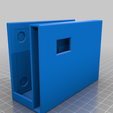
The 2.5" SSD shown is a Samsung 860 EVO, and there is a little window in the enclosure that lets you see that. Another Samsung 2.5” SSD which I have, the 850 EVO, is conveniently labeled in the same way so the window lets one distinguish between drives (at least, I assume, for the Samsung EVO line).

Of note, in the photo, the SATA to USB cable is plugged into the Pi's USB 2.0 port because my setup involves a Pi running Windows from the SSD; something that does not really work at this point with the three different SATA to USB cables which I have tested.

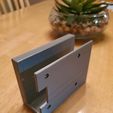
The enclosure has two screw holes in the bottom to secure the SSD, which may or may not be used as the drive stays in place just fine without them.

It also has four holes for screws to help suspend the Flirc case. Again, these may not be needed as the case should stay in place without them. However, I have set it up this way so the Flirc case will stay put even if it gets bumped or pushed. The screws used for this are the ones that come with the Flirc case.

Pro tip: I matched the colour of the enclosure to the Flirc itself. However, in another enclosure I printed I matched the colour of the printed enclosure to my LAN cable for easier cable management/identification!

The print was made with Autodesk Fusion 360, and the associated .f3d file is included along with the .stl file.

I used PRUSA Slic3r to create the printable file and put supports on the opening surrounding around where an SD card (note: not the SDD, but SD card) can be inserted into the Pi. please see this post for the best advice (with thanks to towlerg) on how to do that: https://forum.prusaprinters.org/forum/prusaslicer/for-support-enforces-only-not-behaving-as-expected/
No other supports were needed in the print.

Hope this will be of good use to you.

Advertising


Issue with this design? Report a problem.

Would you like to support Cults?

You like Cults and you want to help us continue the adventure independently? Please note that we are a small team of 3 people, therefore it is very simple to support us to maintain the activity and create future developments. Here are 4 solutions accessible to all:

  • ADVERTISING: Disable your banner blocker (AdBlock, …) and click on our banner ads.

  • AFFILIATION: Make your purchases online by clicking on our affiliate links here Amazon.

  • DONATE: If you want, you can make a donation via Ko-Fi πŸ’œ.

  • WORD OF MOUTH: Invite your friends to come, discover the platform and the magnificent 3D files shared by the community!


Sharing and downloading on Cults3D guarantees that designs remain in makers community hands! And not in the hands of the 3D printing or software giants who own the competing platforms and exploit the designs for their own commercial interests.

Cults3D is an independent, self-financed site that is not accountable to any investor or brand. Almost all of the site's revenues are paid back to the platform's makers. The content published on the site serves only the interests of its authors and not those of 3D printer brands who also wish to control the 3D modeling market.

100% secure payment by credit card, PayPal, Apple Pay, Google Pay, etc.
View all payment options.