Skip to content

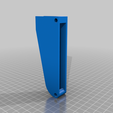
19" Zoll Raspberry Pi Halterung

Advertising
Advertising
?
Creation quality: 5.0/5 (1 vote)
Evaluation of members on the printability, utility, level of detail, etc.

  • 3.8k views
  • 4 likes
  • 47 downloads

License
3D design format
PDF and STL Folder details Close
  • Materialliste_v2.pdf
  • _10ZollSpacer.stl
  • _L%C3%BCftermodul.stl
  • _RPi_Tr%C3%A4ger_-_LED.stl
  • _RPi_Tr%C3%A4ger_-_Model-B.stl
  • _Rpi_Tr%C3%A4ger_-_Basic.stl
  • _Tr%C3%A4gerrahmen.stl
  • _Tr%C3%A4gerwinkel.stl

Learn more about the formats

Publication date 2021-02-17 at 10:57
?
Published to Thingiverse on: 2021-02-12 at 20:59
Design number 295578

3D printer file info

3D model description

If you think there is the need for an englisch description/manual please leave me a message.

UPDATE: Aufgrund mehrfacher Nachfrage der Trägerrahmen für RPi Model-B hinzugefügt!

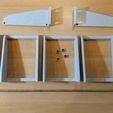
UPDATE2: Für 10 Zoll Racks habe ich nun einen Spacer hinzugefügt. Somit können die Montagewinkel, zwei Modulträger und der Spacer als eine Einheit in ein 10" Gehäuse verbaut werden.

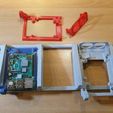
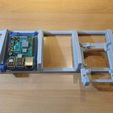
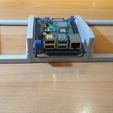
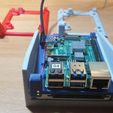
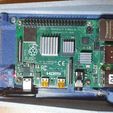
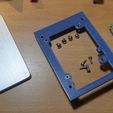
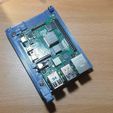
Das Projekt habe ich realisiert, da mich die ganzen rumliegenden RPi Gehäuse und die damit verbundene eingeschränkte Zugänglichkeit gestört haben. Mein Ziel war es auf eine 19 Zoll Höheneinheit mindestens 5 RPi´s mit normaler Stromzuführung über ein Winkelstecker unterzubringen. Ein Pi-Hat (PoE Stromversorgung über das Netzwerkkabel) möchte ich aus Kostengründen nicht einsetzen!

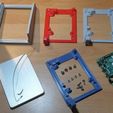
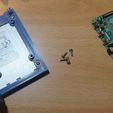
Des Weiteren wollte ich aus Gründen der Langlebigkeit nicht nur SD-Karten als klassisches „Systemlaufwerk“ verwenden, sondern die Möglichkeit haben auch SSD Platten zu verwenden. Diese lassen sich in der Standardbaugröße und 7,5mm Dicke unterhalb der Trägerplatte montieren und mit einem SATA-zu-USB Kabel am RPi verbinden. Je nach RPi sind hier jedoch verschiedene Vorgehensweisen zum Arbeiten auf der SSD nötig.

Außerdem ist das System modular aufgebaut, wobei die Trägerplatte nicht erneut gedruckt werden muss, falls aufgrund einer Nutzungsänderung später einmal Lüfter benötigt werden. Der Lüfteraufsatz ist einfach durch einstecken nachzurüsten.

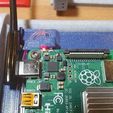
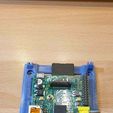
Außerdem ist die LED Version der Trägerplatte vorbereitet um vom RPi 3 und 4 die hinten liegenden LED Signale in den Griff auf die Vorderseite zu bringen. Dadurch kann dort die Aktivität des Pi´s jederzeit abgelesen werden.

Ich habe mich bei diesem Projekt von vielen schon realisierten Lösungen im Netz inspirieren lassen und die gesammelten Ideen zusammenfließen lassen.

Ich habe das Projekt als noch nicht abgeschlossen hochgeladen, da ich noch weitere Träger für andere Geräte entwerfen möchte.

Advertising


Issue with this design? Report a problem.

Would you like to support Cults?

You like Cults and you want to help us continue the adventure independently? Please note that we are a small team of 3 people, therefore it is very simple to support us to maintain the activity and create future developments. Here are 4 solutions accessible to all:

  • ADVERTISING: Disable your banner blocker (AdBlock, …) and click on our banner ads.

  • AFFILIATION: Make your purchases online by clicking on our affiliate links here Amazon.

  • DONATE: If you want, you can make a donation via Ko-Fi 💜.

  • WORD OF MOUTH: Invite your friends to come, discover the platform and the magnificent 3D files shared by the community!


Sharing and downloading on Cults3D guarantees that designs remain in makers community hands! And not in the hands of the 3D printing or software giants who own the competing platforms and exploit the designs for their own commercial interests.

Cults3D is an independent, self-financed site that is not accountable to any investor or brand. Almost all of the site's revenues are paid back to the platform's makers. The content published on the site serves only the interests of its authors and not those of 3D printer brands who also wish to control the 3D modeling market.

100% secure payment by credit card, PayPal, Apple Pay, Google Pay, etc.
View all payment options.