Skip to content

Workbee CNC Drag Knife Plotter Cutter Blade

Advertising
Advertising
?
Creation quality: 5.0/5 (1 vote)
Evaluation of members on the printability, utility, level of detail, etc.

  • 2.6k views
  • 5 likes
  • 29 downloads

License
3D design format
F3D, STEP, and STL Folder details Close
  • Plotter_Cutter.f3d
  • Plotter_Cutter.step
  • Printed_base.stl
  • Printed_bottom.stl
  • Printed_top.stl

Learn more about the formats

Publication date 2021-02-17 at 12:55
?
Published to Thingiverse on: 2021-01-25 at 14:01
Design number 295801

Template info

3D model description

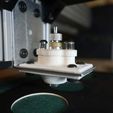
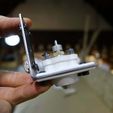
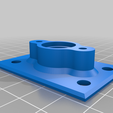
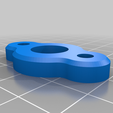
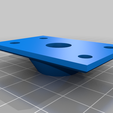
The printable parts for this design are fairly fast and straightforward to print.

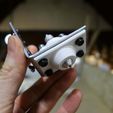
You'll need to purchase a plotter blade holder, that you can get very cheaply from places like eBay and Amazon.

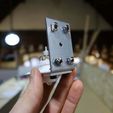
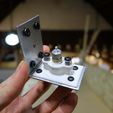
You'll also need a metal right-angle bracket, which creates the rigidity for the tool and attaches directly to the Z axis of your Workbee CNC using the four drop-in tee nuts and M5 x 8mm low profile screws.

Parts list:
(4x) M4 x 10mm button head screws
(2x) M4 x 16mm button head screws
(4x) M4 nuts
(6x) M4 washers
(4x) M5 x 8mm low profile screws
(4x) M5 drop-in tee nuts
(2x) 0.5mm x 7mm x 20mm Spring (or similar)
(1x) Metal right-angle bracket
https://www.screwfix.com/p/sabrefix-heavy-duty-angle-brackets-galvanised-40-x-60mm-25-pack/71671
(1x) Blade holder
https://www.amazon.co.uk/gp/product/B07PF7W5VD/ref=ppx_yo_dt_b_asin_title_o01_s00?ie=UTF8&psc=1

Additional tools:
12mm drill bit
Alan key set
M4 screw thread tapping set (preferable but optional)

I used the steel right-angle brackets listed and drilled out the central hole with a 12mm drill bit for the blade holder to fit through. You could just as easily adjust the files for another bracket, or bend your own bracket out of some 2mm steel using a vise and drill the holes to match.

If you'd rather use a different blade holder, then you can also easily adjust the files for this.

The main aim is to make a snug but freely moving fit around the blade holder within the custom parts, so that the springs can be adjusted to create an even pressure and cut depth across your CNC table.

I threaded the holes under where the springs sit with a tapping tool to create a smooth action for tightening and loosening them, but if you don't own this tool, you could get away with drilling the hole and forcing the screws in.

A cutting mat or sheet of MDF with an even layer of spray mount (left to dry) on it work very well as a method of holding your work piece.

If you'd rather purchase a ready to use kit, please feel free to contact me at: tom@thomasforsyth.co.uk

Advertising


Issue with this design? Report a problem.

Would you like to support Cults?

You like Cults and you want to help us continue the adventure independently? Please note that we are a small team of 3 people, therefore it is very simple to support us to maintain the activity and create future developments. Here are 4 solutions accessible to all:

  • ADVERTISING: Disable your banner blocker (AdBlock, …) and click on our banner ads.

  • AFFILIATION: Make your purchases online by clicking on our affiliate links here Amazon.

  • DONATE: If you want, you can make a donation via Ko-Fi πŸ’œ.

  • WORD OF MOUTH: Invite your friends to come, discover the platform and the magnificent 3D files shared by the community!


Sharing and downloading on Cults3D guarantees that designs remain in makers community hands! And not in the hands of the 3D printing or software giants who own the competing platforms and exploit the designs for their own commercial interests.

Cults3D is an independent, self-financed site that is not accountable to any investor or brand. Almost all of the site's revenues are paid back to the platform's makers. The content published on the site serves only the interests of its authors and not those of 3D printer brands who also wish to control the 3D modeling market.

100% secure payment by credit card, PayPal, Apple Pay, Google Pay, etc.
View all payment options.