BACKGROUND
La historia de este pequeño Printbot, del que estamos muy orgullososos, comienza hace unos meses, cuando mi hijo Javier de 8 años recibió como regalo de Reyes un kit de Robótica (de bq, os lo recomiendo) y empezamos a trastear con cosas de electronica básica, arduino y demás. Y teniendo una impresora 3D y despues de montar algún que otro printbot, dijimos, ¿Y por que no intentamos hacer un nosotros desde cero? ¿Y si diseñamos uno y vemos si somos capaces?
It has to be said that our electrical, programming and automation conocimientos era "0", and welcomes the time of the message and 3D modeling, from this moment on, all the demand is there for hacer.
AGRADECIMIENTOS
Antes de seguir contando esto he de dar las gracias a la gente de bq, a su plataforma DIWO, a sus cursos de robótica y a su plataforma de programación por cajas de Arduino bitbloq.
Muy especialmente quiero agradecer a Juan Carlos, de PROMETEC (http://www.prometec.net) por su excelente curso abierto de Arduino, sin el cual hubiera sido imposible acometer esta tarea.
También he de dar las gracias a Javier Vidal Peña (https://Twitter.com/javidalpe) que con paciencia nos ha ayudado a hacer la web de control y a depurar nuestro código del programa.
EL CONCEPTO
The idea was to hack a robot for remote control, with integrated camera, to be able to manejado a distance and to have a direct view of the el. From the possible remoto control systems we have been using as well as the WIFI, we thought that we would be able to have a greater autonomy, control and the possibility of transmitting video in real time, to the menos in a controlled area, and with the possibility to have remote control from the internet (this is one of the first steps to log in).
Dado que teníamos una Gopro, la cual se conecta en streaming con su propia app con el teléfono móvil, pensamos que parte del trabajo ya lo teníamos solucionado, y todo lo que quedaba era resolver el control del movimiento del robot.
An important disadvantage that we present ourselves in the previous primeras, is the fact that the streaming of the channel is delayed for one second. It is a little inconvenient, not obstinate for our robots to be so positive, or simply because the robot's control system is not able to handle a robot in the morning!!!!!! Seguramente será algo con solución, pero en nuestro caso, es casi mas un punto a favor que una pega.
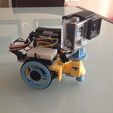
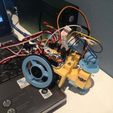
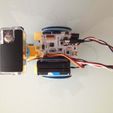
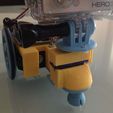
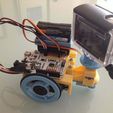
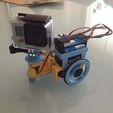
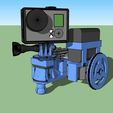
Dicho esto, por lo demás se trata de un rover con dos servos de rotación continua, montados en un chasis sobre el que se sitúa la electrónica y una montura para la cámara, con un micro servo que permite el giro de 180º.
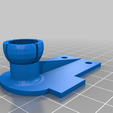
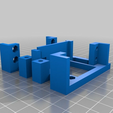
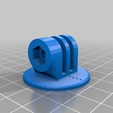
LAS PIEZAS IMPRESAS
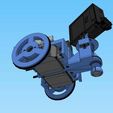
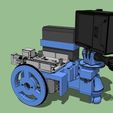
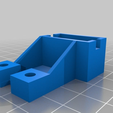
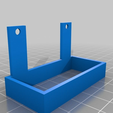
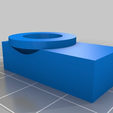
Para el diseño de las piezas nos hemos servido de nuestra experiencia previa montando los printbots de bq (beaetle, y renacuajo) y alguno más que hemos visto aquí en thingiverse, Hemos partido de algunas piezas de ellos, las cuales hemos copiado i/o modificado para dar con nuestra solución. The idea was to build a solid, sensible and compact chasis. By saying that we use autcad and sketchup.
There are some minor problems with the colisiones and with the glass that the robot is printed in back colors, but it is also necessary to retouch some pieces of the primer prototype to solve the problems with the casings. Iso con un solidworks o un inventor no pasa!
Las que hemos subido en su versión actualización son las del prototipo que veis impreso. We are currently working on more features, such as a wifi connection.
MAIN COMPONENTS
Placa controladora Freaduino UNO (compatible con arduino UNO, o similar. Esta tiene la ventaja de incorporar en la propia placa los conectores SVG en cada PIN)
2 SM-S4303R Continuous Rotation Servos or similar
One 9g micro servo (including tornillos)
Modulo WIFI ESP8266 (conector FTDI para programarlo si es necesario)
Una Cámara Gopro Hero 3, con su montura (O similar con WIFI)
Tornillos y tuercas M3 (distintas medidas, 12, 14, 30 mm, etc)
Una bola o canica o rodamiento de 12 mm de diámetro
2 juntas tóricas de 50 mm
One portapilas 8 x AAA
Una miniprotoboard
Algunos protoboard cables
FUNCIONES PRINCIPALES Y CONTROL
Avanzar, retroceder, giro a izquierdas, a Derechas y parada.
Movimiento de cámara a derecha, a izquierda y posición central.
Con la web de control se controla mediante pulsaciones en las flechas.
Hay que ejecutar mediante comandos AT en el monitor serie del Arduino lo siguiente:
AT+CIFSR? // Esto nos dara la URL de nuestro ESP8266
AT+CWLAP="tured", "tucontraseña" //Esto solo una vez, ya que se queda almacenado.
In the control web you can access a dialog box with the URL of your printbot (where has the AT+CIFSR command been ejected?
Recomiendo echar un vistazo a los tutoriales del ESP 8266 de www.prometec.net, en donde se explica muy bien como configurar el ESP8266 y sus peculiaridades.
http://www.prometec.net/arduino-wifi/
He adjuntado el programa de control, aun en fase de depuración y mejora. Se admiten sugerencias y aportes (Esta es nuestra parte mas floja) ;) Y como digo, he puesto una versión Beta, a medio funcionar. Espero en unos días tenerla completa, correcta y más depurada. Lo pongo así, con la esperanza de que alguno que controle más nos eche una mano!
El fichero controlweb.html se ejecuta en el explorador para el control del printbot (mantener pulsada la flecha de movimiento, y soltar para detener).
Para Terminar, un par de videos de la fase de pruebas (en bucle y sin control WIFI). En breve pondremos videos del manejo en remoto:
https://www.youtube.com/watch?v=HMv9-_M3Ngg
https://www.youtube.com/watch?v=LGqeGaWIHyk

/https://fbi.cults3d.com/uploaders/4139254/illustration-file/13d32ca3-889f-4c59-b165-ee84cc523af3/IMG_0134.JPG)
