Skip to content

Mercenary Kit for 3dSets Landy - RollCage Kit

Advertising
Advertising
?
Creation quality: 5.0/5 (1 vote)
Evaluation of members on the printability, utility, level of detail, etc.

  • 6.4k views
  • 16 likes
  • 21 downloads

License
3D design format
STL Folder details Close
  • MWRD_Landy_Cage_Front1.stl
  • MWRD_Landy_Cage_Front2.stl
  • MWRD_Landy_Cage_Rear.stl
  • MWRD_Landy_Cage_SandRampMount.stl

Learn more about the formats

Publication date 2021-02-26 at 21:45
Design number 315922

3D printer file info

3D model description

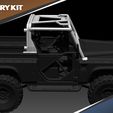
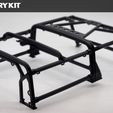
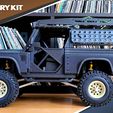
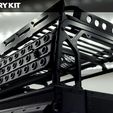
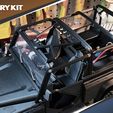
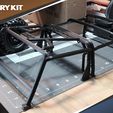
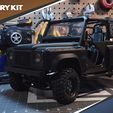
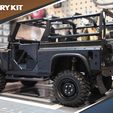
The Mercenary Roll cage Kit is compatible with the short, 2 door variants of the 3dSets Landy. Models 3 and 4. It allows you to skip printing the hard tops included in the sets and achieve a true soft top and no top Landy. The cage can be used either in half or full configurations to cover only the cabin or the full truck from windshield to rear. It features plenty of hooks to mount accessories and mounting points for some Sand Ramps.

To mount this you will need the Bed Liner Kit To install the Roll Cage

Some 2mm holes need to be drilled into the rear fenders to mount the roll cage. those holes are in the bed liner print so you know exactly where to drill!

3D printing settings

All parts can be printed 100% infill as they are pretty thin. No supports needed for anything in this kit. All STLs come preoriented and grouped for easy printing.

Assembly:
-First Remove the Support Structure from the middle pillar in Front1.STL
-Drill the 2mm holes in the base of the pillar, one on each side. The 6 on the front pillar are not necessary.
-Orient and screw with 4x 8mm M2 screws the 2 shorter horizontal bars. The flat part of the those bars will go towards the bottom and will fit perfectly when in the right orientation
-Front2.STL will be the roof of this section. it is pressfit into the Middle pillar and screwed into the front pillar with 4x 6mm screws.
-You now have the front cage completed. Set it aside and print Rear.STL. Again, remove the support structures from the middle and rear pillars
-Drill the 4x 2mm Holes in the middle pillar and the 6 holes in the rear pillar.
-There are 4 horizontal bars. the simple straight ones slot into the middle pillar bottom sockets .
-the T shaped ones slot into the top socket of the middle pillar and connect with the curved bar.
-the rear pillar can now slot all those bars into the sockets.
-10x 8mm M2 screws will secure all of those into place. Make sure they bars are fully into their sockets.
-Attach with 8x 8mm M2 screws the two halves
-Each SandRamp Mount is assembled with a 10mm m2 screw into the small T shaped socket. Glue that screw into position and glue the socket into the larger part. it will only fit in one orientation.
-Screw the mounts into the cage on either side with 2x 6mm M2 screws for each
-Finally the whole cage is assembled and can be mounted on the Landy. If you already have the Bed liner installed you need to drill the 2mm M2 holes in the rear fenders.
-Mount the rear Pillar 6x 6mm M2 screws and another 6x in the middle pillar.
-2x 8mm M2 screws to mount the top front windshield to the cage
-Finally insert the two small brackets from Front1.STL into position to replace the original windshield wiper brackets. and secure them and the front cage with a 10mm M2 screw on each side. Note that the new brackets don't have slots for the wiper guide so you can either trim the wiper guide or create a groove in the brackets.

That's it! enjoy rolling over safely :)

Advertising


Issue with this design? Report a problem.

Would you like to support Cults?

You like Cults and you want to help us continue the adventure independently? Please note that we are a small team of 3 people, therefore it is very simple to support us to maintain the activity and create future developments. Here are 4 solutions accessible to all:

  • ADVERTISING: Disable your banner blocker (AdBlock, …) and click on our banner ads.

  • AFFILIATION: Make your purchases online by clicking on our affiliate links here Amazon.

  • DONATE: If you want, you can make a donation via Ko-Fi πŸ’œ.

  • WORD OF MOUTH: Invite your friends to come, discover the platform and the magnificent 3D files shared by the community!


Sharing and downloading on Cults3D guarantees that designs remain in makers community hands! And not in the hands of the 3D printing or software giants who own the competing platforms and exploit the designs for their own commercial interests.

Cults3D is an independent, self-financed site that is not accountable to any investor or brand. Almost all of the site's revenues are paid back to the platform's makers. The content published on the site serves only the interests of its authors and not those of 3D printer brands who also wish to control the 3D modeling market.

100% secure payment by credit card, PayPal, Apple Pay, Google Pay, etc.
View all payment options.