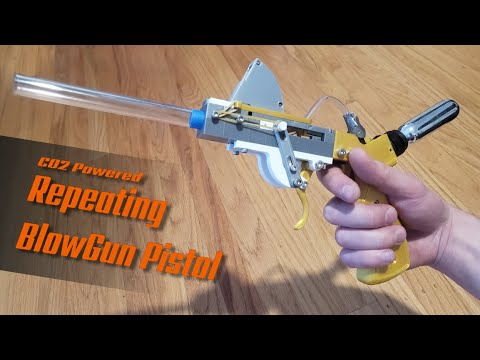
Presenting my latest invention: The Repeating BlowGun Pistol.
Thats right, its a magazine fed CO2 powered pistol that shoots frickin blow darts. Its reloaded via lever action and can be operated one handed. The magazine holds 6 darts and with a bit of practice, you can load and fire at a rate of around 60 rounds per minute.
See it in action here
Unlike some of my other projects, this one relies heavily on specific parts that youll need to purchase. All of these parts are fairly inexpensive and available on Amazon. They are listed below. One important note is that I specifically modeled the pistol's grip to fit the exact CO2 bike pump specified. Theres no guarantee it will fit similar Bike pumps as I took measurements from the exact one I have.
DISCLAIMER: By downloading these files, you agree that I shall not be liable for any damage, injury or harm resulting directly or indirectly from the use of these files or instructions. Always be safe and aware when operating these mechanical toys and enjoy!
Required Parts
CO2 Bike Pump
Rigid Tube (10mm Inner Dia, 14mm Outer Dia)
Flexible tubing (4.25mm Inner Dia, 5.75mm Outer Dia)
Mini blow darts
16g or 20g threaded CO2 canisters
Neodymium cylinder magnets (5mm Dia, 3mm Height) [x4]
M4x30 screws [x2]
M4x20 screws [x2]
M4x10 screws [x4]
M3x30 screws [x2]
M3x20 screws [x5]
M3x12 [x2]
M3x8 screws [x7]
M2x12 screws and nuts [x3]
Small rubber bands
Assembly Guide
Magazine Assembly
Gather all of the magazine parts contained in the MagazineAssembly file, along with three M2x12 screws and nuts and two of the magnets.
Sand down the inner faces of the Magazine halves so that they can connect to eachother without gaps.
Take the MagazineExtractorArm_Left and the left side of the Magazine. Insert the thin end of the extractor arm into the slot on magazine. You should be able to click the arm into place so that it slides back and forth within the slot. Do the same for the right side.
Next, connect the two magazine halves together with the M2 screws and tighten. Ensure you can place darts into the magazine and have them move freely.
Now take the MagazineMagnetTab and insert the two magnets into the holes. Ensure the poloarity of the magnets is the same so that they both point in the same direction. Depending on your printer's tolerance, the magnets will either need to be pushed into the holes with some force and be held securely, or if the fit is looser, you might need to apply some glue to keep them in place.
Finally, glue the MagazineMagnetTab to the front bottom of the Magazine such that the magnets point downwards.
Barrel Assembly
Gather the following parts: BarrelBottom, BarrelTop, SliderBolt, BoltActuatorLeverMount_Right and Left, flexible tubing, two magnets and M3 screws.
Take the flexible tubing and push one end of it into the rear of the SliderBolt until it is flush with the end of the nozzle on the front of the slider bolt. Place the SliderBolt with the cylinder facing down into the channel on BarrelBottom. Ensure the larger end of the channel on BarrelBottom points in the same direction as the nozzle end of the slider bolt.
Insert the two magnets into the cylindrical holes on the top of BarrelTop and ensure they are aligned such that they will attract the two magnets in the Magazine tab.
Next, place the BarrelTop onto BarrelBottom such that the rails on BarrelTop enclose the SliderBolt, which should move freely back and forth. Secure the BarrelTop to BarrelBottom with 2 M3x20 screws using the front most pair of holes.
Insert 2 M3x30 screws through the rear pair of holes on BarrelTop and screw them in until the end of the screw is flush with the bottom of BarrelBottom.
Take the ActuatorLeverArmMount_Left and right and align their rear most holes with the M3x30 screws, then finish screwing them in until the ActuatorLeverArmMounts are connected. Fully secure them by screwing 2 M3x12 screws into their front most holes, connecting them to BarrelBottom.
Now, take the rigid tube (14mm OD, 10mm ID) and cut it to your desired length. It should be at least 10cm in length. A longer tube results in a bit more power and accuracy.
Insert the tube into the front hole of the barrel assembly. It should be as tight as possible.
If its loose, wrap some masking tape around the tube and try again. Its also helpful to put a bit of hot glue on the rim of the tube before inserting to create an airtight seal with the Barrel assembly.
Finally, locate the 4 holes (two on either side of BarrelTop) and screw in the M3x8 screws. They shouldnt go all the way into the holes, but should stick out a bit. We will use these to hook the rubber bands around in a later step.
Optional Step: Attach the magazine to the BarrelTop's magnets. The MagazineMagnetTab should be flush with the front of BarrelTop. Take the MagAttachKey parts and glue them to BarrelTop such that their small round tabs fit into the cutouts on the MagazineMagnetTab. The MagAttachKey is there to prevent the magazine from sliding forward and backwards when attached. Ive found that this occasionally happens depending on the quality of the print, so only do this if you find it necessary. As a consequence, these parts will cover the front screw holes on BarrelTop, so if you want to retain access to them, unscrew them first and screw them back in from the bottom instead.
Bolt Actuator Assembly
Gather the following parts: BoltActuatorLever (x2), BoltActuatorTriggerCoupler, BoltActuatorTrigger_Short, M3 and M4 screws.
First, move the SliderBolt about halfway along its slide distance such that the pegs coming out of the side are in line with the hole on the ActuatorLeverMount's curved arm.
Place the long slot on the BoltActuatorLever over the peg, then align the large hole on the opposite side of the lever with the hole on the ActuatorLeverMount's curved arm. Secure it with an M4x10 screw. Repeat for the other side.
Next, take the BoltActuatorTriggerCoupler and place it between the two ActuatorLevers, aligning the middle hole/slot of the ActuatorLevers with the T shaped cylinder of the Coupler. Secure it in place on either side with an M3x12 screw. It shouldnt be too tight as we want the lever and coupler to be able to rotate.
Take the BoltActuatorTrigger and secure the top most hole to the rear holes on the side of the mount on each side with M4x10 screws. Connect the Coupler to the trigger's lower hole with an M3x8 screw.
Use two small rubber bands to connect the pegs of the SliderBolt with the protruding screws on the side of BarrelTop. You should now be able to pull the ActuatorTrigger to move the SliderBolt all the way back, and release it to let the SliderBolt return forward. Ensure the motion is smooth and loosen any screws if necessary.
Now take the MagSlider and slide it onto BarrelTop from the rear such that the angled rails fit into the channels on the MagSlider. Using the other two small rubber bands, loop them around the hooks on the MagSlider and connect them to the other protruding screws on the side of BarrelTop. Ensure that the mag slider can move freely when pushed by the SliderBolt.
Grip Assembly
Gather the following parts: Grip halves, CO2 bike pump, TubeValveCoupler, MainTrigger, M4 and M3 screws.
Start by disassembling the Bike pump. Youll need to pry off the plastic shell that covers the top. You can do this by gently inserting a flat head screw driver under the lip and lifting it over the small pin which keeps it in place. Do this for the other side as well and the shell should pop off. Next, remove the green trigger by prying it off of the two angled pegs at its hinge. Once these have been removed, you can proceed to screw the TubeValveCoupler's larger end into the nozzle end of the Bike pump.
Take the two Grip halves and place them together. The rectangular portion on the rear has two small holes that the small pins on the Bike pump should fit into. Once the pump is enclosed by the grip halves, screw them together with the two M4x20 screws and nuts.
Next, place the MainTrigger into the slot in the grip and insert the M3x30 screw through the hole in the Grip and through the trigger. Try pulling the trigger, it should depress the small green button on the top of the Bike pump, which releases the gas.
Now, use two M4x30 screws to secure the grip to the rear end of BarrelBottom
Finally, connect the flexible tubing from the SliderBolt to the TubeValveCoupler. Ensure that its long enough so that when you cock the BoltActuatorLever, the tube doesnt have kinks in it and there isnt too much resistance. Once in place, either glue it to the tube coupler or wrap some tape around it to keep it secure.
Congrats! Youre done :) Just load up a magazine and load the BikePump with a CO2 canister. I find that 20g cartridges last longer and give more power than 16g cartridges.
To improve performance, ensure that the flexible tube isnt too long and has a tight seal. Also try adding hot glue to the rim of the Barrel tube then pressing it in to the BarrelTop/Bottom assembly to reduce leakage.
:format(webp)/https://fbi.cults3d.com/uploaders/17487350/illustration-file/7bc51696-a521-4e54-a68d-43d01add1672/YT_Thumbnail.png)


/https://preview3d-images.cults3d.com/variants/70k2d6n6pmxakzd6nej88z2fxzy3/cbbb7afd8a0ec9560f7f7940881f98c31dcb04582a03efcc135070de65821be8)
/https://preview3d-images.cults3d.com/variants/tngd3n3snx4lmcygl3yro6zs9fy6/cbbb7afd8a0ec9560f7f7940881f98c31dcb04582a03efcc135070de65821be8)
/https://preview3d-images.cults3d.com/variants/uvwhtaeyxdkys7eqnn0u6ghyi0gs/cbbb7afd8a0ec9560f7f7940881f98c31dcb04582a03efcc135070de65821be8)
/https://preview3d-images.cults3d.com/variants/cm2w9r0frdat0qici3k8ilzt7xbv/cbbb7afd8a0ec9560f7f7940881f98c31dcb04582a03efcc135070de65821be8)
/https://preview3d-images.cults3d.com/variants/zm8ixzc8tq5msu4t169xk3hpsdx3/cbbb7afd8a0ec9560f7f7940881f98c31dcb04582a03efcc135070de65821be8)
/https://preview3d-images.cults3d.com/variants/gbqg6argefmbosoz5iboqp28v1m4/cbbb7afd8a0ec9560f7f7940881f98c31dcb04582a03efcc135070de65821be8)
/https://preview3d-images.cults3d.com/variants/z6wyzjz39rbb3k5c9llxjfjl1yyq/cbbb7afd8a0ec9560f7f7940881f98c31dcb04582a03efcc135070de65821be8)
/https://preview3d-images.cults3d.com/variants/z9y4hiciwf3mlw3py47axh987tn2/cbbb7afd8a0ec9560f7f7940881f98c31dcb04582a03efcc135070de65821be8)
/https://preview3d-images.cults3d.com/variants/yu1po8qc7xvccbce5t61y105xe10/cbbb7afd8a0ec9560f7f7940881f98c31dcb04582a03efcc135070de65821be8)
/https://preview3d-images.cults3d.com/variants/1u9lutyt7fbuxrcvi94j1rhmqapg/cbbb7afd8a0ec9560f7f7940881f98c31dcb04582a03efcc135070de65821be8)
/https://preview3d-images.cults3d.com/variants/7vvx5wghmfnwf6zo54b7u2ilnqqh/cbbb7afd8a0ec9560f7f7940881f98c31dcb04582a03efcc135070de65821be8)
/https://preview3d-images.cults3d.com/variants/4y6x60np1ahwxwabw6etcdw2dqti/cbbb7afd8a0ec9560f7f7940881f98c31dcb04582a03efcc135070de65821be8)
/https://preview3d-images.cults3d.com/variants/68b15zm8ghrho1ctolns8xqu8qcy/cbbb7afd8a0ec9560f7f7940881f98c31dcb04582a03efcc135070de65821be8)
/https://preview3d-images.cults3d.com/variants/sww8zfvpxzeocv6zy9dmkktowgp2/cbbb7afd8a0ec9560f7f7940881f98c31dcb04582a03efcc135070de65821be8)
/https://preview3d-images.cults3d.com/variants/mmkkx0oj1yw1j3c30thgd4qj4wef/cbbb7afd8a0ec9560f7f7940881f98c31dcb04582a03efcc135070de65821be8)
/https://preview3d-images.cults3d.com/variants/u650jl5wz87y5yx0yv7zlc9btz4x/cbbb7afd8a0ec9560f7f7940881f98c31dcb04582a03efcc135070de65821be8)
/https://preview3d-images.cults3d.com/variants/be9fdajdbc5hf4uc3nbk6jbrhrbx/cbbb7afd8a0ec9560f7f7940881f98c31dcb04582a03efcc135070de65821be8)
/https://preview3d-images.cults3d.com/variants/0p7glu9i2axh3o5hyvialzhval7h/cbbb7afd8a0ec9560f7f7940881f98c31dcb04582a03efcc135070de65821be8)
/https://preview3d-images.cults3d.com/variants/tu1ymai5776i18kqqyfvv4l7hobw/cbbb7afd8a0ec9560f7f7940881f98c31dcb04582a03efcc135070de65821be8)
/https://preview3d-images.cults3d.com/variants/f2p6h7apgklrryoks393jw8j4fej/cbbb7afd8a0ec9560f7f7940881f98c31dcb04582a03efcc135070de65821be8)
/https://preview3d-images.cults3d.com/variants/yvkhovnm571k2vz1ogwqdes2amnw/cbbb7afd8a0ec9560f7f7940881f98c31dcb04582a03efcc135070de65821be8)
