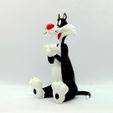
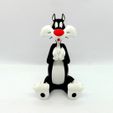
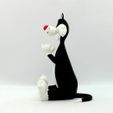
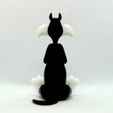
Sylvester James Pussycat, Sr. is a fictional character, an anthropomorphic tuxedo cat in the Looney Tunes and Merrie Melodies series of cartoons.
Sylvester appeared in 103 cartoons and most of his appearances have him often chasing Tweety, Speedy Gonzales, or Hippety Hopper. Three of his cartoons won Academy Awards, the most for any starring Looney Tunes character. Sylvester's trademark exclamation is "Sufferin' succotash!"
No supports are required. One piece contains built-in supports, an optional part without the built-in supports is also supplied if you want to use your slicer supports. If you have the proper filament colors, no painting is needed.
The assembled model is 200mm tall.
Enjoy!
...........................................................................................................
Print Instructions:
Supports: No
Resolution: .2mm
Infill: 10%
Notes:**
Refer to the notes below for a few helpful printing and assembly instructions.
...........................................................................................................
Building the model
Colors
Black: (Paramount3D PLA - Black)
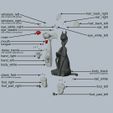
body_black
body_black_without_supports (optional piece without built-in supports)
eye_blacks (contains two identical pieces)
whiskers_right (contains two identical pieces)
whiskers_left (contains two identical pieces)
foot_pad_left
foot_pad_right
..
Red: (Hachbox PLA - True Red)
mouth
nose
..
White: (Overture PLA - White)
eye_white_left
eye_white_right
tail_white
body_white
hand_left
hand_right
foot_left
foot_right
ear_left
ear_right
hair_back_left
hair_back_right
..
Pearl: (Protoparadigm PLA, out of business - White Pearl)
claws_hands (contains eight identical pieces)
claws_feet (contains six identical pieces)
..
Pink: (Paramount3D PLA - Harajuku Pink)
tongue
...........................................................................................................
Printing and assembly tips
Printing tips
1 - No supports are required.
2 - There are some pieces that may need brims or rafts, use your discretion. When setting up my prints I prefer to be conservative, especially since the base of many parts are hidden when inserted into another part. For the smaller parts, a good first layer is helpful.
*I used brims on:
claws_hands
claws_feet
hand_left
hand_right
3 - I used a pearl white color for the claws to hightlight them. A clear transparent with a higher infill may work well, or a silky white.
4 - The body_black piece is taller than any of my other models. It fits on my Prusa MK3 but not on the Prusa mini. Be sure to check this part first to ensure your printer can handle the height. The model can be resized down, but be careful to check that the small parts can still be printed.
..
Assembly tips:
1 - Take your time gluing the model together and enjoy the process.
2 - I used E6000 sticky craft glue to put this model together. The sticky glue allows more time to position the parts than a fast drying superglue. I have 'fat fingers' and a shaky hand, so the sticky glue works out best for me, especially with small pieces. Just remember to leave enough time for the glue to set before combining too many parts.
3 - Be sure to insert the body_white (with completed mouth/tongue) into the body_black before attaching the hands.
4 - All the claws have round bases. Be sure to rotate the nail in the correct direction when inserting and gluing them in.
5 - The whiskers fit perfectly, but need to be positioned correctly to insert them. The flat side from the printer bed faces back. The holes are notched and the whiskers only fit one way. Personally, I had to keep poking around to fit them in but once positioned correctly they slid right in.
6 - Refer to the assembly diagrams in the pictures section as well as the uploaded pictures for putting the model together. The model is meant to be glued.
Do not hesitate to ask questions, feedback is essential to making better models.

/https://fbi.cults3d.com/uploaders/12888752/illustration-file/7de3bce1-61c8-4f40-875f-d7582aea2b95/sylvester-angle1.jpg)
